Laser Tools has provided some advice to follow to diagnose turbo issues.
Turbocharger failures are rarely as simple as a “bad turbo”. Over-reliance on the vehicle’s OBD system can easily lead to misdiagnosis. Almost any fuelling or engine issue can cause the ECU to generate turbo pressure regulation fault codes.
A code for underboost (P0299, for example) is not saying the turbocharger is faulty; it simply indicates that, for some reason, the expected boost pressure has not been achieved. The technician’s next step should be to investigate everything that could cause reduced boost pressure.
In many cases, if the turbocharger has failed, it has done so because of another underlying issue. Turbo failures are often due to a problem elsewhere in the engine, intake, exhaust or lubrication system. Replacing the turbocharger without identifying the cause risks a comeback, a disputed warranty claim and a frustrated customer..
For the technician, it’s essential to gather as much information and evidence as possible from multiple sources before condemning the turbo.
Why turbos fail
Modern turbochargers operate at extreme speed and temperature, so small faults can become major damage very quickly. By identifying the symptoms of turbo trouble, you can then address the causes.
Some of the warning signs to look out for include:
-
Loss of power, poor acceleration, limp-home mode or an illuminated engine management light
-
Excessive black smoke caused by low boost or poor air control.
-
Blue smoke caused by oil entering the intake or exhaust side.
-
Whining, siren-like or scraping noises from the turbo area.
-
Boost pressure fault codes, actuator position faults or DPF-related faults.
-
Oil in the intercooler pipework, intake tract or exhaust system.
The most common causes are oil starvation, oil contamination, foreign object damage, over speeding, overheating and variable-geometry mechanism faults.
Oil starvation can destroy bearings and thrust components in seconds. Common causes include blocked or restricted oil feed pipes, carbon build-up, low oil level and poor oil pressure. The Laser 4851 Oil Pressure Test Kit, which tests for oil pump pressure and can detect faulty oil pressure switches and warning lights, is ideal for carrying out such checks.
Oil contamination is also just as damaging. Degraded oil, debris from a previous failure, poor-quality filters or carbon deposits can score bearing surfaces and shorten the life of a new unit. A replacement turbo should never be treated as a standalone part swap; the oil system must be cleaned, checked and protected.
Modern turbocharged engines rely on high-quality engine oil that is kept clean and changed at the correct intervals. So, always check the oil feed, confirm the correct oil specification has been used and inspect the oil for signs of contamination.
The diagnostic route
First, inspect the basics. Check the air filter, intake hoses, intercooler, boost pipes and clamps for splits, collapsed sections, restriction or oil saturation. A leak between the compressor outlet and the engine can make the turbo work harder than intended, leading to over-speeding and premature failure.
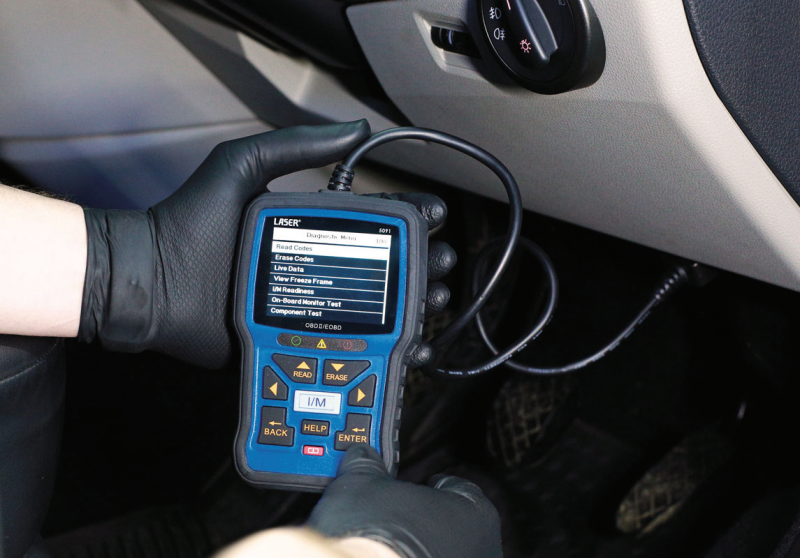
Start with the fault history, not the turbo. Scan the vehicle and record all engine, boost, actuator, EGR and DPF codes before clearing anything. A professional diagnostic scan tool such as the Laser 5091 OBDII/EOBD Code Reader & Reset Tool will provide live data, actuator tests and adaptation functions, all helping to simplify the diagnostic process.
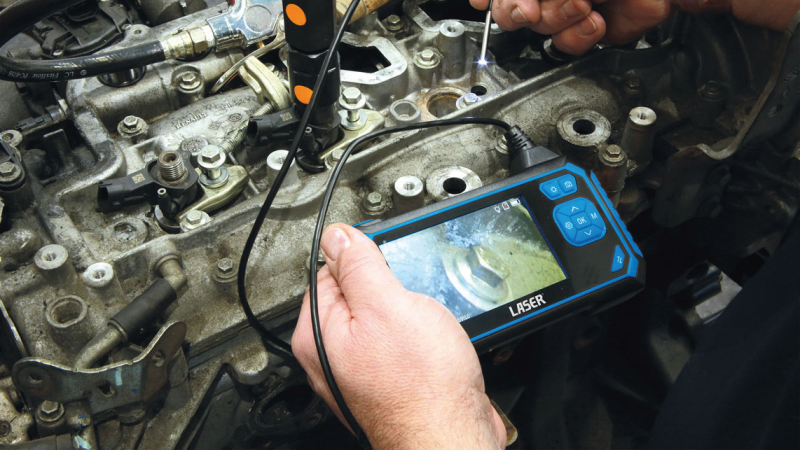
Similarly, when inspecting compressor blades, turbine damage, intake pipes and intercooler contamination, a borescope such as the Laser 9195 & 9196, is well suited to the job.
Do not ignore the exhaust side. A restricted DPF, catalytic converter or exhaust blockage can raise backpressure and exhaust gas temperature, slow turbo response, damage seals and bearings. Differential pressure testing is an essential part of the diagnostic routine Laser Tools 3752 Vacuum/Pressure Test Kit, which creates and holds a metered vacuum for testing, is ideal for this task – and should be done before condemning the turbo.
Variable geometry and actuator issues
Variable-geometry turbochargers add another layer of diagnosis. Sticking vanes, carbon build-up, worn linkages, wiring faults, poor earths, CAN communication faults or a failed electronic actuator can all produce similar symptoms. Replacing an actuator without checking that the vane mechanism moves freely can lead to rapid repeat failure.
Lasting fixes
The correct repair depends on the cause. If oil starvation is the issue, replace restricted feed pipes, confirm oil pressure and flow, fit the correct gaskets, change the oil and filter, and prime the turbo before first start. If contamination is present, flush or clean the oil system as appropriate and investigate engine wear or previous failure debris.
If foreign object damage is found, inspect and clean the entire intake and exhaust path. Replace damaged hoses, air filters and gaskets, remove fragments from previous failures and check the intercooler for trapped oil or debris.
If over-speeding is suspected, smoke-test the boost system and check for leaks, incorrect mapping, over-fuelling, actuator faults or wastegate problems. Laser offers two smoke machines 8831 and 9275 for introducing smoke into the intake or exhaust system to identify leaks. When used with the Laser 7981 Turbo System Tester Set, sections of pipework can also be isolated for pressure and smoke testing.
For DPF-related failures, cleaning or replacement of the turbo alone will not cure the vehicle. The DPF condition, differential pressure sensor, pipework, EGR operation, injector condition and regeneration strategy must all be checked to ensure the exhaust system is no longer forcing the turbo to operate in damaging conditions.
Fitting best practice
Before fitting a replacement turbo, clean the intake tract, inspect the intercooler, replace the oil and filter, renew the oil feed pipe where required, fit new gaskets, check the oil return path and prime the unit with clean oil. Crank the engine as specified to build oil pressure before allowing it to fire, then check for leaks, abnormal noise and correct boost control.
After the repair, always road test the vehicle under controlled conditions while monitoring live data. Confirm boost response, actuator movement, exhaust backpressure and smoke output.
A turbocharger is a precision component, but it depends on the health of the entire engine system. Workshops that minimise comebacks are those that diagnose the root cause, not just the consequence. With the right tooling, disciplined checks and a system-based approach, turbocharger repairs can be profitable, reliable and easier to defend should warranty questions arise.