
The Toyota Avensis 2.0 D4D is a large family car. Introduced to the market in 1997, it has seen three generations of build, with the last being introduced from 2009 to the present day. In this article, we tackle the second generation Toyota Avensis D4D front wheel bearing and give some handy hints and tips to assist with the replacement.
Bearing type
The type of bearing used is a generation one bearing with no encoding sensor built in, so the bearing can be installed in either way. It can, however, still be a little tricky as the bearing has to be pressed into the hub and, if done incorrectly during this process, can damage the bearing.
Firstly, check to see if the vehicle is fitted with alloy wheels. If it has, the chances are that they may be fitted with anti-theft locking bolts, so make sure that you have the key before starting the repair. Raise the vehicle on the ramp to the full working height – although the repair could be carried out on the floor if necessary – and remove the wheel on the relevant side.
Whenever possible it is advised to replace the wheel bearings in pairs as it is more than likely that the bearing on the opposite side is just as worn as the one you are replacing. Undo the large hub nut that secures the drive shaft to the hub and release the drive shaft from its position. Clean the track rod end, using a wire brush to remove any hard rust, and remove the locking pin. Loosen and remove the nut from the track rod end, release from its position and move to one side (Fig 1 below).
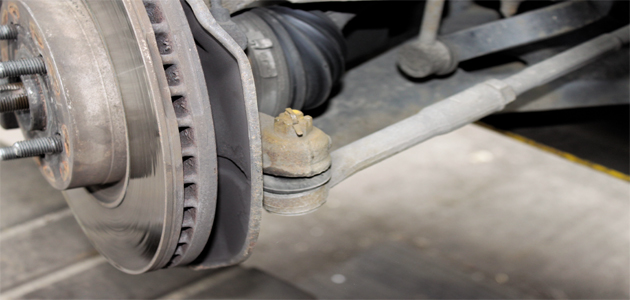
Fig 1
Remove the brake calliper piston and support by hooking it directly to the coil spring (Fig 2 below).
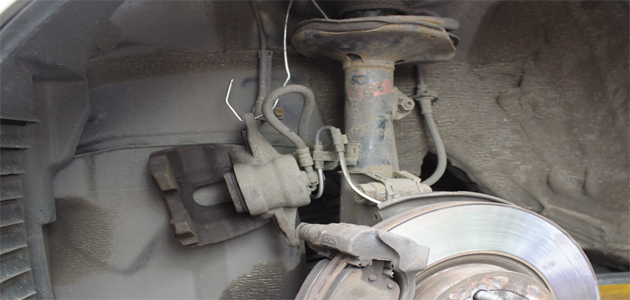
Fig 2
Remove the two bolts that secure the brake calliper to the hub and remove the complete assembly away from the work area. You will need to gain access to the wheel arch, but the removal of the wheel arch liner is unnecessary, so just remove the fixing bolts to the front half of the liner and allow it to hang down (Fig 3 below).
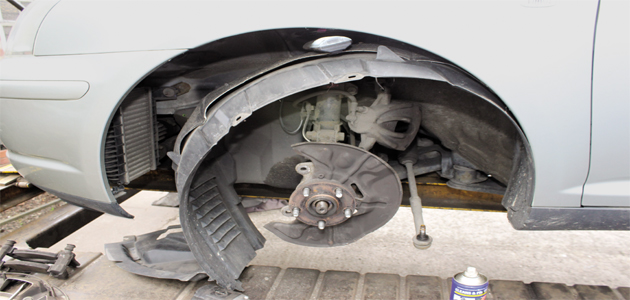
Fig 3
The ABS sensor is to be disconnected, and this can be found inside the wheel arch. With the liner now free you will have enough access to reach the sensor and disconnect it (Fig 4 below).
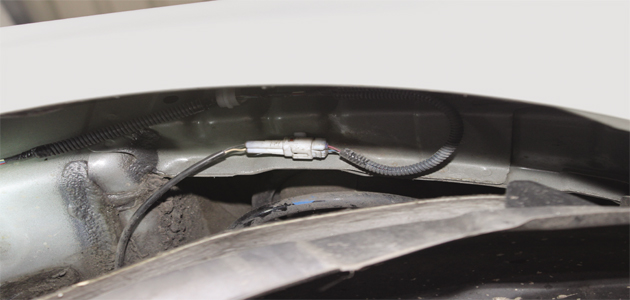
Fig 4
Remove the ABS lead from its support bracket once disconnected.
Remove the flange
Release the wishbone from the ball joint by removing two bolts. Undo the two bolts that secure the hub to the suspension strut and release it from the strut. With the hub removed, we can now concentrate on the removal of the bearing. Firstly, the drive flange has to be removed from the bearing; in this example we used a strong steel tube positioned centrally on the flange. By using a press, carefully push the flange out to remove (Fig 5 below).
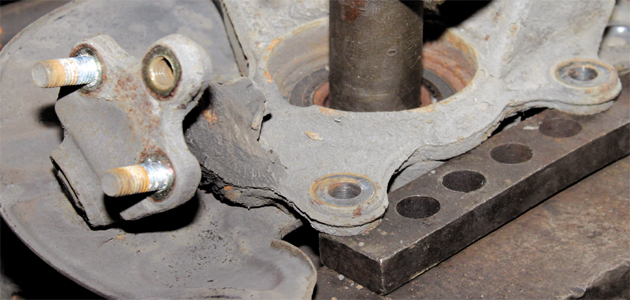
Fig 5
Remove the back plate from the hub to make it easier to remove the bearing and remove the circlip. We removed the bearing from the wheel hub by using an old bearing and, through the use of a press, we pushed the bearing out. Because the bearing can be fitted either way, it could be a good idea to note the position of the old bearing and install the new bearing the same way.
The inner raceway of the bearing will then have to be removed from the hub; it can be a little tricky to attach a puller securely to remove this. Hold the hub securely in a vice and, with a die grinder, carefully score part way through the inner race – just enough to weaken it and taking extra care not to cut right through and damage the hub (Fig 6 below).
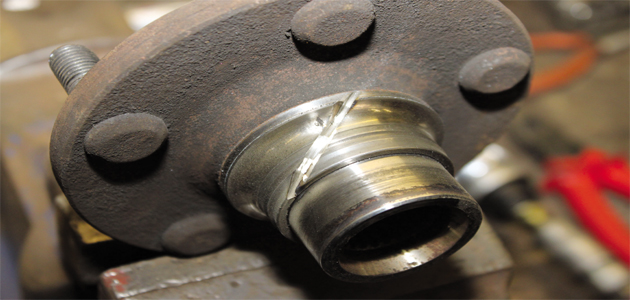
Fig 6
Using a blunt air chisel to crack and then remove is a nice controlled way of extracting the inner race without causing damage. Once the bearing has been removed, take the time to check that the hub profile is perfectly round and not damaged.
The outer race of a bearing will always take the shape of the hub its being pressed into so, if the hub has been damaged and is not perfectly round, this could prematurely wear the bearing over time. Clean the hub and drive flange to remove any dirt and rust.
Pressing force
When you fit the bearing into the hub, make sure you press on the outer race and not on the flange. By doing this you ensure that the pressing force is not transmitted through the balls or rollers in the bearing, but only through the outer race. In our case we’ve used the old bearing to press the new one into the hub as this is a perfect diameter and will not cause any damage.
The new bearing will have a new circlip supplied, which can now be fitted. After finding a suitably sized tube (the same size as the inner race) the hub can then be pressed onto the drive flange, avoiding any damage to the ball races. The installation of the remaining parts is the reverse of the removal.


