
Although SuperPro has created a solution to the problems caused by the bush design on some Land Rover models, the original component has proved tricky to remove. Not any more…
The design of the original Land Rover bush, fitted to the lower front control arms on the Discovery Series 3, 4 and Range Rover Sport 320 models, has proven to be vulnerable to failure. Deterioration of the rubber outer-casing allows hydraulic fluid leaks as well as ‘shocks’ – such as those generated by speed bumps, pot holes and kerbing. The net result is excessive movement in the lower arm, vague steering, tyre wear and noise.
The replacement bush kit from SuperPro includes some unique design features to replicate the flexibility of the original hydraulic bush, whilst taking advantage of the SuperPro materials’ durability and high levels of resilience.
Drawing on substantial experience of similar bushes and having carried out extensive on-car evaluation, SuperPro’s engineers selected an innovative design with three pieces of polyurethane, including a central piece featuring deep cutaway sections in the polyurethane.
These ‘voids’ are key to allowing the material the opportunity to flex and move in line with Land Rover’s original parameters.
The materials’ resilience ensures that the suspension retains its alignment. And, because it delivers this without the hydraulic features of the original, its less susceptible to damage and wear.
All good then? Well, not quite. Once fitted the SuperPro bushes offer an excellent solution, but the problem has been the removal of the original bushes. The arms can be difficult to remove from the car, hard work aligning in a press and the bushes themselves are often stubborn in the extreme.
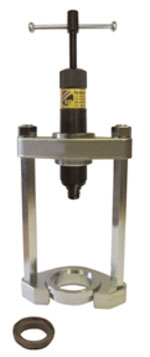
We turned to specialist tool experts – Sykes-Pickavant – with a brief to come up with something that would simplify the process. The company has gone beyond our expectations by producing a puller kit (pictured, right) which not only makes the removal of the old bushes and refitting of new ones much easier, but allows the job to be completed with the arm still fitted to the car.
INSTALLATION MADE EASY – THE PROCESS
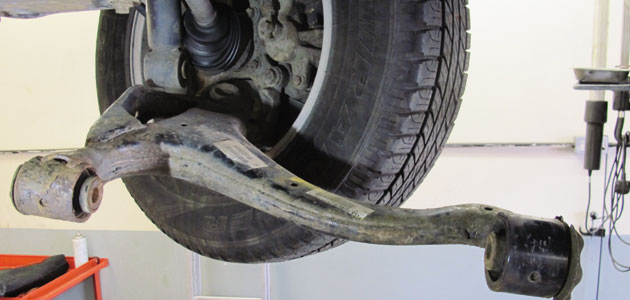
1. Unfasten the bolts retaining the control arm from the chassis, but leave the ball joint connected to the hub.
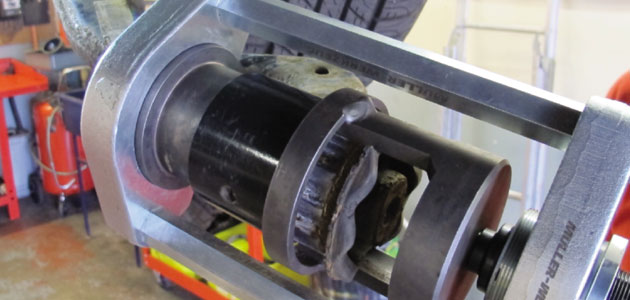
2. By assembling the puller frame and press tools around the bush, the old component can be removed in-situ. The application of a little heat to the outside of the housing – so it expands a little – can help loosen the outer shell of the bush from the inside of the housing, however, in most cases you will need the 12 tonnes of effort from the hydraulic ram.
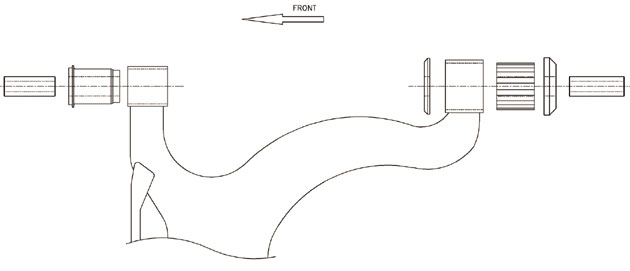
3. The new bushes are assembled as per the diagram below. It is essential that plenty of the lubricant supplied is used on the inner bore of the bushes before the new steel sleeve is inserted.
4. The front bush, which features an outer steel shell, can be refitted in a reversal of the removal process without the need for any heat; the rear bushes can simply be fitted by hand.
The arm should be reassembled into the car using the original Land Rover torque settings – it is recommended to re-check these after 1,000 miles or one month. And, in common with all suspension work, the car should be given a full wheel alignment check.


