This month, REPXPERT Alistair Mason replaced the clutch in a 2008 Ford Focus 1.6L (petrol), which had covered more than 85,000 miles.
With a book time of just shy of five hours and only basic workshop equipment required, this is a profitable repair for any workshop.
A two-post vehicle lift, engine support, gearbox jack and clutch alignment tool are all required. The radio code and wheel bolt key should also be close to hand.
Gearbox removal
With the vehicle placed on the vehicle lift, open the bonnet and remove the air filter assembly. Note that there is a small breather pipe that must be disconnected (Fig 1). With the air box removed, do the same with the battery and battery carrier – this provides good access to the top of the gearbox and bell housing area.
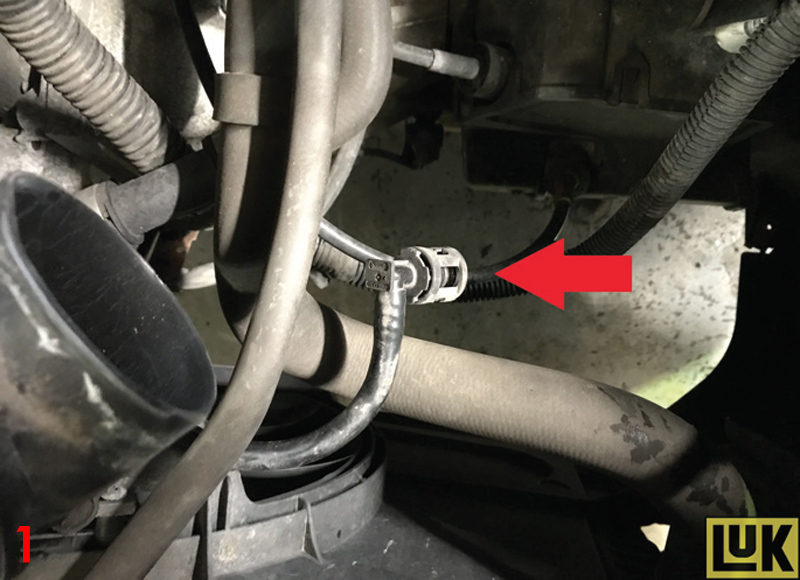
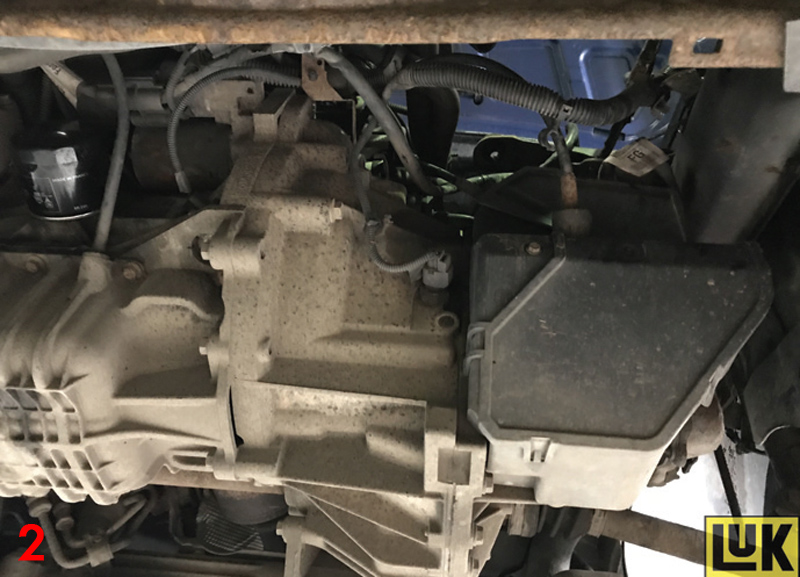
Raise the vehicle lift to gain access to the underside of the vehicle. Remove the plastic gear-change cover (Fig 2 and 3) and disconnect the two gear-change cables and the reverse light switch multiplug. Undo the lower bell housing bolts, leaving two easily accessible to support the gearbox until removal.
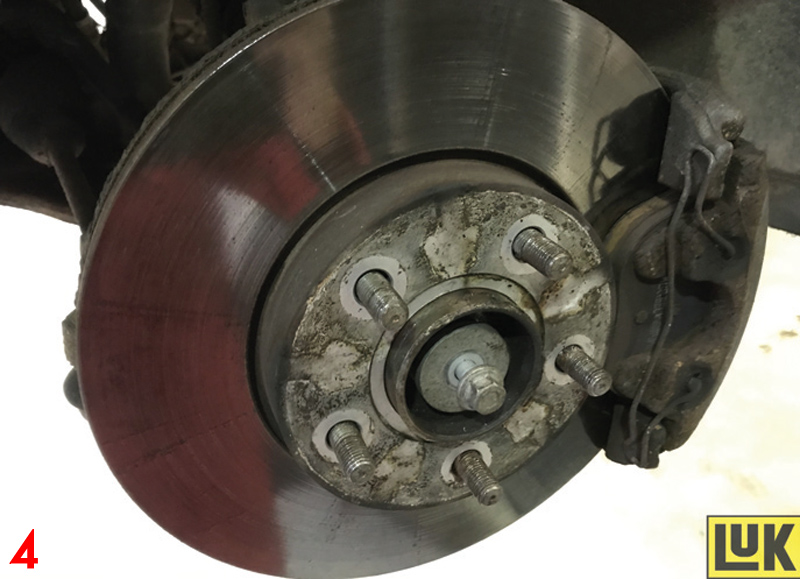
Remove both front wheels, centre hub/driveshaft bolts (Fig 4) and both front bottom ball joint nuts, and disconnect the bottom arms from the hub assemblies. Next, detach the centre bearing carrier on the O/S driveshaft, slide the driveshafts out of the hub assemblies, lever the inner driveshaft joints out of the gearbox, and remove both front driveshafts. A small amount of oil may drain when the driveshafts are removed, so an oil collection system may be required.
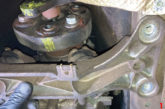
Next, remove the lower gearbox pendulum mounting and remaining lower bell housing bolts. Support the engine with either an engine brace or subframe mounted support, then lower the vehicle lift. Remove the gearbox mounting and upper bell housing bolts, disconnect the hydraulic pipe from the concentric slave cylinder, and blank as required.
Lower the engine/gearbox assembly slightly to aid gearbox removal and raise the vehicle lift if not already carried out. Support the gearbox with a suitable transmission jack, undo the final easily accessible bell housing bolts, and ease the gearbox away from the engine. Once the gearbox input shaft is clear from the clutch, lower the transmission jack and remove the gearbox.
Clutch replacement
With the gearbox removed, undo the six bolts that hold the clutch to the flywheel, ease the clutch cover off its dowels and remove the clutch cover and plate, inspecting the clutch area for any leaks from the engine or gearbox. Rectify if required.
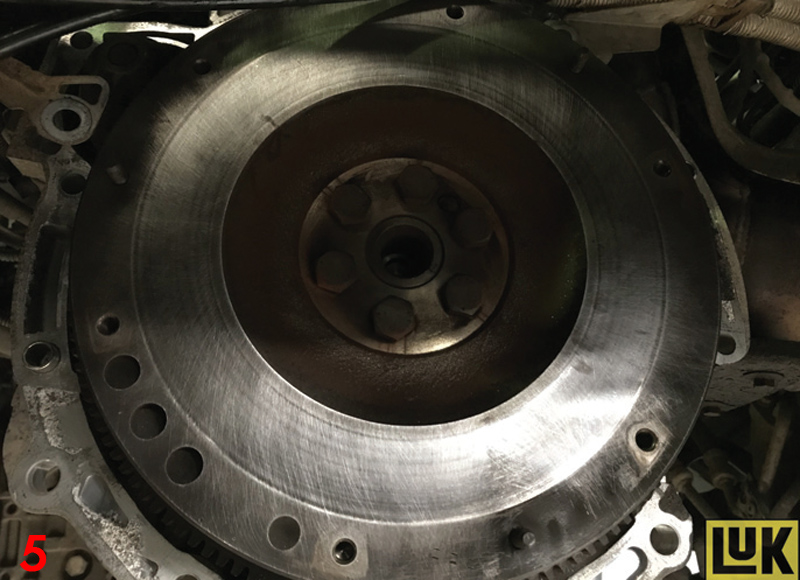
Clear the excess clutch dust using clutch and brake dust cleaner. Remove the ‘glaze’ from the flywheel surface using an Emory cloth, and inspect for heat cracks (Fig 5). Replace if required then clean, ready for clutch installation.
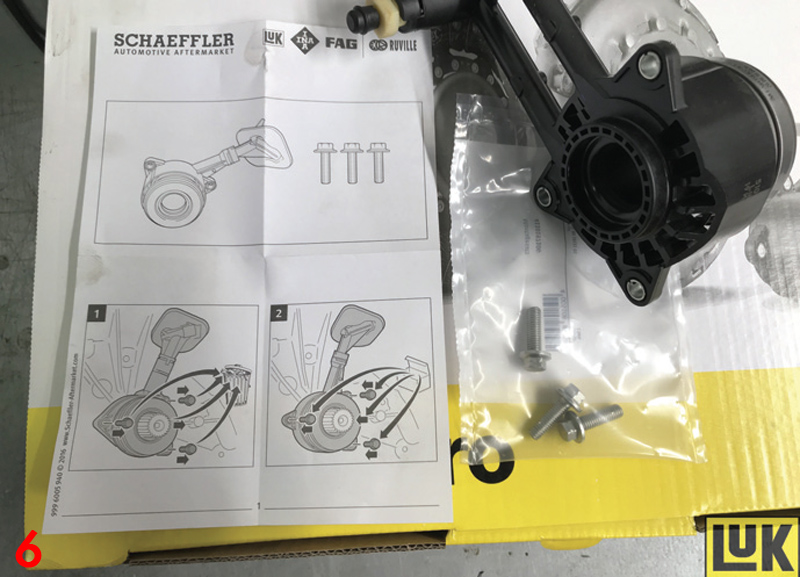
Remove the concentric slave cylinder (CSC) from the gearbox, clean the bell housing with clutch and brake dust cleaner, and mount the new CSC squarely on the cleaned surface. Take note of the bulletin inside the box; it instructs how to use the replacement retaining bolts supplied, as the new CSC body has been modified. Torque to the manufacturer’s specification (Fig 6). It is worth noting that the new CSC can sometimes be pre-filled with clean brake fluid to aid the bleeding process.
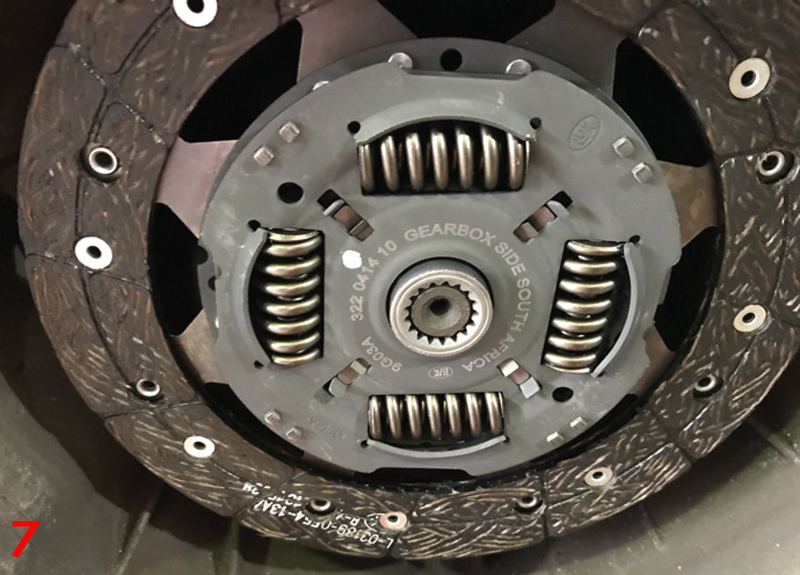
Apply a light smear of high-melting point grease on the gearbox input shaft. Then, slide the new clutch plate onto the input shaft, which will distribute the grease evenly and also confirm the clutch plate is correct for the vehicle (Fig 7). Remove the clutch plate and wipe off any excess grease.
Using brake and clutch dust cleaner, degrease the new clutch pressure plate, mount the new clutch plate using an alignment tool and then mount the clutch, ensuring the plate is mounted correctly with the gearbox side facing away from the engine. Next, insert and tighten the bolts evenly and sequentially.
It is always best practice to flush out the old hydraulic fluid from the hydraulic system; allow the old fluid to drain out, whilst replenishing the fluid as it drains. When running clear, clamp or block the hydraulic pipe as required.
Check that all cables are clear of the clutch area so that they won’t be trapped or pinched when the gearbox is installed. Ensure that the gearbox alignment dowels are located correctly.
Gearbox installation
Mount the gearbox onto the transmission jack. Then, ease it into position, align with the engine and slide it into position so that it engages onto the alignment dowels. Secure this with two easy-to-access housing bolts.
Bring the engine and gearbox back into position and refit the gearbox mounting. Reinstall in reverse order of removal and top up the gearbox oil, if required.
The clutch can be bled using the vacuum bleeding method, which draws fluid and air out of the system. Reset all electrical items when the battery lead has been connected. Finally, carry out a road test.