REPXPERT’s Alistair Mason replaced the clutch on a 2007 BMW Z4. Launched in 2002, the Z4 has been fitted with various engine types – either four or six- cylinder inline configurations – but has always been rear-wheel drive.
Now in its third generation, the Z4 has proved to be a success for BMW. Replacing the clutch, including a flywheel, in a Z4 is a relatively simple process and should take no longer than three-and-three-quarter hours. In terms of equipment, technicians will require a two-post ramp, transmission jack and a BMW clutch alignment tool.
Step-by-step procedure
With the car sat securely on the ramp, open the bonnet and remove the bell housing bolt, which is positioned at 12 o’clock – this is the only work that is required on the top side of the vehicle, as every other step is carried out from the underside.
Once the ramp is lifted, remove the engine and gearbox under-trays, before unscrewing three bolts to detach the propshaft and rubber cushion drive from the back of the gearbox. To reduce the likelihood of balance issues after the repair, it is best practice to mark the position of the propshaft. Once the propshaft has been taken away, disconnect the gear linkage stabiliser, and then linkage by removing the retaining pins and then easing the linkages up and above the gearbox.
Working forwards, disconnect the reverse light switch multiplug and unclip the loom from the retaining clips. Next, unscrew the two nuts that mount the clutch slave cylinder, removing the slave cylinder carefully, and inspecting the push rod and rubber protection boots for evidence of wear. Once checked and satisfied, stow away from the bell housing area.
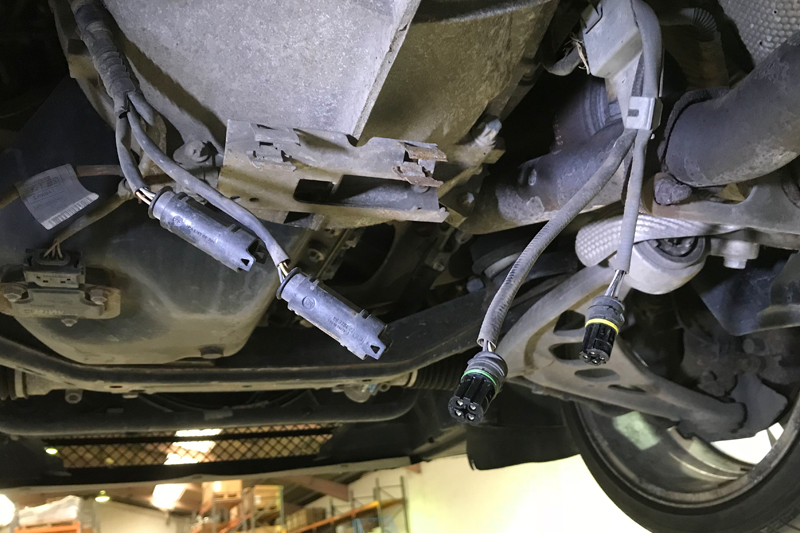
The next job is to remove the two round multiplugs from their retaining brackets, located on the bottom of the bell housing, and then disconnect them (see below).
Stow away the wiring looms, before undoing the two bolts that secure the bracket to the bottom of the bell housing and remove the bracket. Next, unscrew all but one of the bell-housing bolts, leaving one easily accessible one in place. Support the gearbox with a transmission jack, then remove the rear gearbox mounting, followed by the final bell housing bolt and then ease the gearbox away from the engine – the propshaft and gear linkages may have to be eased above the gearbox during removal too.
Once the gearbox is clear from the engine, lower the transmission jack and remove the gearbox completely, storing it in a safe and secure area. With the gearbox removed, remove the clutch assembly and check the flywheel for any surface wear, ‘blueing’ or heat cracks. The dual mass flywheel ‘free play’ can also be checked using the information on LuK’s DMF Checkpoint app or on the Schaeffler REPXPERT hotline.
To replace the dual mass flywheel, remove the flywheel retaining bolts and the flywheel. It is important to also check the back of the engine for any oil or coolant leaks and rectify as required to ensure the new clutch is not contaminated, and that the back of the engine is clean and free from old clutch dust.
Installing the new flywheel
Now mount the new flywheel, making sure the crankshaft location dowel sits correctly. Install the appropriate bolts and torque to the manufacturer’s specification.
Next, replace the release bearing and arm supplied in the clutch kit. Remove the release bearing and arm, clean the bell housing using brake and clutch dust cleaner, and then inspect the release bearing guide tube and the release arm pivot point for any wear. Both parts are prone to wear, so inspect closely and change if in any doubt.
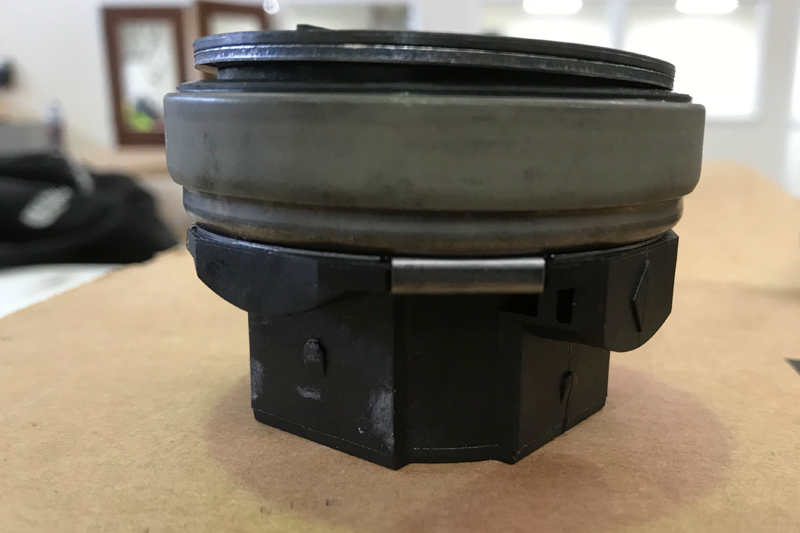
When mounting the release bearing into the release arm, pay special attention to the position of the bearing. It can locate in two positions – one having a long reach and the other having a short reach (see below).


Lubrication is not required when installing, as nylon to metal is self- lubricating. Lightly smear some high melting point grease onto the gearbox input shaft splines, and then attempt to place the new clutch plate on them – this step will confirm whether the clutch plate is correct. If all is okay, evenly distribute the grease, with the clutch plate removed, and wipe off any excess grease.
Now mount the new clutch onto the flywheel. Note that most BMW clutches are supplied with a transport locking plate fitted to the clutch cover, stopping the use of a conventional clutch alignment tool, so a special clutch plate alignment tool is needed, as the transport locking plate must not be removed until the clutch cover has been fully installed.
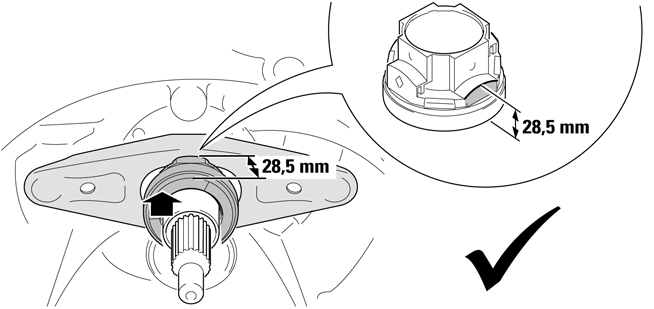
■ Insert the correct diameter clutch alignment tool into the spigot bearing in the crankshaft (see below).

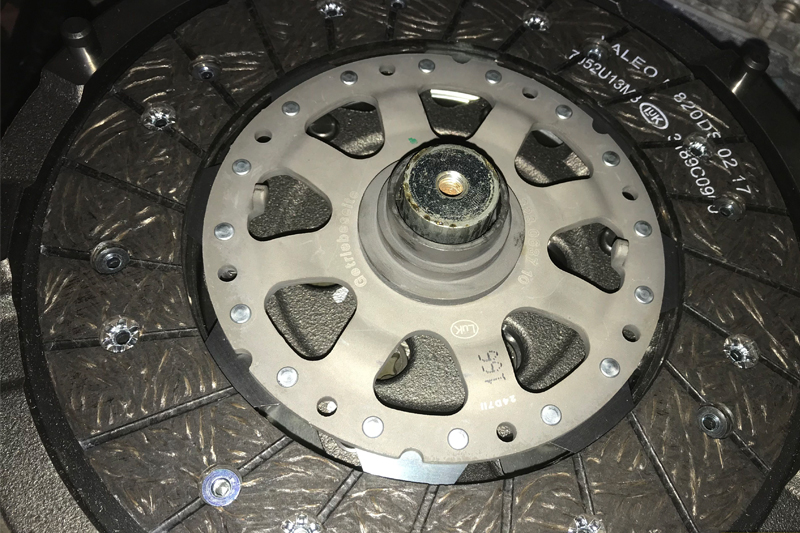
■ Mount the new clutch plate onto the alignment tool, confirming that ‘Gearbox Side’ or ‘Getriebe Seite’ is facing outwards (see below).
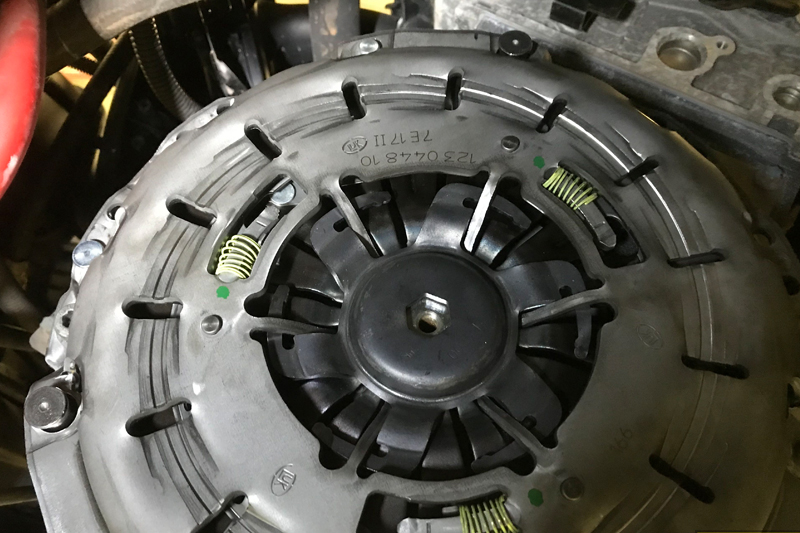
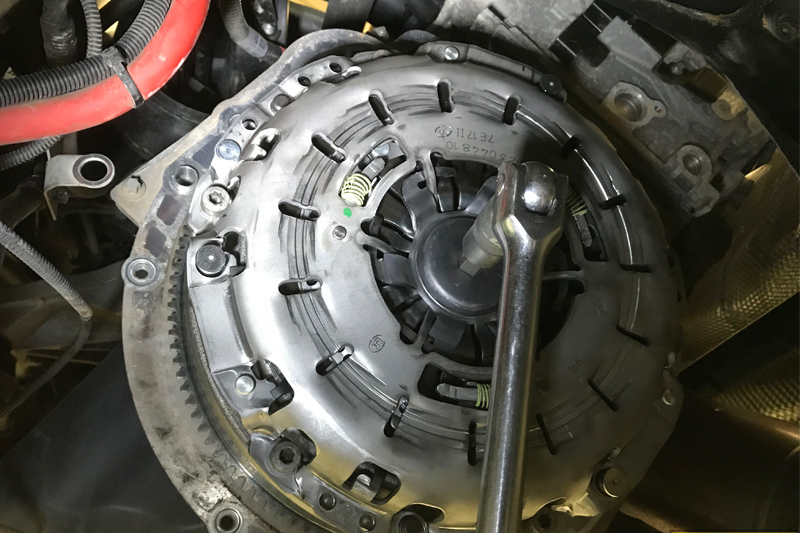
■ Fit the clutch cover onto the flywheel, ensuring the alignment dowels locate, insert and tighten the bolts evenly and sequentially, and torque to the manufacturer’s specification (see below).
■ Remove the transport locking plate (see below) and the clutch plate alignment tool.
Reinstalling the gearbox
Before refitting the gearbox, check the engine to gearbox alignment dowels are installed in the engine block. In addition, some of the bell-housing bolts are made of aluminium and can only be used once, so these must be replaced when reinstalling the gearbox.
Once ready, using the transmission jack, install the gearbox and place it onto the engine dowels. Once located, install and tighten the bell-housing bolts – refitting is in reverse order of removal.
To guarantee a safe repair, always carry out a full road test once the repair has been completed.


