Welcome to the first Original Equipment Suppliers Aftermarket Association (OESAA) garage advice project. In this article, technical experts from OESAA will be looking at a 1.2 Puretech Belt in Oil system, offering advice on efficient system diagnosis, parts replacement, supporting services available and commercial advice to assist the garage’s reception.
The trend is that some of the vehicle manufacturers are using engines with a “belt in oil” system. The main reason behind this is because this system is more efficient (up to 30% more efficient compared with a chain system) and therefore helps to reduce vehicle emissions. Other advantages to take into consideration are: we can use a narrower belt and therefore gain more room in the engine bay; belts do not stretch unlike chains so engine timing will not alter; the system is quiet in operation with the added advantage that the Belt in Oil system is lighter compared to a timing chain system.
One of the “Hot Topics” around the independent garages at the moment seems to be Belt in Oil system problems and how these problems can present themselves. The faults to look out for on this particular engine are:
- Stop driving warning light illuminated
- Oil pressure warning light illuminated
- Fault code P15A8 stored in the engine control unit
- Brake vacuum pump failure and no servo assistance on the brakes
The other area we must also remember is the routine servicing and inspection of these vehicles and also small repair visits where a quick visual check of the belt confirms the system is serviceable giving peace of mind to the customer.
Diagnostic & repair process
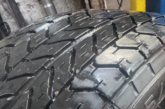
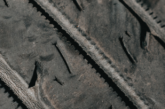
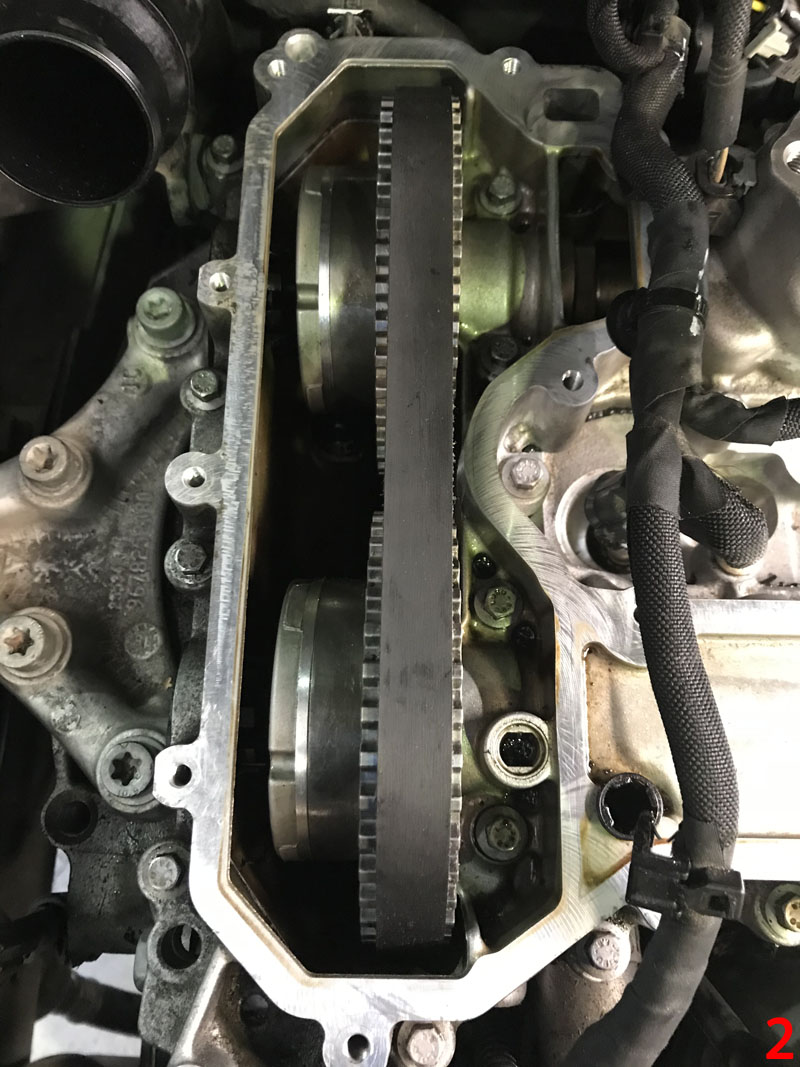
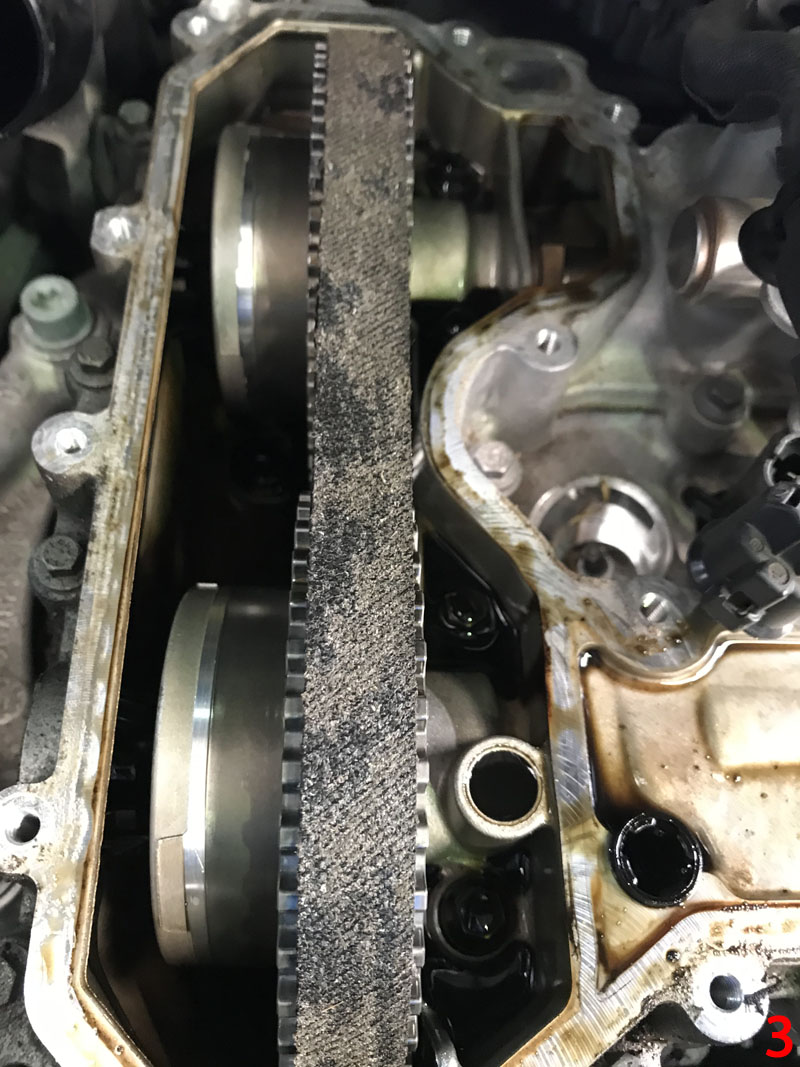
1. The first step of the diagnostic process is to simply remove the engine oil filler cap, which is situated above the timing belt and, with the aid of an inspection light, carry out a visual inspection of the timing belt (figure 1). At this point we are looking for a nice smooth, black and shiny surface (figure 2). If a rough, grey, cord texture is at all visible (figure 3) further investigation is required

2. At this point, it is worth checking with the vehicle manufacturer if any service actions are required on the vehicle, as some repairs have been covered by the main dealers. The garage may feel that it is giving away work, but handled in the correct manner, I am sure the customer will be glad of the financial saving and will return the loyalty
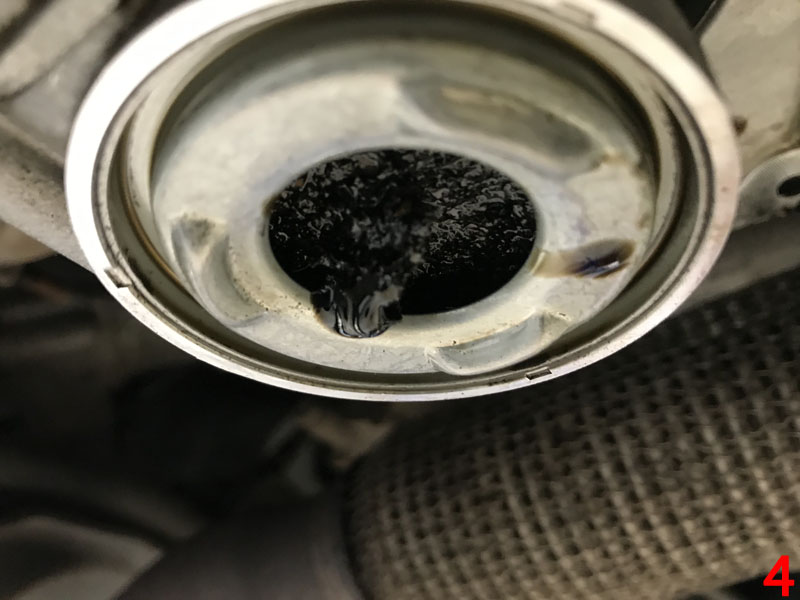
3. The next step of the diagnosis and investigation process is to inspect the oil pump strainer. Simply drain the engine oil. Note: some oil can be kept for analysis if required and, if a quality oil is used, this is should be a relatively inexpensive process, as was the case here, with Motul. Once the oil has drained, remove the sump and inspect the oil strainer, the chances are, if the black rubber belt coating has started separating from the belt, it will collect on the oil pump strainer (figure 4). At this point belt replacement is required and the unit should be replaced per the manufacturer’s instructions
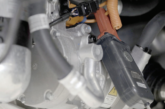
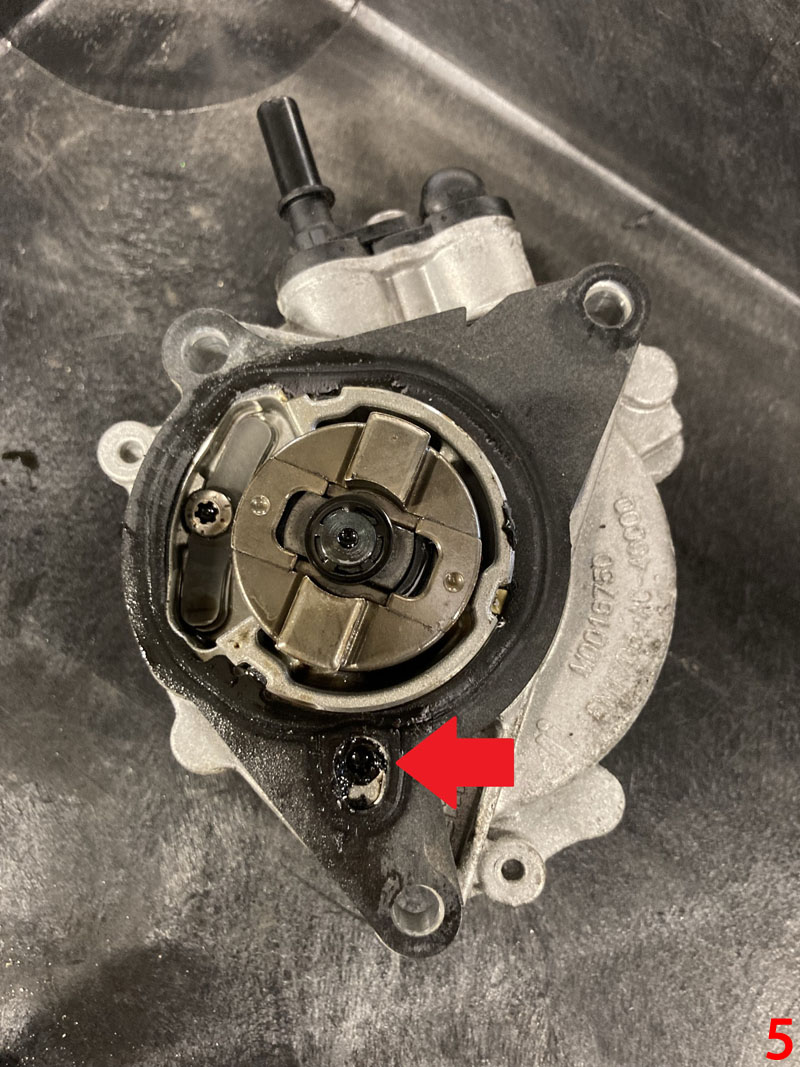
4. During the belt replacement process, the engine vacuum pump will be removed. It is important to check the oil way and ensure it is clear of any debris (figure 5). If unsure of the vacuum pump’s condition or performance, replacement is advised. It is also important to remove both variable valve timing solenoids and clean the filters as required. One final item to remove and check for debris is the banjo bolt that connects the oil feed pipe to the turbo. Clean as required and replace the seals
Tooling
Another positive to this repair for any independent workshop is the small investment in tooling, the only two specialist tools required are a torque wrench (that every workshop should have) and an engine specific timing/locking kit to set the critical engine timing. In this instance we used the Laser engine timing kit 6200 with a cost of around £180.
So now let’s look at the commercial aspect to the business, now having a diagnostic path to follow and a repair process. This will allow you to talk to the customer with confidence and knowledge about the repair, therefore, gaining their trust and the repair. This repair can easily be completed in 8 hours and with only a few parts required and a quote can be generated quite quickly.
Vehicle aftercare
When maintaining these vehicles, there are now some important factors to take into consideration:
1. The belt change interval on the 1.2 PSA Puretech engine has reduced from 112,500 miles/120 months down to 64,000 miles/72 months
2. When replacing the timing belt, always use an O.E. branded timing belt kit such as Dayco or INA, this will ensure that the timing belt, tensioner, idlers and all associated parts meet the O.E. specification
3. The engine oil plays a crucial part to the service life of the timing belt, so the correct specification oil is critical and also the frequency of oil changes, as too often is as bad as not often enough because the required detergents in the oil can affect the belt life.
4. With high quality Motul oils and Lubricants you can be sure of:
- Significant oil film resistance and low emission performance during use in the engine
- Reduces friction to ensure gains in energy savings, and therefore fuel economy benefits
5. When replacing the oil filter, always use a OE quality filter, for this project we used a Fil Filter oil filter, this filters down to 35 microns, the oil filter from Fil Filters has been designed to work specifically with that engine and with the recommended oil. The make up of the filter has been specifically designed to minimalise friction using the latest technology in filter media
Conclusion to analysis
The results from the oil tests show there was a high content of fuel in the oil, the cause of this could be short trips along with cold starts, a possible consequence from recent lockdowns. The oil was analysed by Motul oils, this a service they offer and is available to all independent workshops.
The oil filter analysis carried out by Fil filters shows that the oil filter was at 88% capacity in just over 1000 miles of operation and if it had not been replaced, potential engine failure was probable.
Summary
At the present time, there is no known fix for this problem, OESAA’s advice would be,
- Advise the driver/owner to periodically carry out a long run in the vehicle to run the engine oil at operating temperature to help reduce contamination
- Inspect the timing belt at regular intervals
- Look out for any warning lights and action immediately
- Monitor the brake servo assistance
- When servicing the vehicle, always use an O.E quality oil and oil filter
- If timing belt replacement is carried out, always use an O.E. branded timing belt kit and check for any service bulletins
The good news is this is a straightforward repair for any independent workshop with little investment in special tools.