In this month’s Clutch Clinic, Charles Figgins, Technical Marketing Manager at Blue Print, takes the PMM audience step-by-step through a clutch replacement on a 2013 Vauxhall Astra.
Vehicle Information
Make: Vauxhall
Model: Astra
Year: 2013
Engine: 1.7 CTDi
Transmission: Six speed
The Vauxhall Astra is a popular compact family car and has a strong presence all over the globe. Depending on the region, the Astra has been badged as brands such as Opel, Holden, Chevrolet and Buick and has been reinvented a number of times since its launch – making this a common model in many markets.
The vehicle featured in this article is a 2013 Astra 1.7 CDTi, equipped with a six-speed transmission which had been brought into the workshop with a possible clutch failure. The transmission was required to be removed for diagnosis and the car was then put on the ramp for repair. The driver’s window was left in the ‘down’ position and the steering wheel was set straight ahead, for removal of the steering column later in the repair.
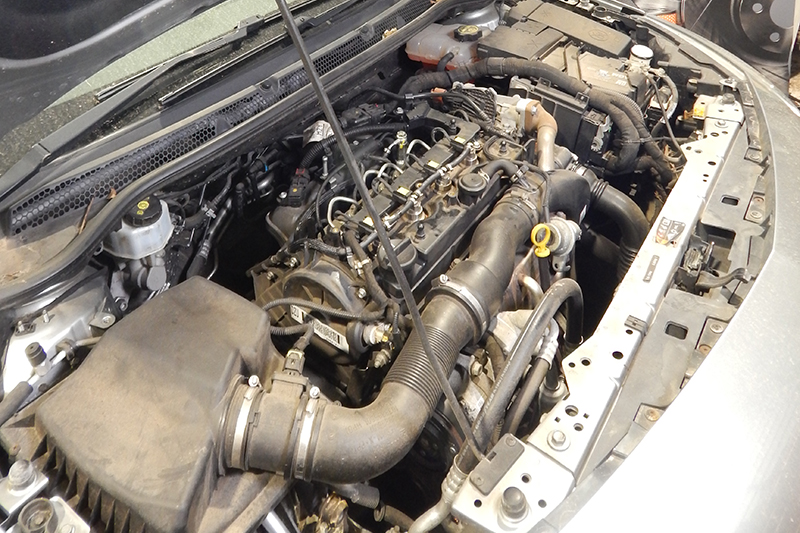
To start the clutch replacement procedure, open the bonnet and disconnect the battery and the engine ECU attached to the battery box. Remove the battery and the engine wiring harness, which needs to be unclipped from the battery box before removal. This will reveal the top of the transmission. here, unclip the gear-selector cables, disconnect the ‘reverse’ and ‘neutral’ switches, and detach the clutchconcentric slave cylinder (CSC) hydraulic hose from the ‘T’-piece connector. Once the hose has been disconnected, it is important to cap it to stop excess fluid loss (Fig. 1).
The next step involves cable ties – these are required to be able to support the air conditioning condenser and the upper mounts of the radiator fan assembly to the radiator. Once sufficiently secure, the subframe – which supports these components – will be ready for removal.
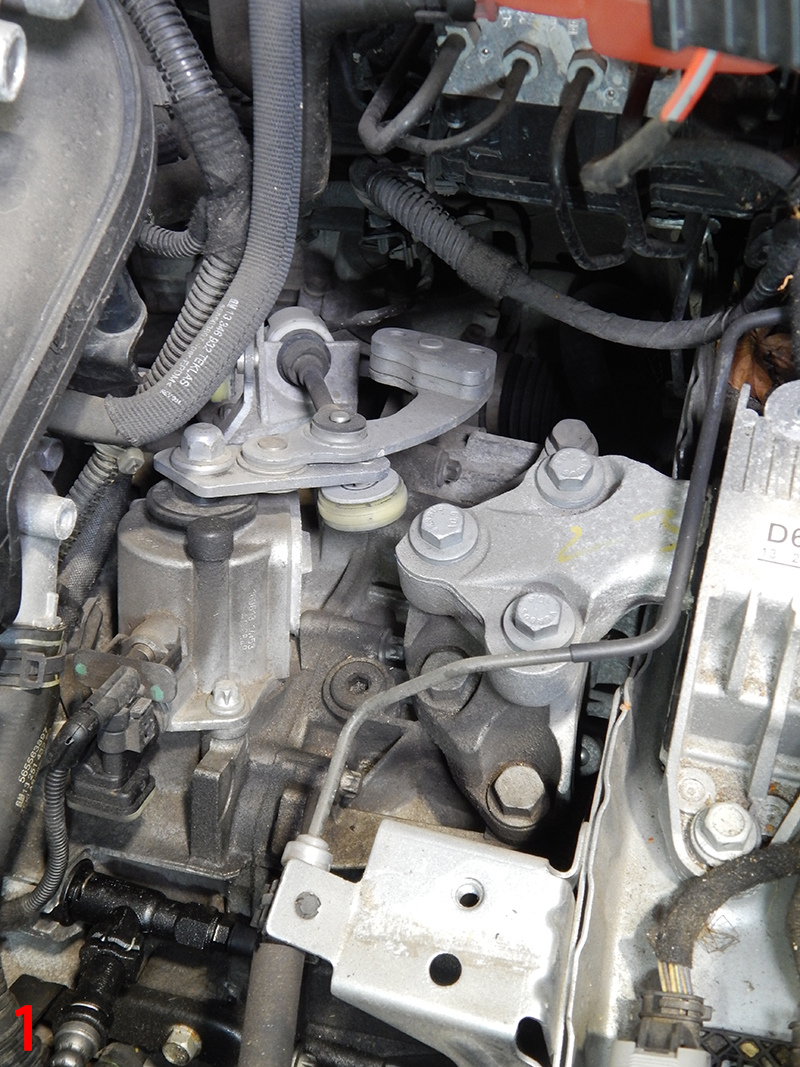
Set the steering wheel in the straight ahead position, then disconnect the steering column from the steering rack (Fig. 2) front wheels and the wheel-arch liners, then raise it again to a ‘working’ height. You will then be able to remove the engine and radiator’s plastic under-trays, revealing what is required to remove the subframe and, subsequently, gain access to the transmission assembly (Fig. 3).

Remove the exhaust-differential pressure sensor hose and the exhaust-temperature sensor, followed by the front section of the exhaust.
Next, unclip both front ABS sensor wiring harnesses and unbolt the lower-suspension arm joints, stabiliser links and track rod ends from the suspension. Then, remove the front and rear engine mounts.
The wiring harness for the electric powered steering rack is the last part that needs removal before the subframe can be taken out. Unplug the wiring harness from the steering rack motor, then unbolt the power and earth cables (which can disappear towards the battery area) from the junction box and earth points.
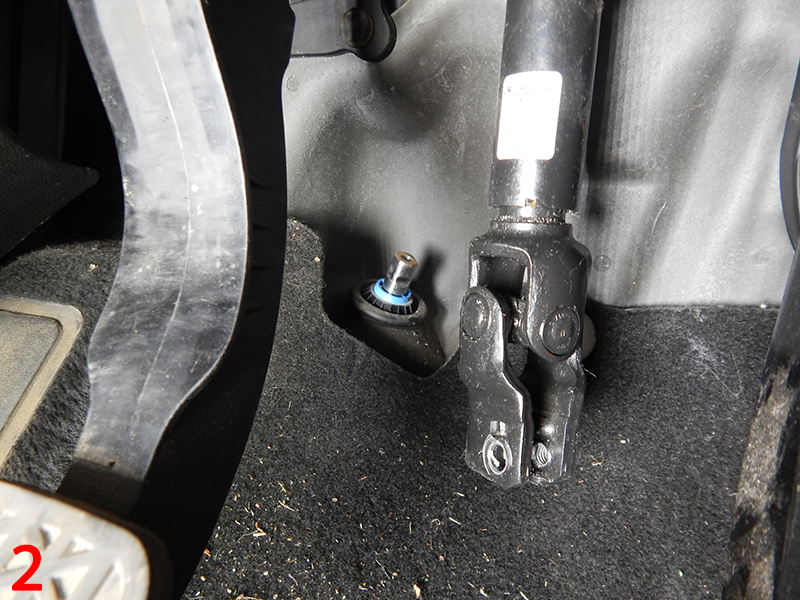
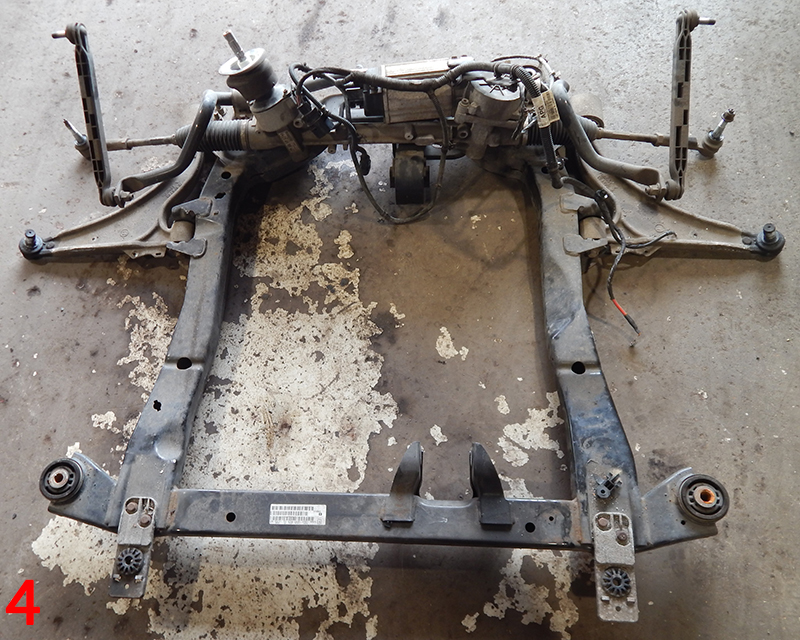
Once the engine and transmission is fully supported, the four subframe-retaining bolts can be unscrewed and the complete subframe (including steering rack, stabiliser bar and lower arms) should be lowered to the ground (Fig. 4).
With the subframe taken out, there is significantly more room for the transmission-removal process. Drain the transmission oil and remove the front driveshafts from the transmission. Remove all but a few of the bell-housing bolts in readiness for removal of the transmission. The starter motor can be left in position.
Make sure the engine is supported before releasing the top transmission mount and removing the last of the bell-housing bolts. Then, separate the transmission from the engine. Lower the transmission to the floor for inspection.
Unbolt the CSC from the transmission and unclip the plastic ‘T’-piece connector from it for cleaning. You should also thoroughly clean the bell-housing and transmission-input shaft, to remove all grease, dirt and friction fibres from the previous clutch. Next, the input-shaft seal needs inspection before you can fit the new CSC to the transmission. Refit the ‘T’-piece connector to the CSC and lightly grease the transmission-input shaft splines in preparation for the reinstallation of the transmission.
Remove and inspect the clutch pressure plate and friction disc; also check the condition of the dual-mass flywheel. For the Astra used in this article, clutch kit ADBP300007 was selected for the repair, along with a replacement flywheel.
For the flywheel replacement, remove the original flywheel from the engine and inspect the main rear oil seal for any potential oil leaks. Clean the area thoroughly before fitting the new flywheel and bolts.
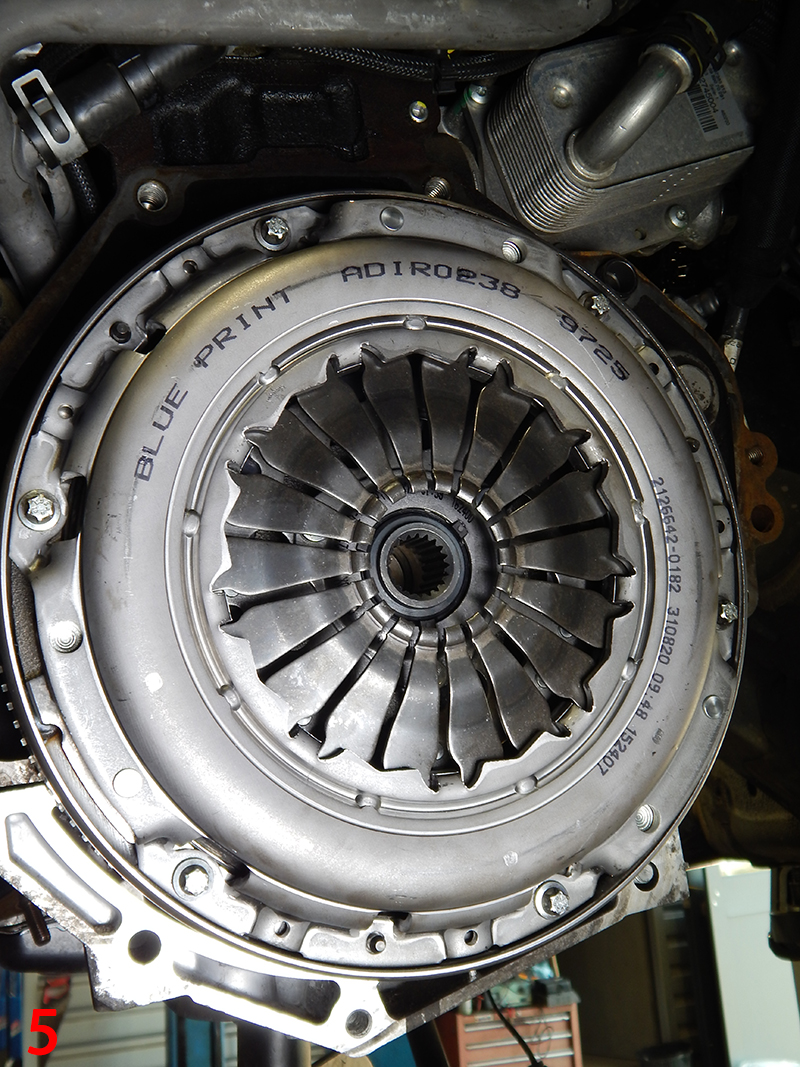
Tighten the new flywheel bolts to the recommended settings, align the clutch kit, and then fit it to the flywheel (Fig. 5).
The transmission was aligned to the engine and secured in place with a few of the bell housing bolts. This was followed by refitting all of the parts to the transmission, and all other parts that were removed in the process of the transmission removal.
Align the transmission to the engine and secure it in place with a few of the bell-housing bolts. Then, refit all parts back to the transmission – as well as all other parts that were removed in the transmission-removal process.
With the transmission securely in place, the subframe can be refitted along with all steering and suspension components, the wiring harness, and the front section of the exhaust.
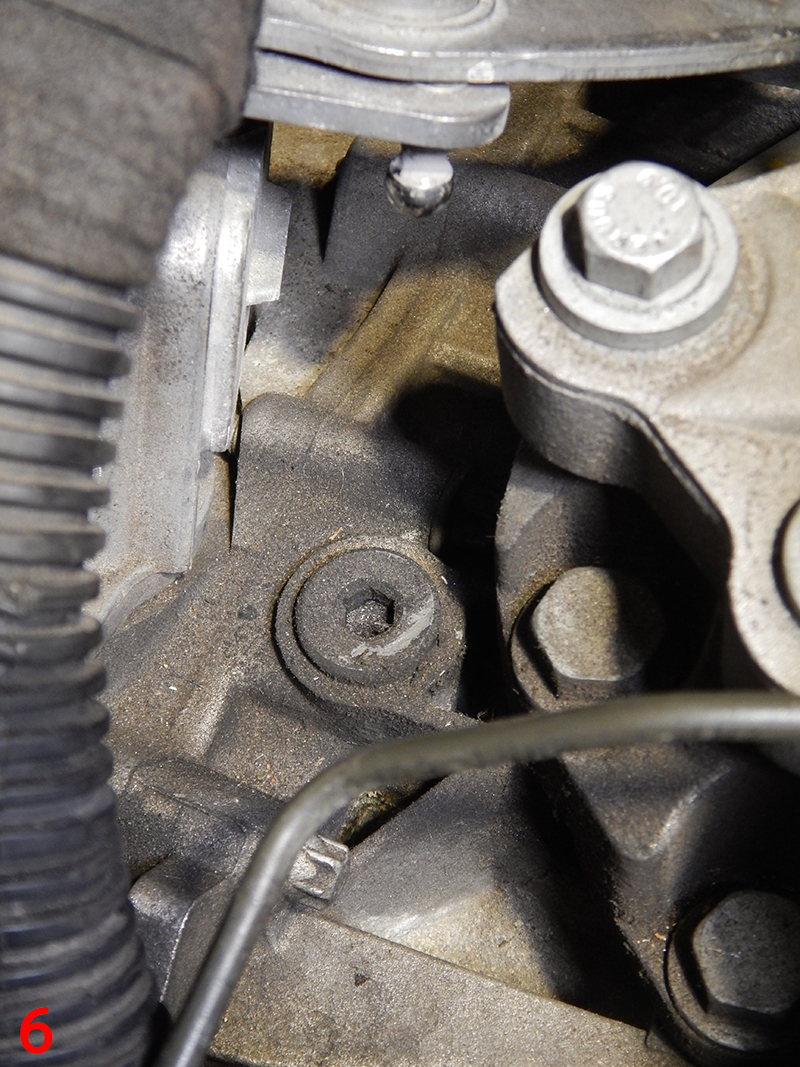
Lower the vehicle and fill the transmission with fresh oil via the filler located on the top of the transmission; the required service capacity is 1.76 litres. Following this, refit the plug (Fig. 6).
The brake and clutch fluid reservoir can now be topped-up with fresh fluid. Afterwards, bleed the new CSC of any excess air.
Refit the gear-selector cables and battery tray (along with all associated wiring), as well as refitting the battery and other covers. Reset the one-touch windows and check the clutch pedal operation. Finally, carry out a road test to ensure the clutch is back to full operational order.


