REPXPERT Alistair Mason takes PMM readers through the process of replacing the front and rear wheel bearings on a 2008 Ford Focus.
The front wheel bearing is commonly known as a generation two bearing. This compact bearing is identified by the hub/drive flange being part of the bearing inner race. Also, at the back of the inner race, a rounded forming is present. The bearing pre-load is set by a machine that orbitally forms the back of the inner race. The rear of the bearing also houses the encoder ring for the ABS system.
It’s easy to make errors with these types of bearings, one such error being to press the bearings into the hub assembly by pressing on the hub flange which, consequently, damages the bearing. The correct method is to press on the bearing outer race.
By using a generation two bearing tool, the technician can ensure that they are pressing directly onto the bearing outer race during installation. Some generation two bearings have a retaining clip that will only be installed successfully by using the correct tooling. Another advantage is that the hub assembly remains on the vehicle, thus, reducing repair times.
With a scheduled repair time of almost one-and-a-half hours for the front wheel bearing and nearly three-quarters-of-an-hour for the rear, this is a simple repair for any independent workshop.
Front wheel bearing
Before getting to work, the generation two wheel bearing tool, as well as a two-post vehicle lift and locking wheel bolt tool, will be needed.
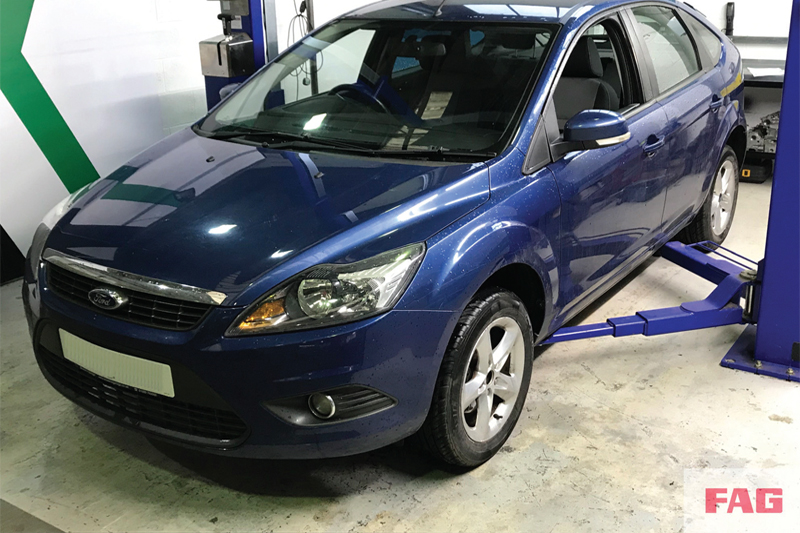
To begin the removal process, slacken the wheel nuts and then raise the lift to waist height before removing the wheel and centre hub bolt. Disconnect the flexible brake hose from the retaining bracket (Fig 1), and then undo the two brake caliper carrier bolts. Remove the caliper itself and secure it to the spring.
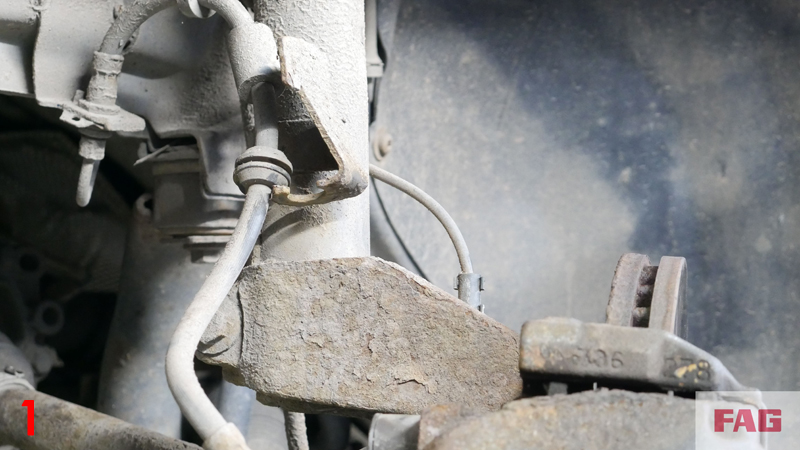
Remove the brake disc and then the bottom ball joint retaining nut, release the ball joint from the hub assembly, ease the assembly outwards and take away the driveshaft from the hub (Fig 2).
A purpose-built generation two bearing tool is now required to remove the bearing; start by selecting the correct size plates/clamshells that mount behind the drive flange, and locate against the front face of the hub carrier and secure into position (Fig 3).
Using the large centre bolt, mount the outer press/force plate and pins and locate the pins onto the flange plate/clamshells (Fig 4).
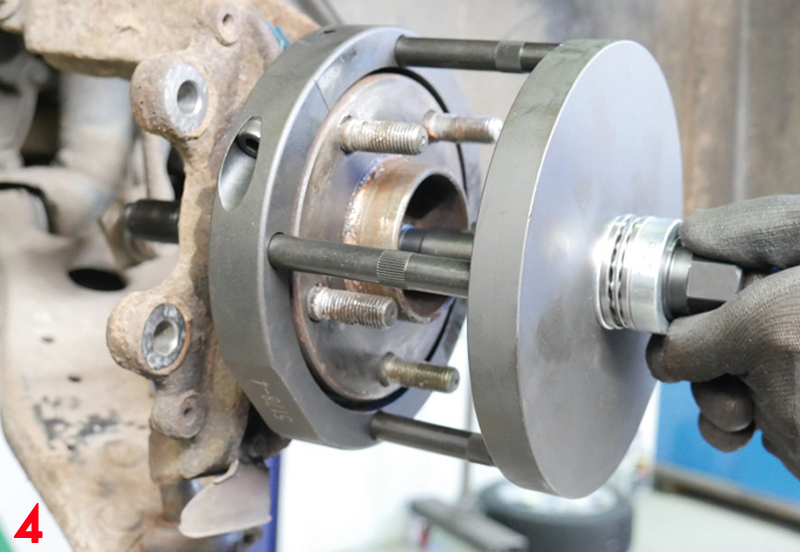
Select the correct extraction adaptor that sits on the inner race at the back of the bearing, which must pass the ABS sensor when being drawn through. Then lubricate the centre bolt and, finally, mount the nut and tighten (Fig 5).
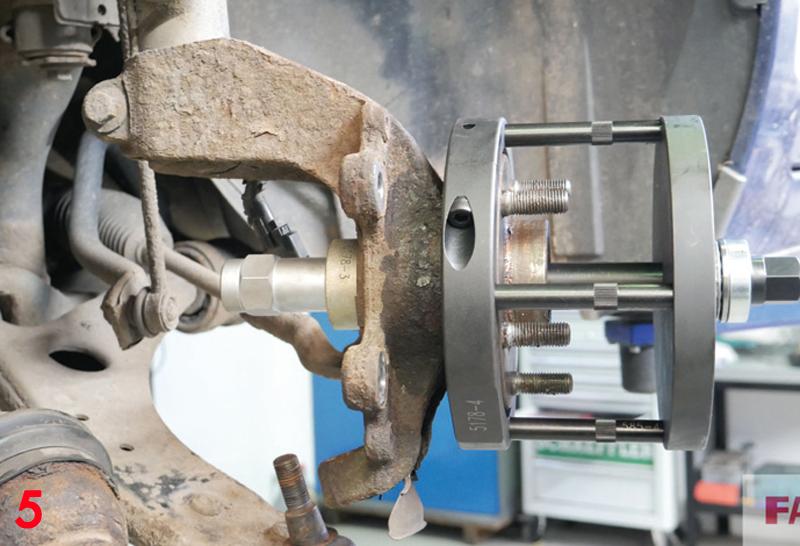
Using a breaker bar, tighten the centre bolt. Whilst tightening the centre bolt, the bearing will be drawn out of the hub assembly. Keep a hand on the bearing and tool, as this could fall when removed. With the bearing removed, ensure the bearing mounting surface is clean and remove any loose rust if required.
Before fitting the new bearing assembly, clean the area at the back of the hub. If any debris is left in the hub housing, it could prevent the bearing from seating correctly.
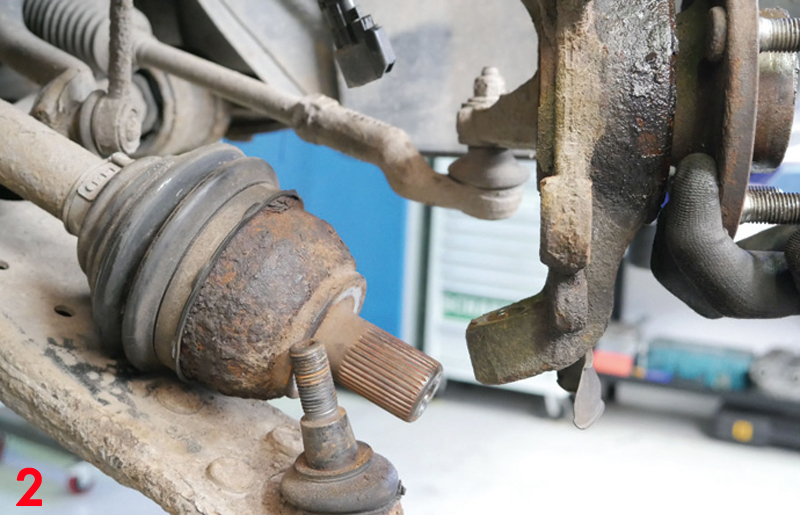
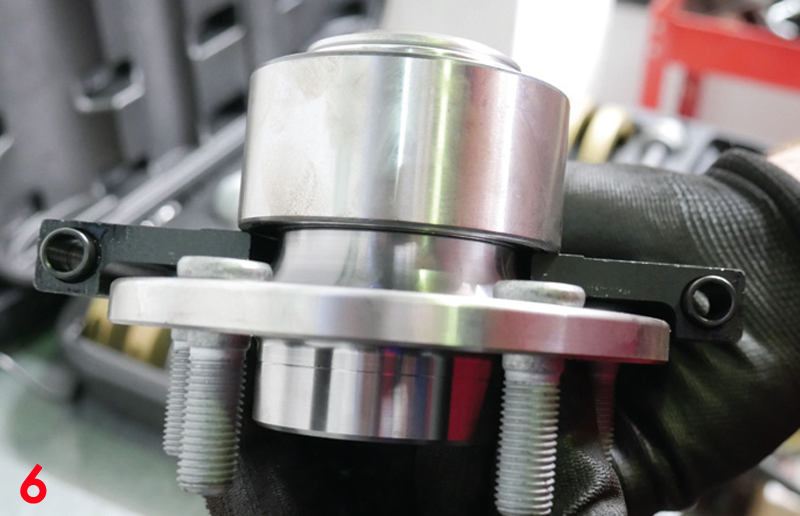
Fit the appropriate plates/clamshells to the new bearing assembly that presses on the outer race of the bearing (Fig 6), and secure.
Mount the correct installation adaptor at the back of the hub assembly; check that it is seated correctly, and that it is not in contact with the ABS sensor. Locate the new bearing assembly at the face of the hub, then insert the centre bolt with press/force plate and pins. From behind, mount the nut on the centre bolt and tighten, ensuring the installation adaptor is located properly. Then, ease the tension onto the bearing, making sure it draws in squarely.
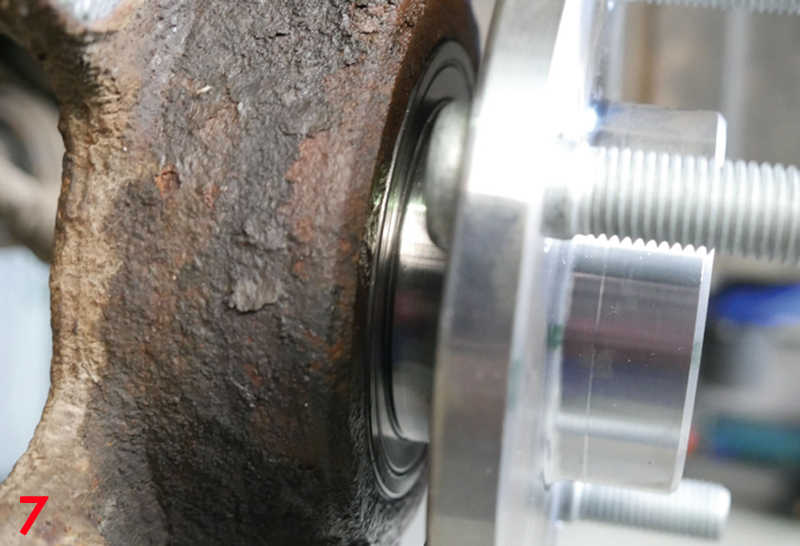
Using a long ratchet or breaker bar, tighten the centre bolt, which will draw the bearing assembly into the hub carrier. Once tight, remove the installation tool and visually inspect that the bearing is seated correctly (Fig 7).
Rebuild in reverse order of removal, torque bolts to the manufacturer’s specification, and remember to test the brake pedal before driving the vehicle, as the calliper has been removed.
Rear wheel bearing
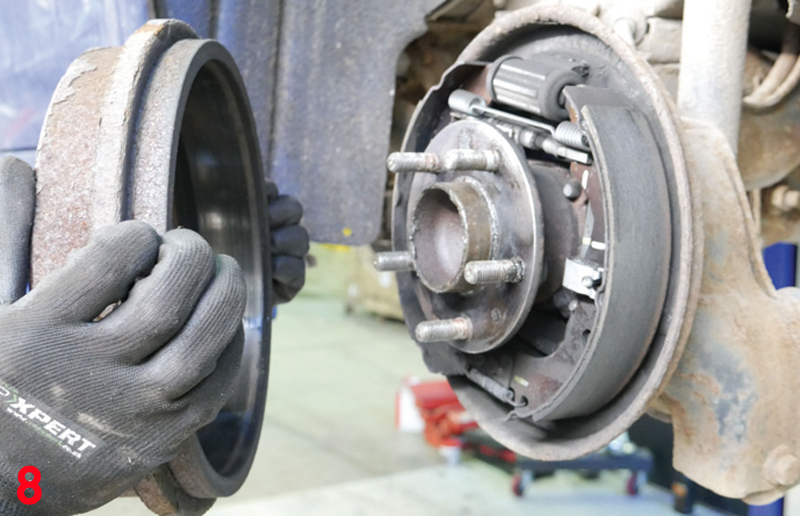
For this section of the vehicle, a vehicle lift, torx socket and locking wheel bolt tool will be required. Removing the bearing should be straightforward: start by removing the rear wheel and brake drum (Fig 8).
Next, remove the four external torx head bolts accessed from behind the brake back plate, disconnect the ABS sensor, and remove the wheel bearing assembly (Fig 9).
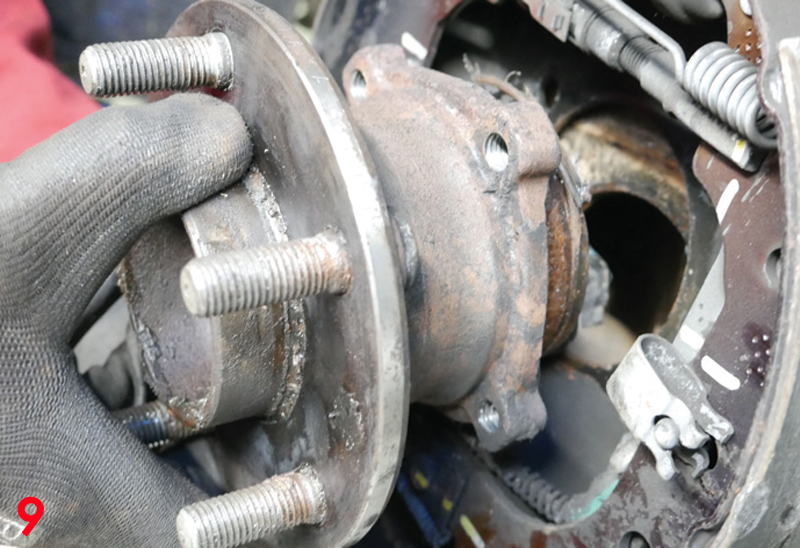
In reality, the bearing corrodes into the hub, so insert the torx bolts back into the bearing and use these to knock out the bearing assembly from behind the back-plate.
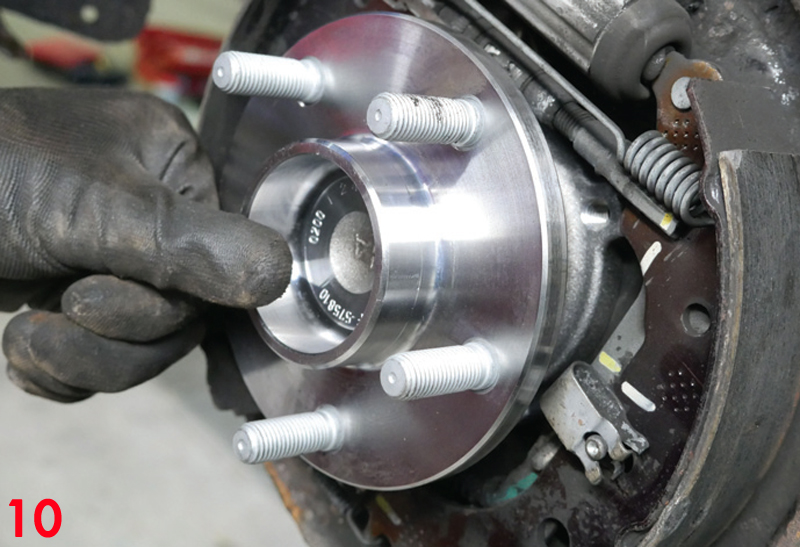
To install the bearing, clean the hub and then insert the component, confirming that the four bolt holes line up (Fig 10).
Insert the new external torx head bolts, tighten evenly, torque to the manufacturer’s specification, and connect the ABS sensor. Finally, fit the brake drum and wheel, then torque correctly.