Below is a step-by-step guide to using Bowmonk’s BrakeCheck unit for performing service and hand brake tests.
1. Position the BrakeCheck unit on a level surface, such as the passenger side foot well
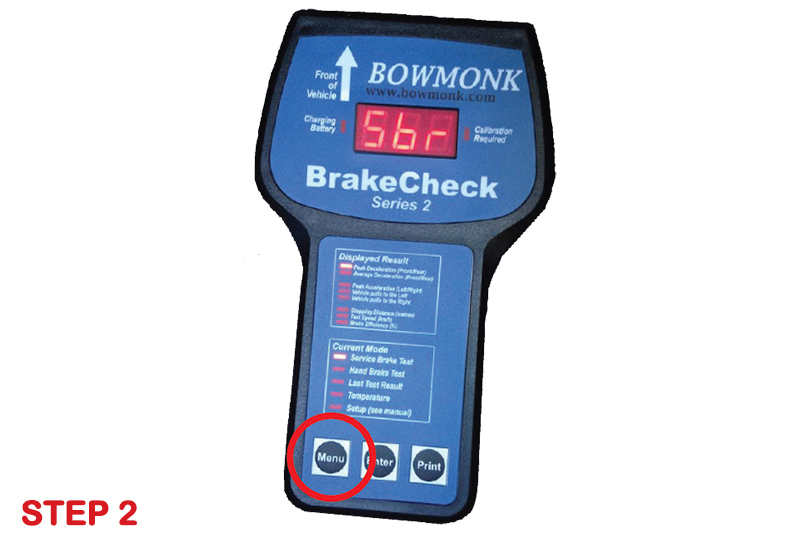
2. Switch the unit on by pressing and holding the Menu button until Sbr appears in the display
3. Confirm ‘Service Brake’ choice by pressing Enter
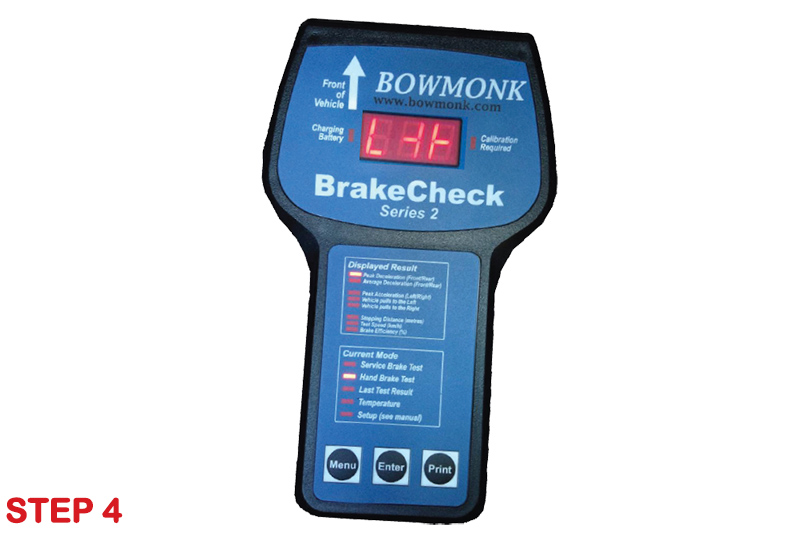
4. When the unit is positioned level enough to start the test a symbol will be shown on the display: Once the symbol is displayed press Enter
5. The unit is now ready for the test
6. When the test area is clear, accelerate the vehicle to an appropriate test speed (e.g. 20 mph)
7. Once the vehicle is travelling at an appropriate test speed, check for traffic approaching from behind
8. If safe to do so, apply the footbrake as a controlled emergency stop, without skidding
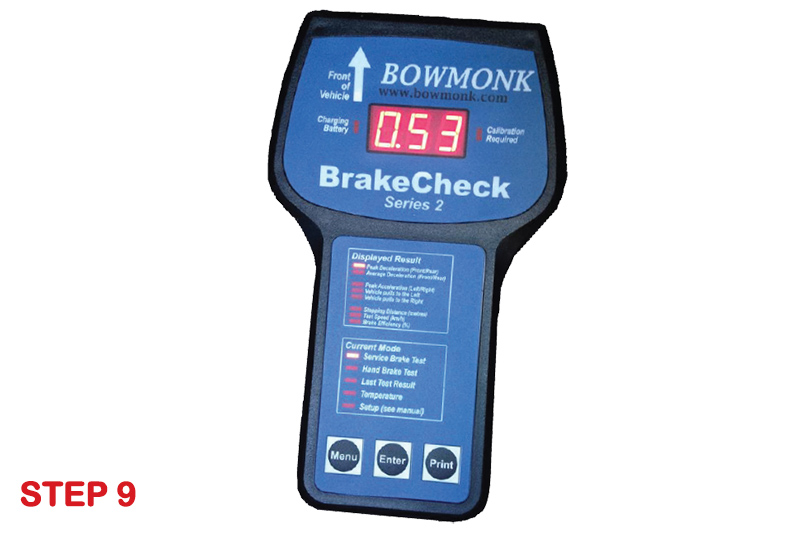
9. Once the vehicle has been brought to a complete stop, the unit will generate and display a braking efficiency value
10. Once the Service Brake test is complete, change to Hand Brake mode by pressing the Menu button (so that the Hand Brake Test LED is illuminated)
11. As before, confirm this choice by pressing Enter, which will take you to the levelling display
12. Press Enter when the level indicator is shown as in step four
13. As before, accelerate the vehicle to the test speed, this time applying the Hand Brake to stop the vehicle
14. Note – please check with your vehicle manufacturer if this type of procedure is acceptable
15. Once the vehicle has come to a complete stop the display will show the braking efficiency of the Hand Brake
16. To view the Service Brake test report, press the Menu button until the Last Test Result and Service Brake Test LEDs are illuminated
17. Then press Enter to display the result, which can now be printed using the optional wireless printer
18. With the BrakeCheck unit positioned approximately 2-3 cm in front of the infrared printer, switch on the printer and press the Print button on the BrakeCheck to print the test result
19. To view or print the Hand Brake test, carry out the same procedure, but use the Menu button to illuminate the Hand Brake Test and Last Test Result LEDs