The Volvo XC90, launched in 2002, has grown to be quite a popular vehicle, with around 50,000 on UK roads today. In this ‘Belt Clinic’ the technical experts from INA – a brand of Schaeffler Automotive Aftermarket – show you how to perform an accurate timing belt replacement:
The timing belt system on this particular vehicle may look a little tricky but, with a little know-how and the appropriate tools, it will prove to be an ideal repair for any independent UK garage.
Recommended values
The engine has been identified as an interference type so, in the event of a timing belt failure, the likelihood of engine damage is extremely high. It is important to install a new timing belt system on an engine at ambient room temperature. Always ensure you turn the engine in the normal direction of rotation unless advised otherwise by the OEM installation instructions. Recommended torque values should always be used and it is also recommended that all the tensioners and pulleys are replaced at the same time as the timing belt.
Nothing out of the ordinary is required to complete the job. For this repair we used a four-post ramp, however a two-post ramp would also be suitable. For safety reasons it is best practice to disconnect the battery earth lead. The vehicle may also be fitted with antitheft locking bolts so make sure the locking key is available before commencing the work.
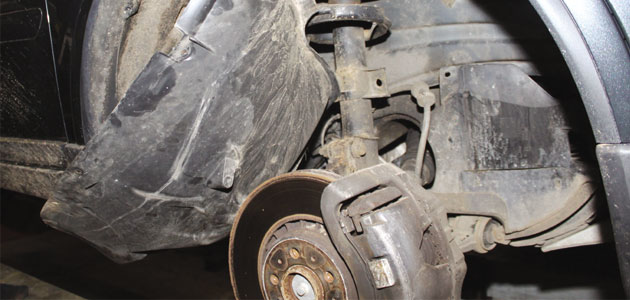
Remove the off side front wheel and the locking clips that hold the front half of the wheel arch liner. A second splash guard will be behind the wheel arch liner which can be completely removed. Fold the wheel arch liner carefully behind the suspension arm to reveal sufficient working space.
Remove the engine strut brace and engine top cover.
Auxiliary belt removal
Remove the auxiliary belt cover and release the auxiliary belt tensioner. It is quite tricky to install the locking pin to hold the tensioner due to the limited amount of space between the engine and body. To overcome this problem we used a torx bit on the tensioner body to release the tension, enabling the removal of the auxiliary belt.
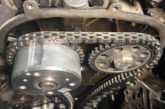
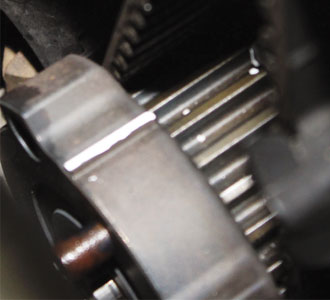
Remove the timing belt cover that is held by four clips and one bolt. Rotate the engine in a clockwise direction until the timing marks become aligned both on the crankshaft and camshaft. The camshaft mark is a very small indent on the pulley which is to align with a small notch on the rear protection cover.
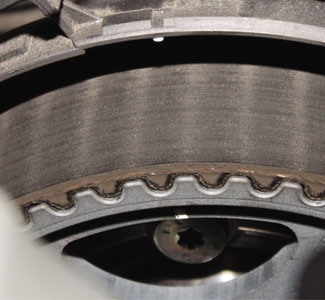
The crankshaft alignment is a little more straightforward as a rivet on the crankshaft pulley should be positioned at the 12 o`clock position.

Rotate the engine a quarter turn clockwise and then release the crankshaft centre bolt and four outer bolts. Remove the crankshaft pulley. Refit the centre bolt and rotate the crankshaft anti-clockwise until the timing marks are aligned on the camshaft and on the crankshaft.
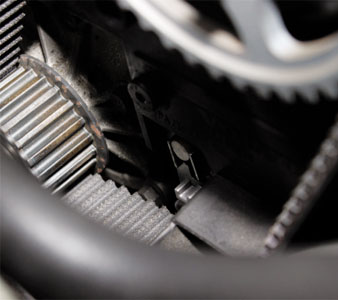
Slacken the tensioner pulley bolt and, using a 6mm allen key, rotate the tensioner until the 10 o`clock position to release the tension. Proceed to remove the tensioner bolt, tensioner pulley, timing belt and, finally, the guide pulley.
Tensioner installation
Install the new tensioner, making sure the allen key adjustment hole is positioned at 10 o`clock and then tighten the tensioner bolt by hand. Install the new guide pulley and tighten the bolt to 25Nm. Install the timing belt in an anti-clockwise direction, starting at the crankshaft pulley. Ensure the belt is kept taught between the pulleys as you install it.
Rotate the crankshaft by a small amount of movement in a clockwise direction to apply tension to the belt between the camshaft and crankshaft pulleys. Rotate the tensioner pulley anti-clockwise until the pointer is positioned just past the right hand side alignment mark of the tensioner back plate.
Slowly rotate the tension clockwise until the pointer becomes aligned centrally between the alignment marks.
Tighten the tensioner bolt to 27Nm. Press down on the non-tensioned side to make sure the pointer is able to move freely. Rotate the crankshaft two turns clockwise and check the timing marks are still aligned and the pointer is still in the central position. If not then the tensioning procedure must be repeated.
The installation of the remaining parts is the reverse order of removal but it is strongly advised to check the condition of the auxiliary belt and driven components for excessive wear and to then consider replacing them. Finally, it is advisable to rotate the engine by hand a number of times before starting the engine to check for any interference or noise.