
When installing a timing belt kit on models such as the Renault Master (this is also relevant to the 2.2DCi variant), installation errors commonly occur as a result of:
1) Inappropriate tools
2) Out-of-date technical information/data
3) Incorrect installation procedure
However, an inspection carried out at a garage in Yorkshire has unearthed an alternative twist on the latter: namely misinterpretation of the installation procedure.
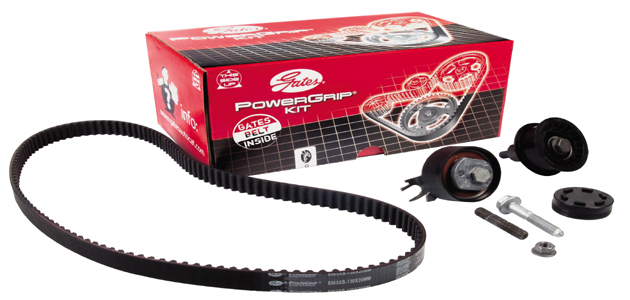
Expert diagnosis
A vehicle had suffered a catastrophic engine failure. The garage in question had used the appropriate tools. It had access to the most up-to-date data and had also followed the recommended guidelines for the installation procedure. In the absence of any other obvious cause of drive system failure, help was sought in the form of a diagnosis supplied by a technical expert from the Gates Technical Training and Support Team.
Misinterpretation
Satisfied that the garage had used the correct tools and had accessed the correct technical data, the installation procedure – detailed on the next page – was subsequently re-examined. In stage one, the tensioner position had been set correctly. The engine had been rotated through two full revolutions in order to establish the appropriate position at high tension, with the lever arm level with the top of the camshaft locking tool.
However, a simple misinterpretation of the setup guidelines for the tension setting, at stage two, had caused the problem.
The lever arm on the tool has a raised edge, which is crucial to the final result. In stage two, it is the Raised Edge of the lever arm that must be level with the top of the camshaft locking tool. Although the difference between the two positions is as little as 1mm, it is enough to initiate the chain of events that causes the drive system to fail prematurely.
Consequential damage
The mechanic had assumed that the second stage was a repeat of the first. Instead of setting the appropriate tension in stage two, stage one had been repeated. But this time, there was no subsequent double revolution of the engine. Consequently, the internal eccentric of the tensioner was in the incorrect position.
As a result the curser soon made contact with the end stop (the spring carrier), causing it to break. This caused complete loss of tension in the drive system, and, thus, catastrophic engine failure was inevitable.
Key learning points
Familiarity with a particular installation procedure can lead to problems – especially in cases where there is a subsequent OE upgrade – but assumptions can be just as dangerous.
Even after the drive system had failed, despite re-reading the installation guidelines several times, the detail concerning the Raised Edge – a key element of the instruction guidelines – had still gone unnoticed by both the garage and the motor factor. The mechanic had seen what he expected to see. It’s an easy but very expensive mistake to make.
Recommendations
Gates always recommends the use of appropriate data at every installation. It is dangerous to assume that one procedure is similar to another. Although manufacturers have models with similar engines in the same range, there are often many different engine codes. Each may require a different installation procedure.
The timing belt replacement procedure
Like so many of today’s modern vehicles, the drive system has its own particular setup. The timing belt replacement procedure on this vehicle can only be completed safely and correctly with the help of an appropriate tool set for the job and a clear understanding of a complex procedure.
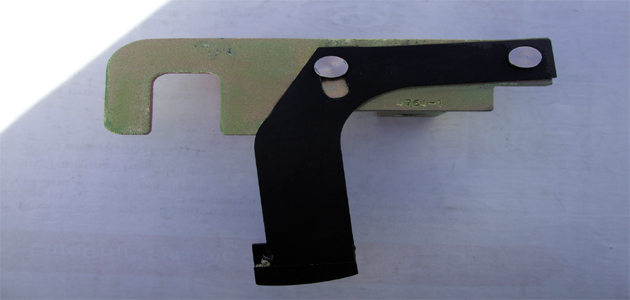
The tool is ready
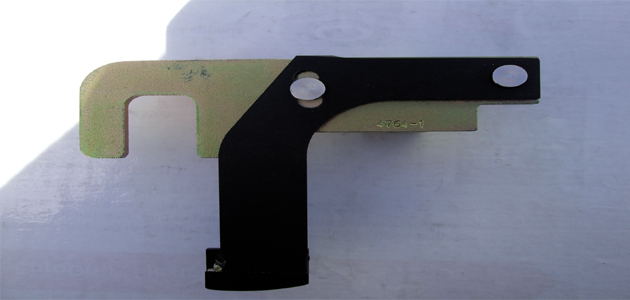
Lever arm level with top of tool, initial position
Setup procedure
The valve timing is managed internally, via a set of gears; however, an auxiliary camshaft runs at half engine speed, and the power from this is transferred to the camshaft via a shorter than normal synchronous belt.
As with most vehicles of this genre, the cold engine is rotated manually in order to bed the belt into the pulleys and to compress the fabric of the jacket around the teeth. The engine is equipped with an automatic tensioner.
Installation tension of the belt takes place in two stages:
1. TENSIONER POSITION
A camshaft locking tool is required to set the precise tensioner position. With the tool in place, the position is set by means of a lever arm on the locking tool itself. When the lever arm is level with the top of the locking tool, high tension has been achieved. This is the desired initial tensioner position. The camshaft locking tool is then removed, and the engine is rotated manually – two full revolutions.
2. TENSION SETTING
The camshaft locking tool is now replaced, and the correct installation tension is set by aligning the raised edge of the lever arm level with the top of the tool. This is the desired installation tension.
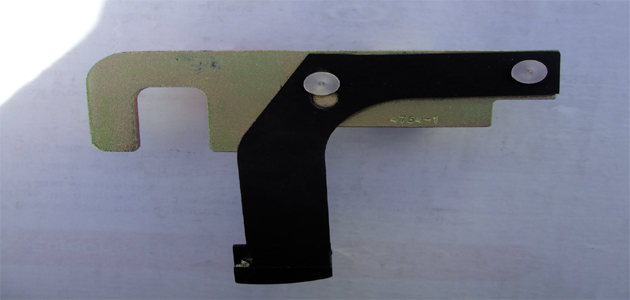
Final position, raised edge comes level with top of tool
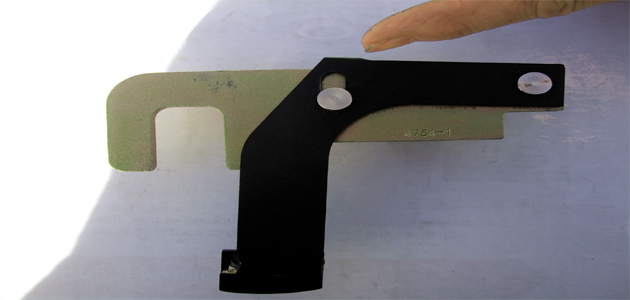
This picture emphasises the raised edge


