VMKC 01121-1 timing belt kit: Important pre-procedure notes
The use of torque wrenches, in the setting of this vehicle’s timing system is crucial. Guessing the torque applied to the tensioners could produce a catastrophic outcome. Volkswagen recommends replacing the belt and tensioner every four years, regardless of the mileage attained and to check all parts of the timing belt kit every 18,000 miles for all applications of this kit. The use of special tools is also recommended when replacing the timining system.
1. Prepare the engine as set out in the VM instructions (Step 1 below).

Step 1
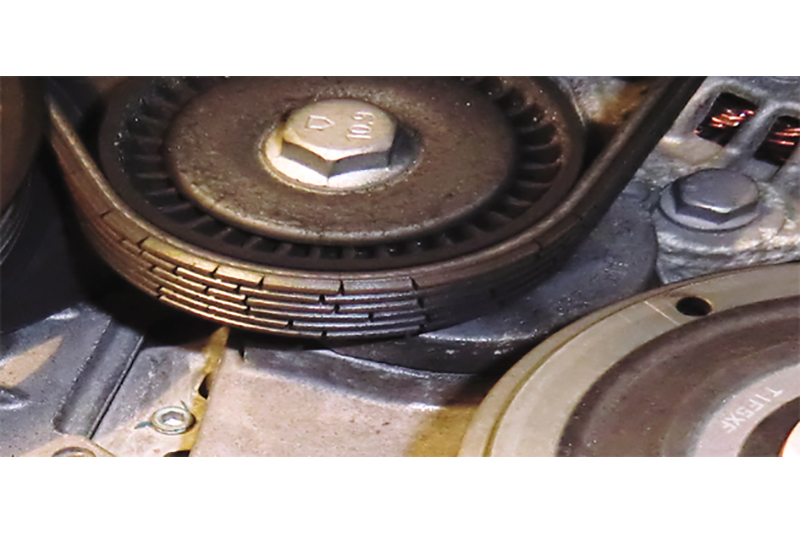
2. Remove the auxilliary tensioner and belt. It is recommended to replace the belt and tensioner at the same time as you replace the timing system components.
3. Ensure that the engine is supported safely and bring the crankshaft to TDC, using the notches on the flywheel as guidance.
4. Remove the upper timing cover, and insert the locking tools (T10016) into the camshaft gears. Note: tools are not fully engaged until the lines on the handles are aligned (Step 4 below).
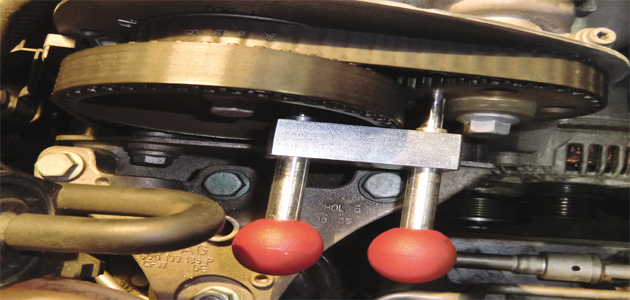
Step 4
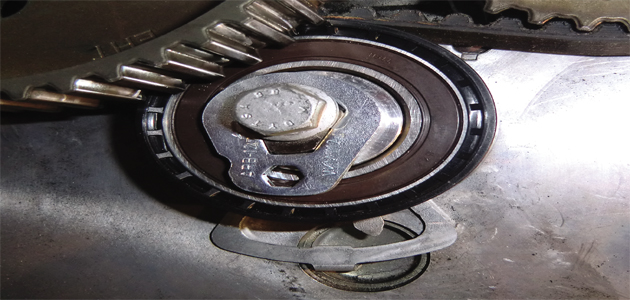
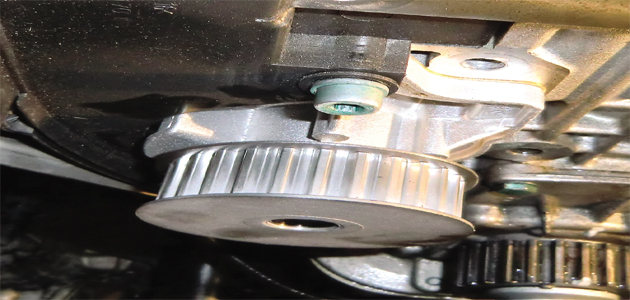
5. Remove the crankshaft pulley, then refit the bolt using two washers. Remove the lower timing casing cover. Ensure that the crankshaft is at TDC: the tooth with the chamfer must be aligned with the mark on the engine (Step 5 below).
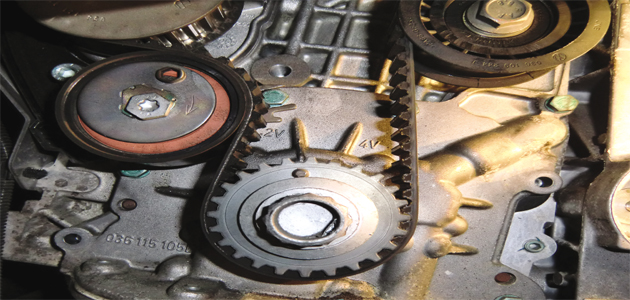
Step 5
6. Loosen the retaining bolt on the tensioners and rotate the tensioners anti-clockwise to release the bolts. Note: cam gear locking tools must be removed in order to remove the outer belt. Care must be taken not to disrupt the timing of the system at this stage!
7. Replace the locking tools.
8. Fit the inner belt. Note: before fitting the VKM 11124 tensioner, ensure that the adjuster plate is in the 6 o’clock position (Step 8 below).

Step 8
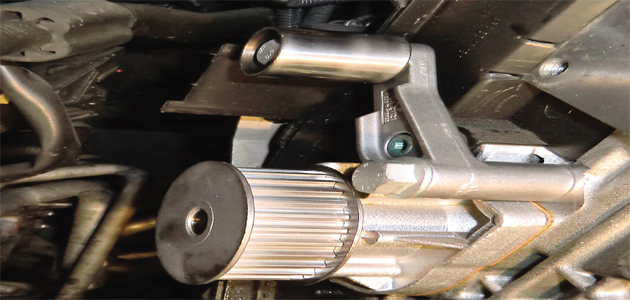
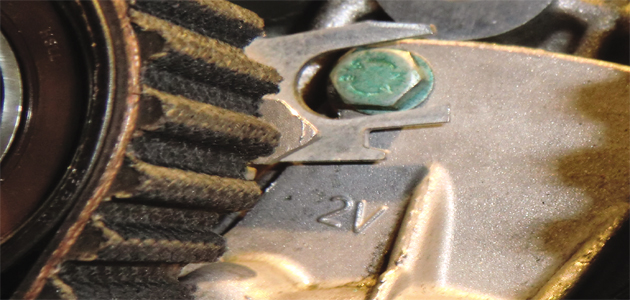
9. Check that the lug is fitted in the opening of the engine before the finger-tightening (Step 9 below).
Step 9
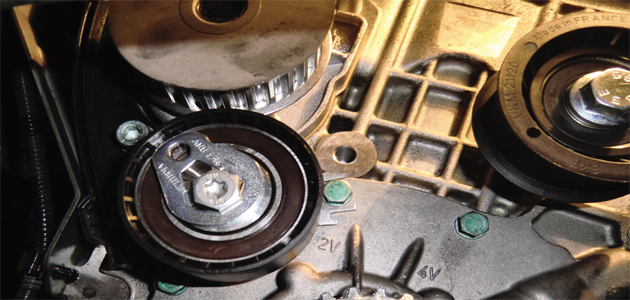
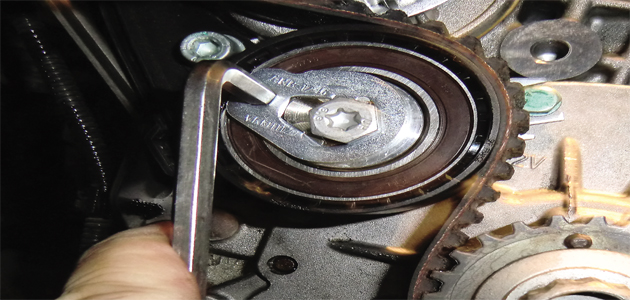
10. Using an alien key, turn the tensioning dial in an anti-clockwise direction until the pointer is aligned with the lower spigot (Step 10 below).
Step 10
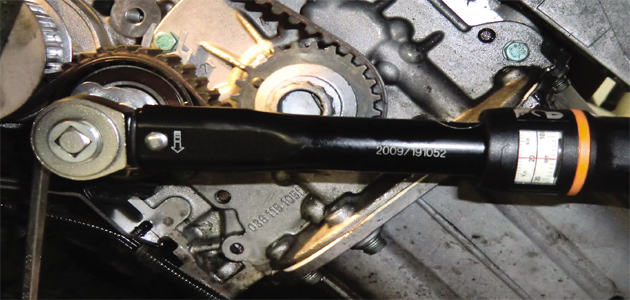
11. Torque to 20 Nm. Tip: use a mirror to check the setting as you apply the torque.
12. Drain the cooling system, and discard. Clean the contact area of the pump and fit the new VKRC 81407. Note: When renewing the cooling system components, always ensure that the engine and radiators are completely flushed with clean water. Any remaining residue i.e. metal particles, calcium desposits etc. can destroy the ceramic seal in the new water pump (Step 12 below).
Step 12
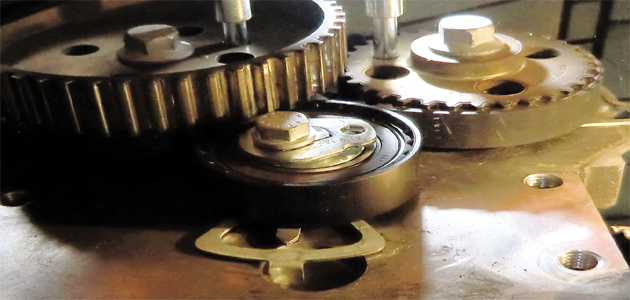
13. Fit the VKM 21121 idler below and torque to 50 Nm (Step 13 below).
Step 13
14. Fit the VKM 21120 and also torque to 50 Nm (Step 14 below).
Step 14
15. Fit the VKM 11120 tensioner and set the tensioner at the 10 o’clock position. Ensure that the backing plate is located correctly and firmly against the engine block.
16. Carefully remove the cam gear locking tools and fit the belt in the following order (Step 16 below):
1) Water pump
2) Tensioner
3) Crankshaft sprocket
4) Large idler VKM 21120
5) Camshaft sprocket
6) Refit the cam gear locking tools at this stage
7) Fit the belt onto the VKm 21121 idler.

Step 16
17. Tighten the belt by turning the setting plate in a clockwise direction (Step 17 below).
Step 17
18. Rotate until the pointer is aligned with the spigot on the backing plate (Step 18 below).
Step 18
19. Then, torque to 20 Nm (Step 19 below).
Step 19
20. Remove all locking tools and rotate the engine twice up to TDC. Refit locking tools and check the settings on the tensioners. If the pointers are not aligned with the backing plate spigots then the procedure must be started again.
21. Refit all components in reverse order.
22. Fill the cooling system with new and correctly premixed coolant. Bleed as per VM guidelines.


