This month, REPXPERT Alistair Mason replaced the timing belt on a 2015 Peugeot 2008 fitted with a 1.2 VVT 3-cylinder petrol engine.
The oil pressure warning light was activated at the relatively low mileage of 52,000 miles. Upon further inspection, the reference fault code P15A8 was traced to a blocked oil strainer, which was found to contain small fibrous particles that had come from the timing belt.
This engine is fitted with a timing belt that runs totally immersed in oil, called a ‘belt in oil’ or ‘wet belt’. A quick visual inspection of its condition can be carried out through the oil filler cap, in order to confirm it is the likely cause of the blocked oil strainer and subsequent fault code.
The following workshop equipment is required for the replacement:
- Vehicle lift (two post is ideal)
- Engine timing tool set
- Torque wrench and engine sealer
- Key (if locking wheel bolts are fitted)
Timing belt removal
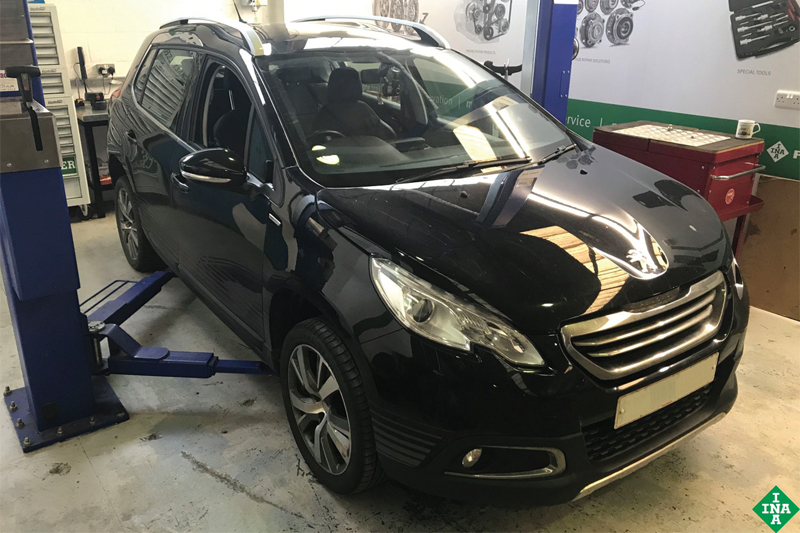
With the vehicle positioned on the lift, raise the vehicle and remove the engine undertray. Then lower the vehicle to waist height, remove the O/S/F wheel and wheel arch liner (Fig 1), and drop the vehicle to access the engine bay.
Remove the engine cover and turbo inlet pipe (Fig 2), first disconnecting the engine breather and vacuum pipe, followed by the engine breather pipe and turbo to intercooler pipe, being careful to unclip the solenoid attached. Disconnect the sensor and take off the intercooler to inlet manifold pipe, the air intake to air filter assembly, the top section of air filter unit, the multi plugs from the coils and injectors, the coils, high pressure fuel pump and metal fuel pipe. Also disconnect the turbo vacuum solenoid and bracket at the rear of the cam cover, and then the multi plugs from the two cam position sensors.

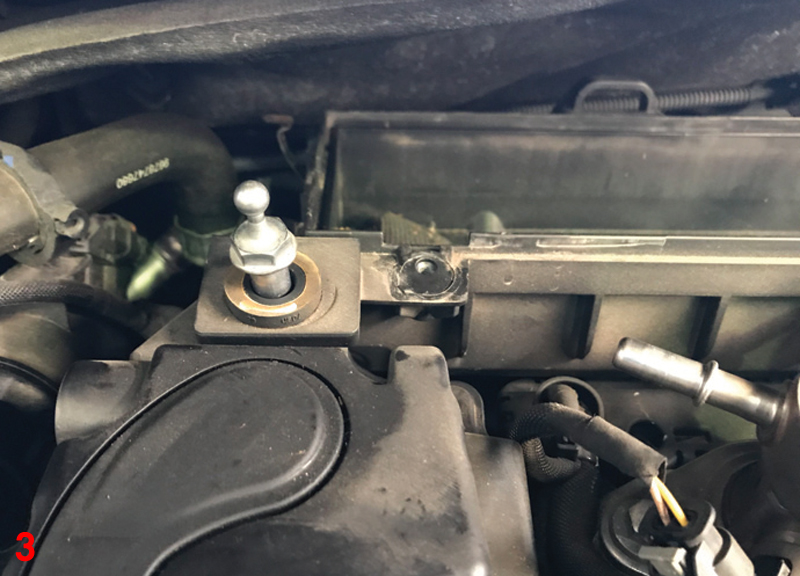
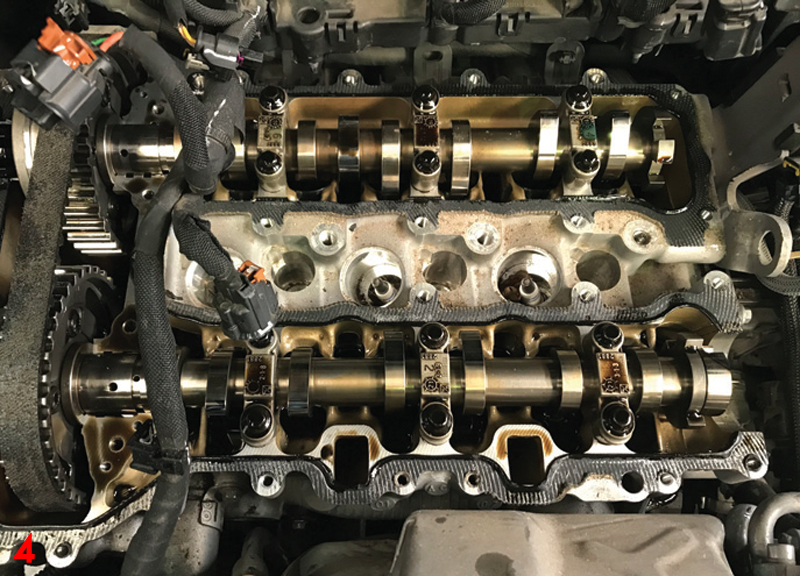
Remove the vacuum pump on the side of the cam cover and the two-engine cover/air filter fixings (Fig 3), followed by the top cam cover assembly (Fig 4).
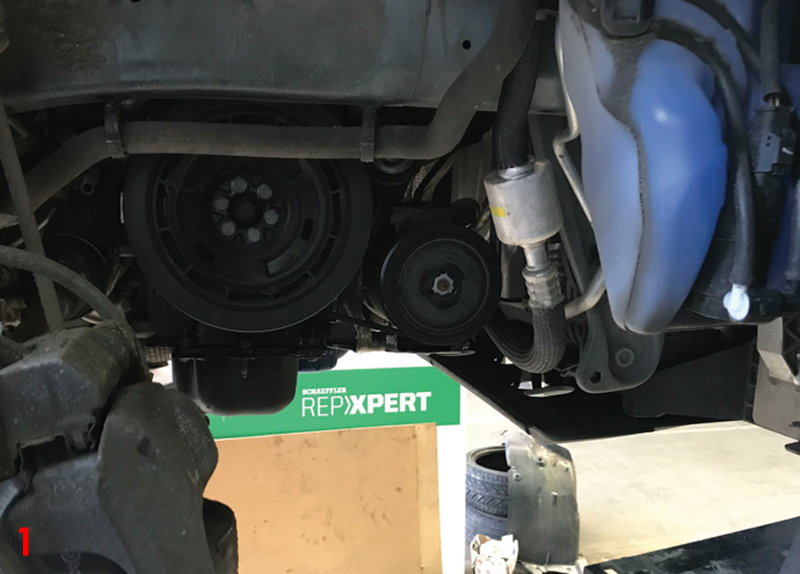
Raise the vehicle lift to gain access to the bottom pulley, remove the auxiliary drive belt by turning the tensioner in a clockwise direction, and inspect the belt for any wear, replacing it if required. Remove the six bottom pulley bolts and then the pulley, which will allow the stretch belt to the water pump to be inspected and replaced if necessary.
Lock the engine with the engine timing locking tools. Using the crankshaft pulley bolt, rotate the engine in a clockwise direction until the flat surfaces of the camshafts are at the 12 o’clock position (Fig 5).
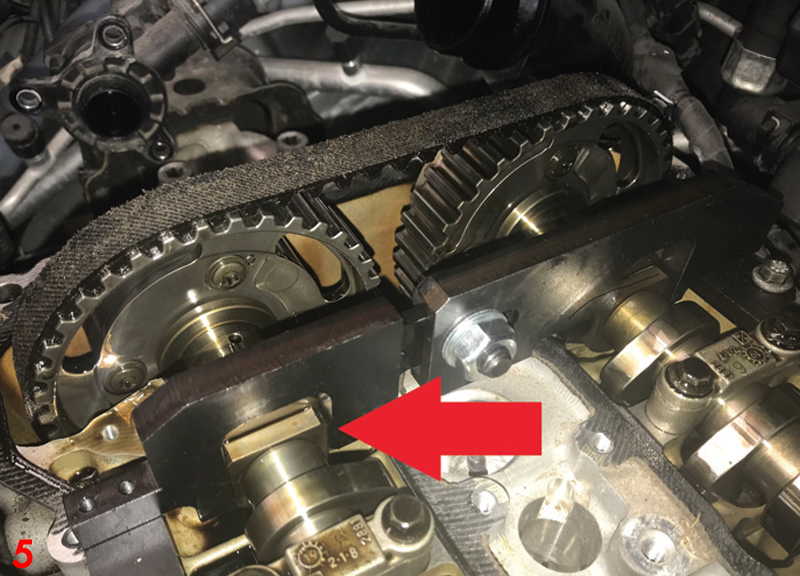
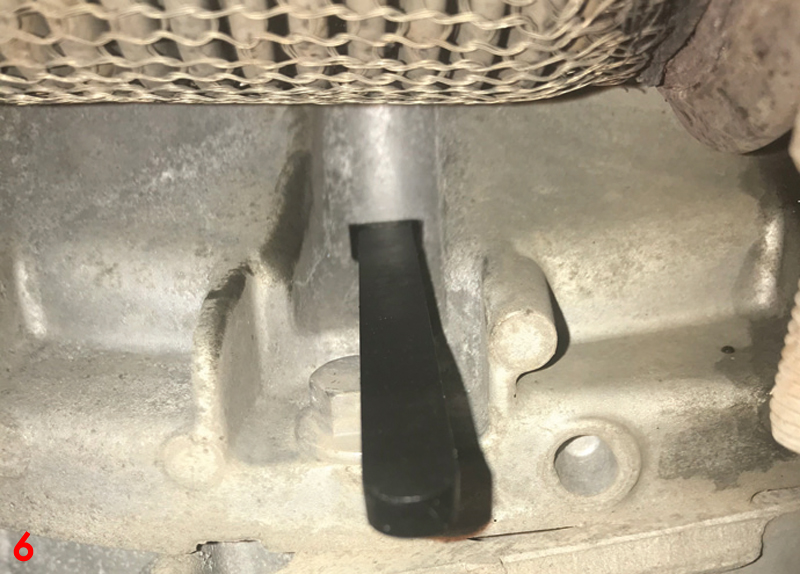
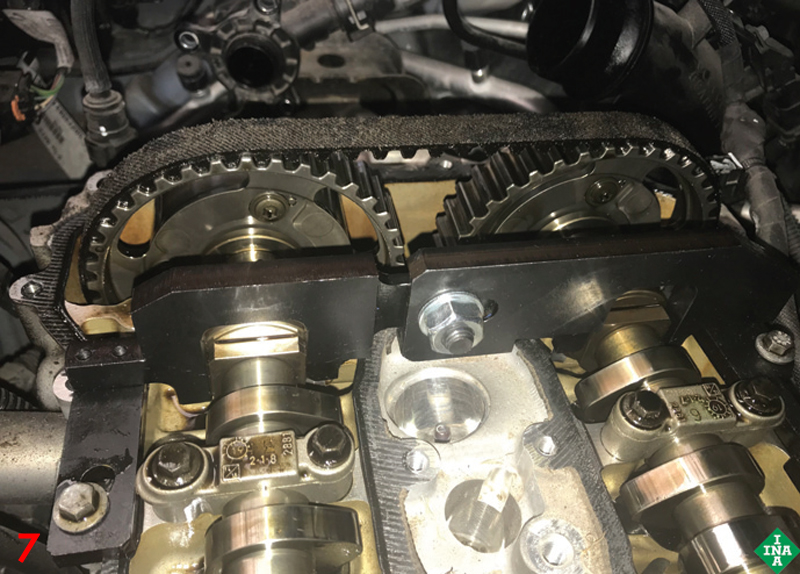
Slide the crankshaft locking tool through the lower bell housing and into the location point in the back of the flywheel (Fig 6), then lower the vehicle lift and fit the camshaft locking plate to the camshafts (Fig 7).
Once the engine has been locked and engine timing confirmed, remove the tools and slacken the crankshaft sprocket bolt. Lock the ring gear using a pry bar through the bell housing, slacken the crankshaft sprocket bolt. Then re-insert the engine locking tools and with the engine locked, remove the crankshaft sprocket bolt.
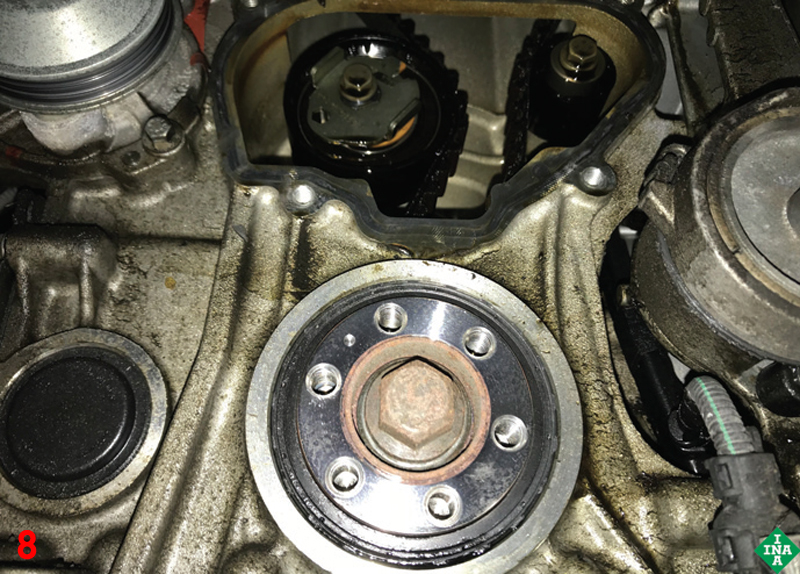
Take off the black plastic plate above the crankshaft pulley and remove the timing belt tensioner and idler (Fig 8), followed by the crankshaft sprocket assembly. The timing belt can now be eased upwards, ready for removal. Lower the vehicle lift to gain access to the engine, and after noting their location, remove both camshaft sprockets and then the timing belt.
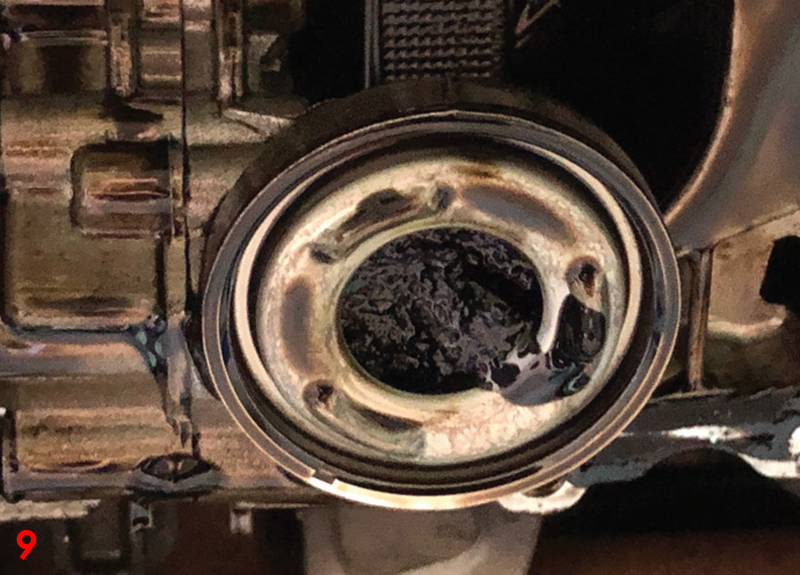
Whilst this repair was carried out, the sump was removed and the oil strainer checked (Fig 9) and cleaned, along with the vacuum pump and variable valve timing units. Finally, the engine oil and filter were replaced.
Note: The timing belt replacement interval for this engine has now been lowered to reduce the risk of this problem.
Timing belt installation
After cleaning the components and surfaces, position the new timing belt in the front of the engine. Ease the crankshaft sprocket assembly into position, ensuring the keyway locates correctly, and fit the new crankshaft bolt to hold the sprocket assembly in position, whilst still allowing it to rotate.
Fit the new tensioner and idler. Tighten and torque the idler bolt then lower the vehicle lift and fit the camshaft sprockets whilst easing the timing belt into position. Ensuring the camshaft sprockets locate on the keyways, install the new camshaft bolts and torque to the manufacturer’s specification.
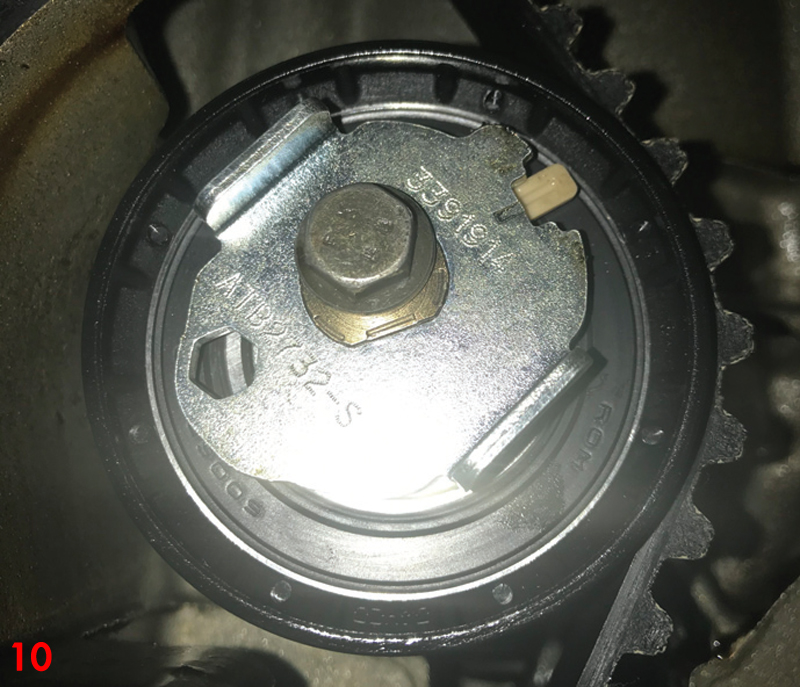
With the belt installed, raise the vehicle lift to gain access to the tensioner, and using an Allen key, rotate the tensioner anticlockwise until the pointer aligns with the mark on the tensioner (Fig 10). Tighten and torque the tensioner bolt. Then, tighten and torque the crankshaft sprocket bolt, but use a counter hold tool, otherwise the locking pin can break.
Remove the engine locking tools, rotate the engine two revolutions, refit the engine locking tools, and check the tensioner is still set correctly.
Refit all items in reverse order of removal, but when fitting the bottom pulley, locate the water pump belt on both pulleys. Using a longer bottom pulley bolt, start to bolt the pulley into position. When close, twist the pulley into the final position and secure with a second bolt. Once secured correctly, replace the longer bolt with the original.


