This month’s Belt Focus comes from Dayco. The timing belt is being replaced on a 2007-16 Renault Kangoo II, fitted with a 1.6 litre petrol engine (K4m.8.30).
Vehicle Information
Manufacturer: Renault
Model: Kangoo
Year: 2007-16
Engine: 1.6 petrol (K4m.8.30)
The popular Renault Kangoo, also badged as the Nissan Kubistar, has been in production since 1997, with a second generation introduced in 2007, the petrol version of which, until superseded in 2016, used a 1.6- litre engine that featured a timing belt-driven water pump. As replacing the belt also requires the auxiliary drive system to be removed, Dayco recommends that all the systems’ components – primary and auxiliary drive – be replaced at the same time.
This step-by-step technical guide will help technicians through the process, to avoid complications and ensure a first-rate job.
As with all primary drive system jobs, the work should be undertaken when the engine is cold, so ideally the vehicle will not have been run for at least four hours.
After disconnecting the battery earth cable and draining the coolant, remove the windscreen wiper arms, then the bonnet seal on the plastic bulkhead, the two trims either side of the windscreen, the cover set in the bulkhead and finally, the bulkhead itself.
This reveals a cross-piece and, underneath, the wiper motor and linkages that both now need to be removed, along with the dividing plate, followed by the airbox.
After removing the front offside wheel, detach the inner cowling and its reinforcement mounted in front of the crankshaft pulley. With access to the auxiliary drive system, use a spanner on the tensioner to take the tension off the belt so it, and then the tensioner, can be taken off. Now remove the lower tie rod attached to the powertrain.
Timing tool
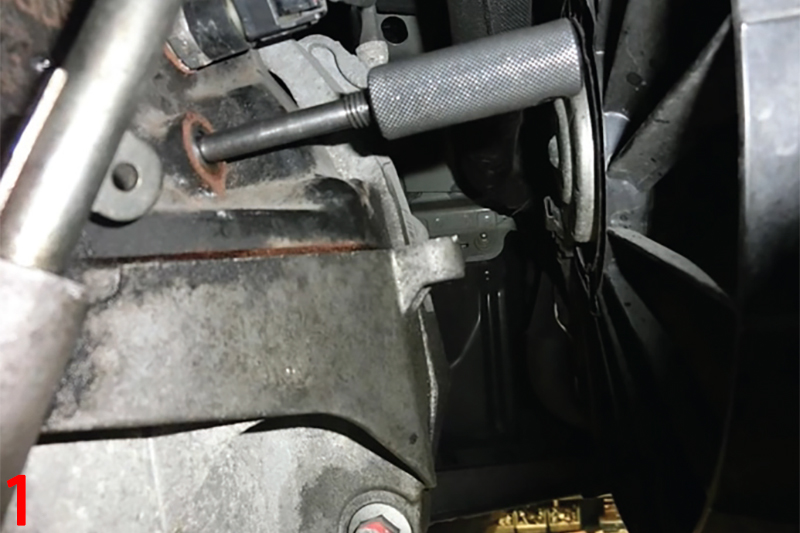
Returning to the top of the engine, remove the two plastic plugs covering the camshafts, mounted at the opposite end to the timing drive system. Then remove the plug in the engine block behind the cooling fan and insert the crankshaft timing pin (Tool 1489) (Fig.1/main image), rotating the crankshaft clockwise with the pulley bolt, until the pin locates. The camshaft timing tool (1496/1750) can now be fitted where the plugs were removed.
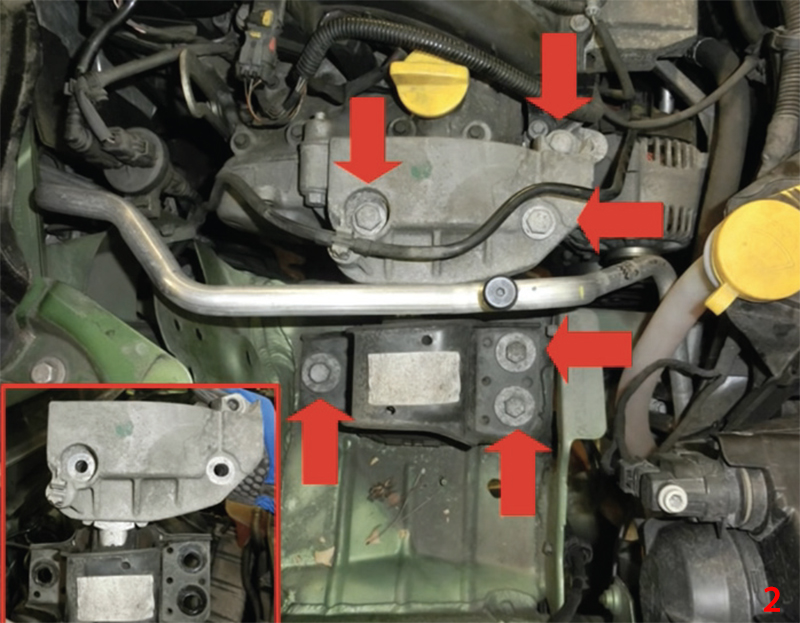
Support the engine underneath with a suitable jack and remove the right-hand upper engine mount (Fig.2) followed by the engine mounting flange that also acts as the upper timing belt case. Next, detach the crankshaft pulley. As this holds in place the crankshaft pinion, which has no locking tab, the engine must be timed first. Then remove the lower timing belt case.
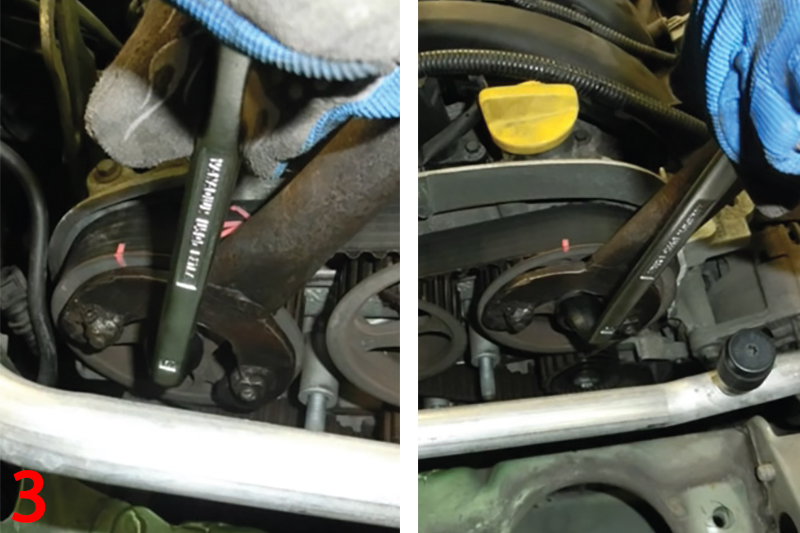
Holding the camshaft pulleys in place, loosen their fasteners (Fig.3), but again, as these also have no locking tabs, loosen them only after the engine has been timed. Then remove the belt tensioner, idler and the timing belt, which gives access to the water pump, and can now be removed.
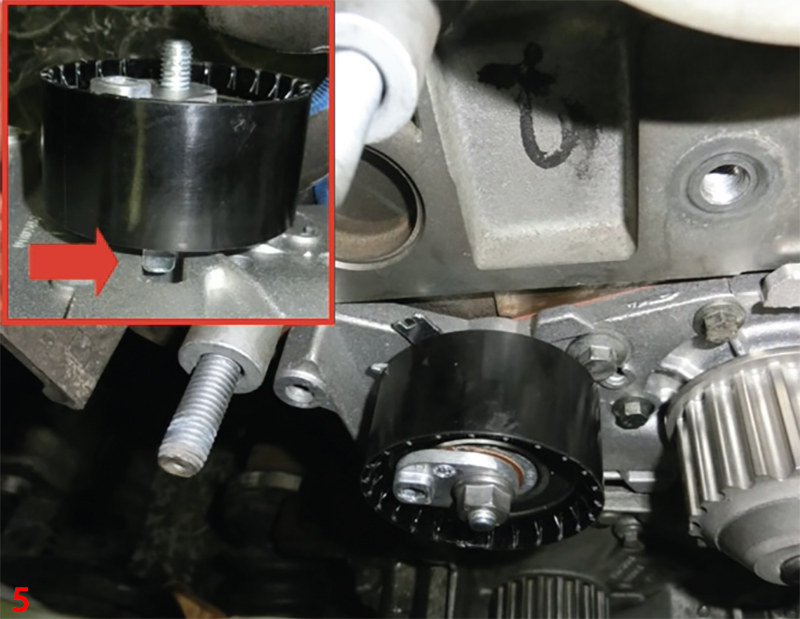
Ensuring that the cooling system has been flushed through and no debris is present, fit the belt tensioner stud into the new water pump from Dayco kit KTBWP4601 (Fig.4), tighten it to 5 Nm (-0+2) and then install the pump with its gasket. Although none should be used on the gasket, the threads of the bolts that secure the water pump do need to be spread with sealant. Attach the new belt tensioner ensuring that the locking tab is located in the slot in the water pump body (Fig.5).

Remove the crankshaft pinion, clean its inner section and the exposed shaft, but do not lubricate these contact surfaces. Likewise, do not lubricate the surfaces between the camshaft pulleys and their shafts.
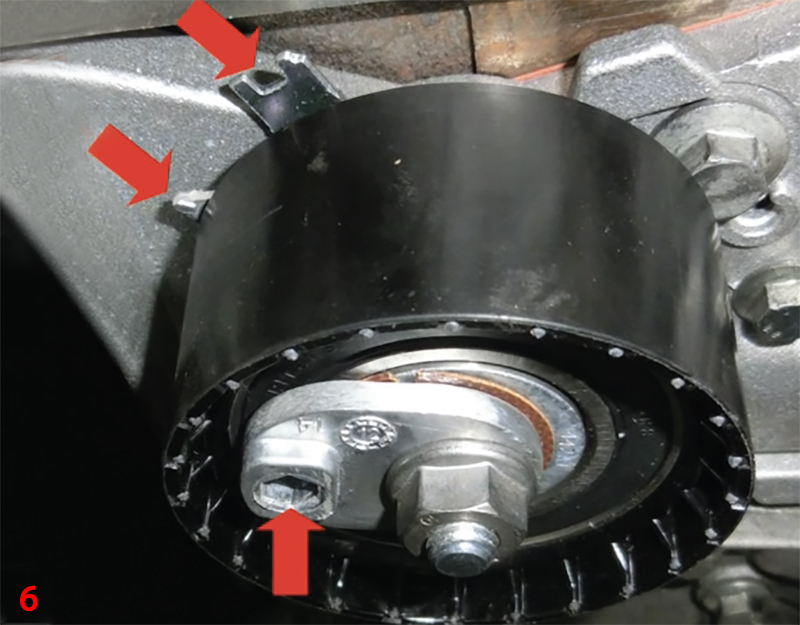
Install the timing belt and then the idler, but leave the slack section facing the belt tensioner. Tighten the idler fastener to 50Nm. Using an hex key, rotate the tensioner so that the index is aligned with the centre of the reference mark (Fig.6) and tighten the fastener to 30 Nm. Then tighten the fastenerson the camshaft pulleys to 30 Nm + 85.
Refit the lower timing belt cover and then after checking that the crankshaft is correctly resting against the timing pin previously inserted into the engine block, position the crankshaft pulley and tighten the new fastener from the Dayco kit to 40 Nm + 145.
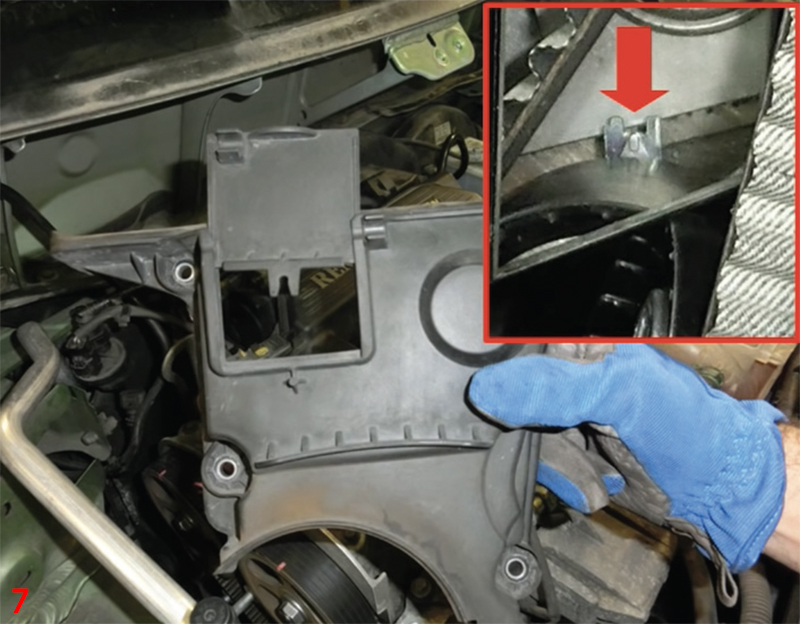
Remove the crankshaft timing pin and camshaft timing tool and, using the crankshaft pulley bolt, rotate the engine clockwise several times and then retime the system properly reusing the special tools. Through the lower window of the lower timing belt cover, check that the index and the reference mark on the belt tensioner are correctly aligned (Fig.7). If necessary, turn the tensioner through the window to reposition it correctly.
Once the engine has been timed correctly, refit the timing tool plug in the engine block and insert the plastic plugs covering the camshafts on the cylinder head by applying sealant to their edges.
Refit all the components in their reverse order, but check, and if necessary, replace the crankshaft pulley with Dayco DPV1260 and the auxiliary belt tensioner with Dayco APV3180. However, Dayco recommends the auxiliary belt 6PK1200 is always replaced.
For vehicles manufactured after 2013, check the auxiliary belt requirement, as some versions use 6PK1130.
Finally, refill the cooling system, start the engine and carefully check for leaks and ensure the radiator fan operates at the correct temperature, replace the thermostat Dayco DT1091H if necessary. Then, once the engine is cold, check the level of the fluid again.


