In this month’s INA Belt Focus, REPXPERT Alistair Mason is replacing the timing belt, coolant pump and auxiliary drive belt kit on a 2012 1.6 litre HDI Citroën C4 Grand Picasso that has covered more than 78,000 miles.
Vehicle Information
Make: Citroën
Model: C4 Grand Picasso
Year: 2012
Engine: 1.6 litre HDI
Mileage: 78,000
The replacement schedule for this belt is every 144,000 miles or 10 years, so as the vehicle had reached its 10th birthday, timing belt replacement was advised, and authorisation given. This is a very popular PSA engine used by Citroën, Ford, Mazda, Mitsubishi, Peugeot, Toyota and Volvo. The repair time is 3.1 hours.
Always follow the Schaeffler 4Ts rule:
- Temperature – Replace and tension the timing belt at an ambient temperature
- Tools – Use the correct engine timing tools
- Tension – The correct timing belt tension is critical on today’s engines
- Torque – Torque all bolts to the vehicle manufacturer’s specifications
Equipment used
- Vehicle lift (two post is preferred)
- Engine support
- Crank and camshaft locking tools
- Coolant drain pan
- Cooling system vacuum bleeder
Timing belt and water pump removal
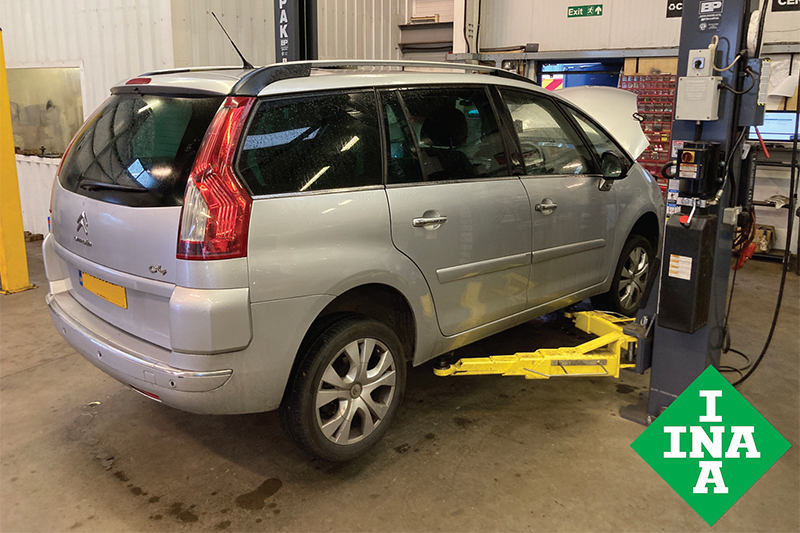
With the vehicle placed on the lift, raise it to waist height, remove the O/S/F wheel and wheel arch liner to gain access to the bottom pulley. Lower the vehicle lift and remove the engine cover and then the auxiliary drive belt by releasing the tension from the tensioner. Detach the drive belt and inspect it for wear and cracks (Fig.1), replacing it if required.
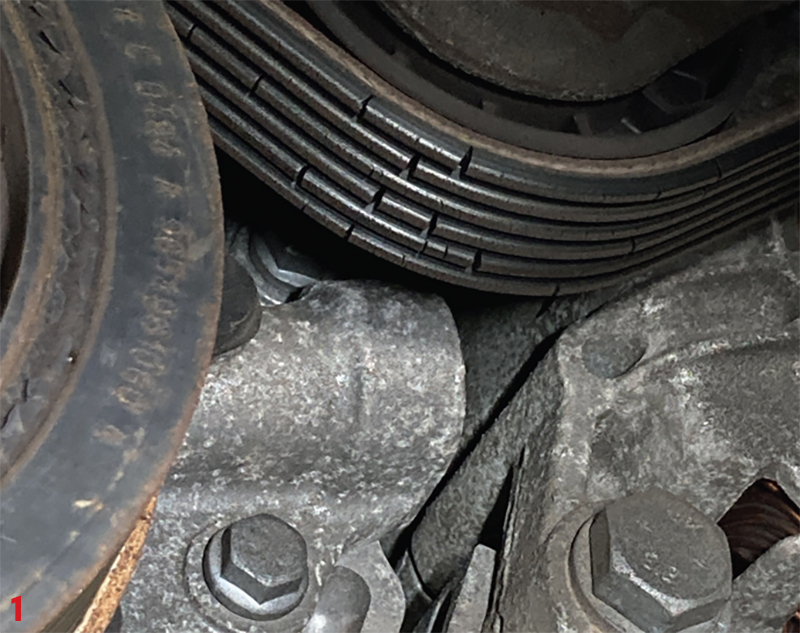
The O/S engine mounting now needs to be removed (Fig.2), so support the engine, take off the O/S engine mounting assembly and then remove the upper timing belt covers. Rotate the engine in a clockwise direction until the camshaft alignment pin can be inserted, but do not insert the locking pin.
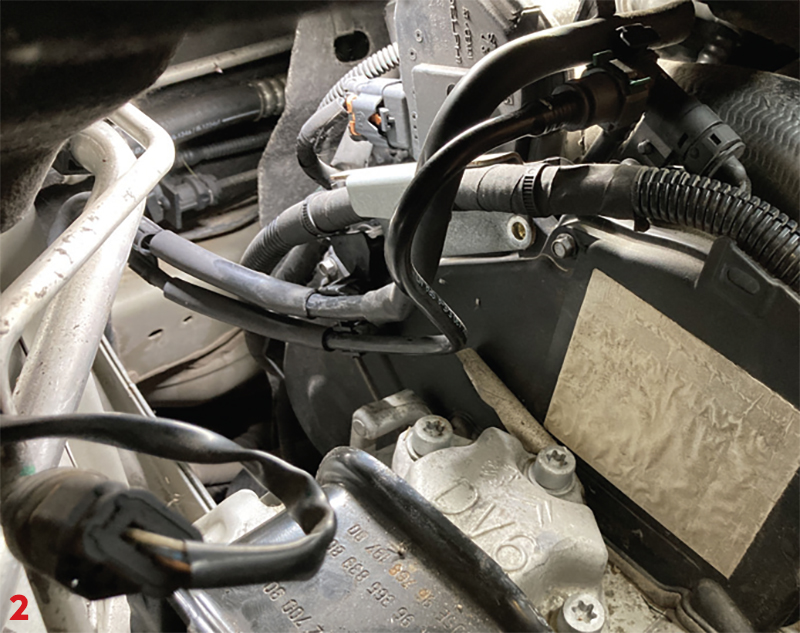
Before the engine is locked, slacken the crankshaft pulley and remove it, inspecting the rubber damper on the pulley for any cracks or wear, and replace it if required. If there is a small hole in the crankshaft sprocket, this indicates that the vehicle has an oval crankshaft sprocket to reduce vibration at the timing belt (Fig.3).
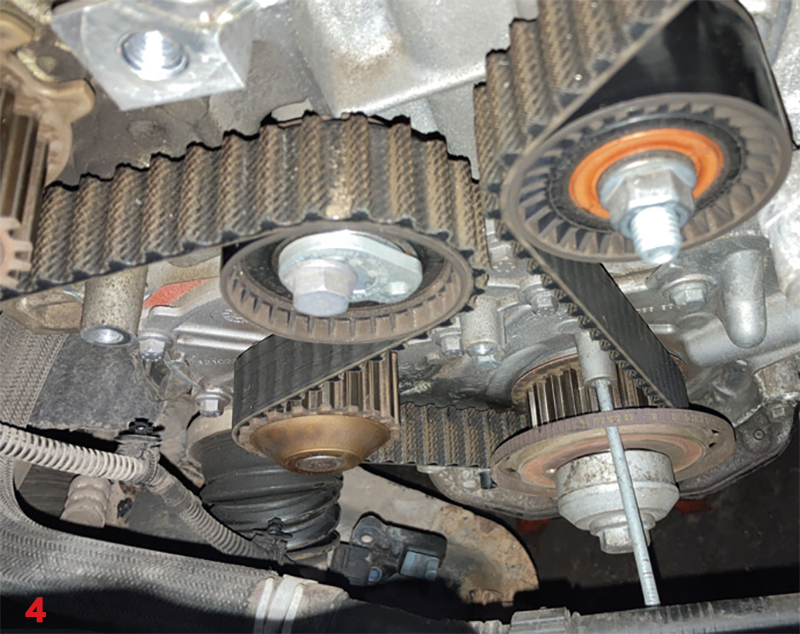
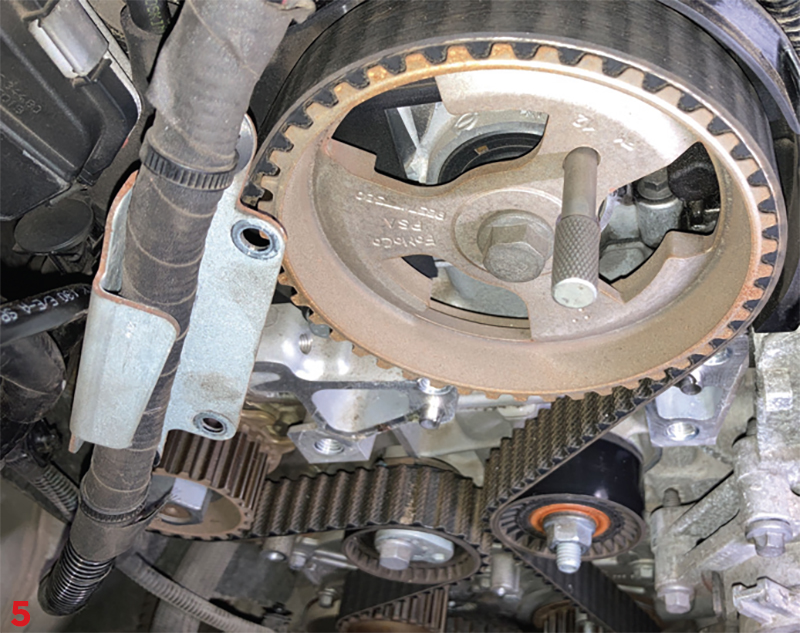
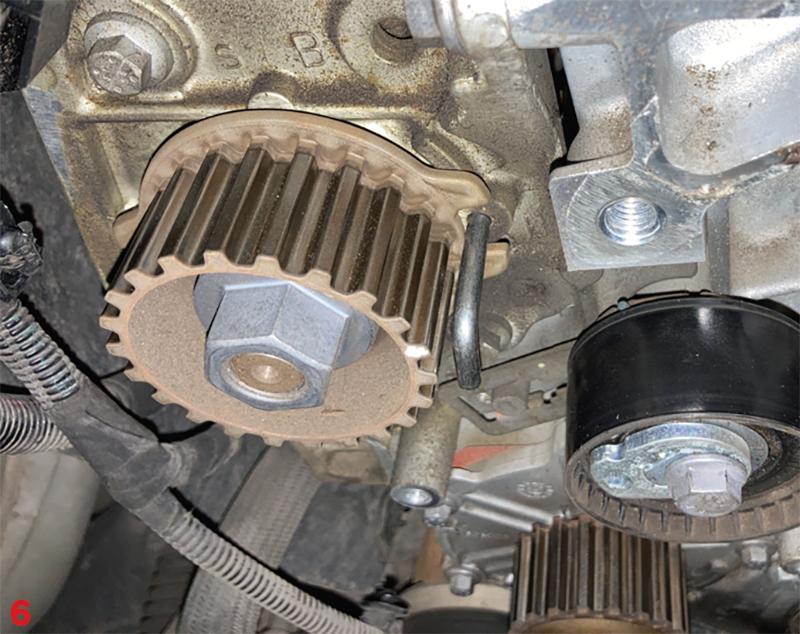
Once the pulley has been removed, take off the lower timing belt cover and then insert the crank bolt, so the engine can be rotated slightly to aid inserting the locking pin into the back of the flywheel. This is a little awkward as it is located behind the diesel particulate filter, but the position can also be confirmed by inserting a pin into the crankshaft sprocket (Fig.4). Lower the vehicle lift and insert the camshaft locking pin (Fig.5), followed by locking the high-pressure fuel pump sprocket (Fig.6).
Note: the high-pressure fuel pump must be timed to the engine, as these pulses must be in time; if incorrect, this can cause the tensioner to fail.
With the crank, cam and high-pressure pump locked, slacken the cambelt tensioner and remove the timing belt, followed by the tensioner and idler. With the timing belt removed, check for any leaks that might contaminate the new belt and rectify as required. Place a coolant drain tray directly under the coolant pump area, remove the coolant expansion tank cap to ensure there is no pressure in the cooling system and then remove the coolant pump. Clean the coolant pump gasket face and then ensure the area is clean and dry.
Timing belt and coolant pump installation
Mount the new gasket onto the new coolant pump and the pump onto the engine, insert and tighten all bolts in an even manner and torque to the manufacturer’s specification. Note – do not put any sealer on the gasket or pump.
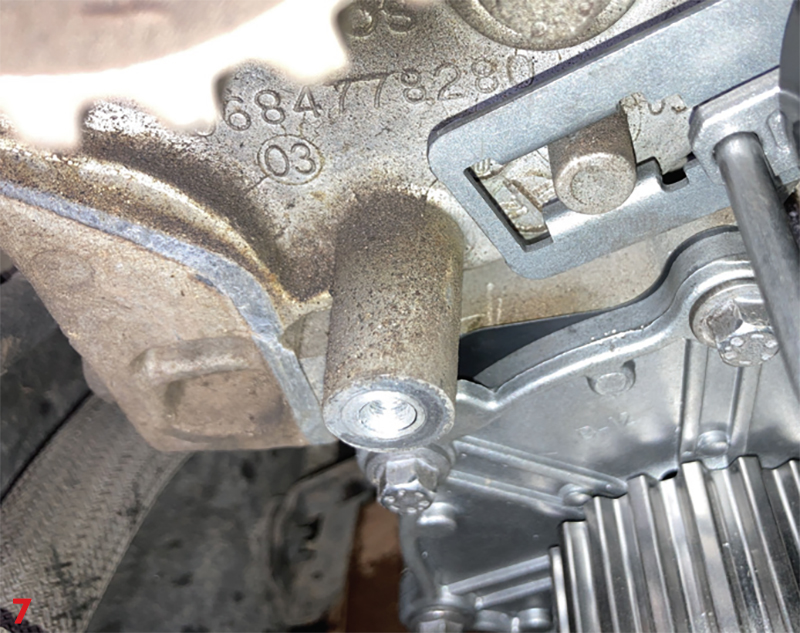
Fit the new timing belt tensioner, ensuring that it locates onto the dowel (Fig.7), and lightly nip the tensioner bolt so the tensioner can be adjusted once the belt has been fitted. Then mount the new idler pulley and torque the nut to the correct specification. Fit the timing belt in the following order: crankshaft sprocket, idler pulley, camshaft sprocket, high-pressure fuel pump and coolant pump pulley, then slide it onto the tensioner.
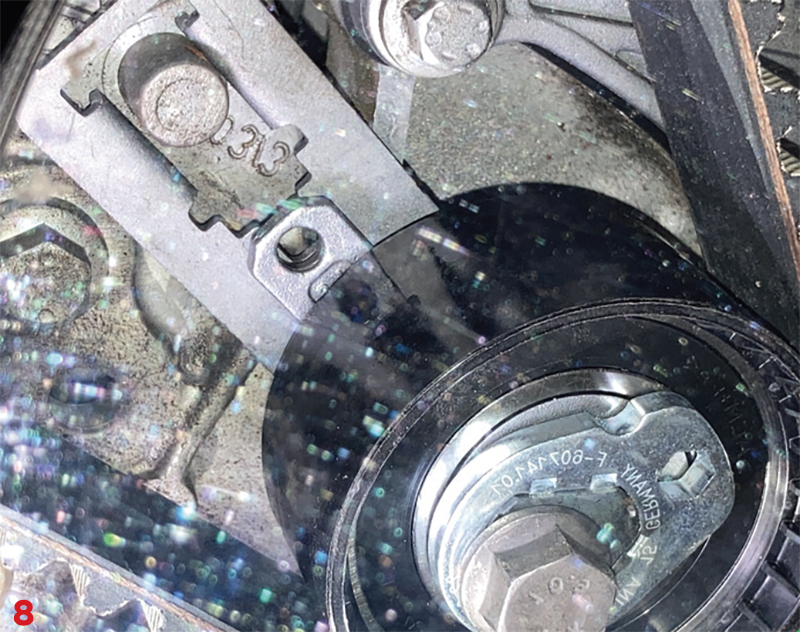
Using an Allen key, turn the tensioner eccentric anticlockwise until the pointer is centrally located in the recess (Fig.8) and tighten the tensioner bolt. Remove all the locking tools and rotate the crankshaft six complete revolutions, then refit the engine locking tools to ensure the timing is correct, and check that the tensioner is still in the correct position. If so, remove the engine locking tools and torque the timing belt tensioner to the manufacturer’s specification.
Finishing touches
Refit all components in reverse order of their removal. In this instance, a new auxiliary drive belt and tensioner was fitted, as the drive belt had cracked and the tensioner showed signs of wear at the pivot point (Fig.9).

Fill the cooling system with new coolant, ensuring it is of the correct specification and concentration. Vacuum filling/bleeding is recommended as it’s one of the best ways to replenish the system as it is quick, avoids air locks and lubricates the new water pump on initial start-up.
Finally, once the cooling system has been filled, run the engine with the heater on to confirm that the coolant is circulating, topping it up if required, and always road test the vehicle to confirm a quality repair has been made.


