
This month, Valeo Technical Trainer Stewart Lynch replaced the clutch on a Peugeot 207 Sport fitted with a 1.4 four cylinder petrol engine that has covered just over 59,000 miles.
This little sports hatchback was jampacked with fun when the original model launched in 2006. The Peugeot 207 was the successor to the 206 and was very similar in principle to the platform used for the Citroën C3. The 207 Sport was an ‘Urban’ hatchback and whilst it had nothing special on the in-car entertainment front, it was victorious in achieving an impressively reliable engine and is still a popular vehicle on the road today.
Before Stewart made the trip to the garage premises, the customer had reported that gear change had become difficult and vibration was being felt through the pedal. Upon arrival at the garage premises, Stewart took the vehicle out for a test drive so he could understand the issues being encountered by the customer. After diagnosis, a clutch replacement was advised and authorised by the customer.
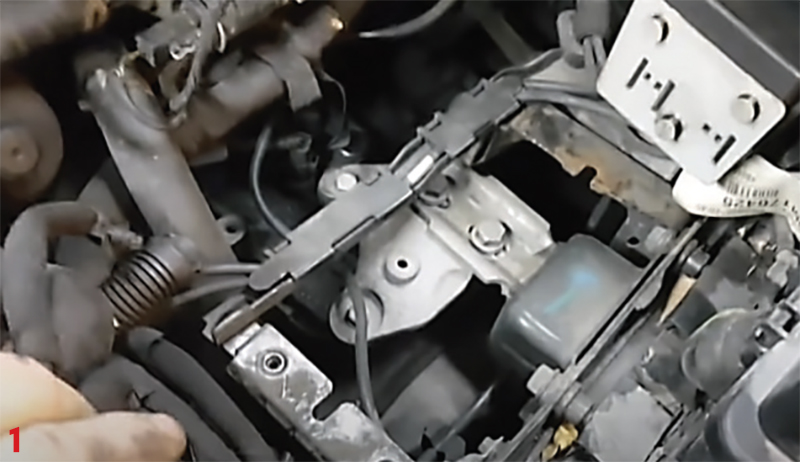
The Valeo online TechAssist platform was used and the vehicle’s VIN entered to obtain the correct clutch kit. With the vehicle on the ramp, open the bonnet and remove the battery, ECU (mounted within a protective case) and Air intake ducting. Remove the Engine cover and Air filter/box (Fig.1). This now provides access to the top of the gearbox. Disconnect the reversing light switch and earth wire.
Then with the vehicle still on the floor, disconnect the gear selector cables/linkage from the gearbox and slacken off the gearboxing mounting. Raise the vehicle to around waist height and remove the gearbox bolts around the bell housing and the starter motor, leave one of the lower large bolts in to prevent the gearbox from coming away from the engine, and remove the wheels and driveshaft hub nuts on both sides and remove the plastic wheel arch liner. In order to gain more access to the gearbox remove the bottom subframe strut and the bottom cross bar.
Next, drain off the gearbox oil, disconnect both bottom wishbone ball joints and remove the drive shafts. Disconnect the clutch slave cylinder from its mounting and remove the crank sensor from its mounting otherwise it will get broken during the refitting of the gearbox (Fig.2).

Next, remove the bottom exhaust mounting and support the engine with a transmission jack on the underside as there is no contact area or support within the engine bay to allow an engine cradle to be used. Finally, remove the gearbox mounting bolts on the near side mount bracket. Remove the final bell housing bolt and ease the gearbox out and transport to a safe working area.
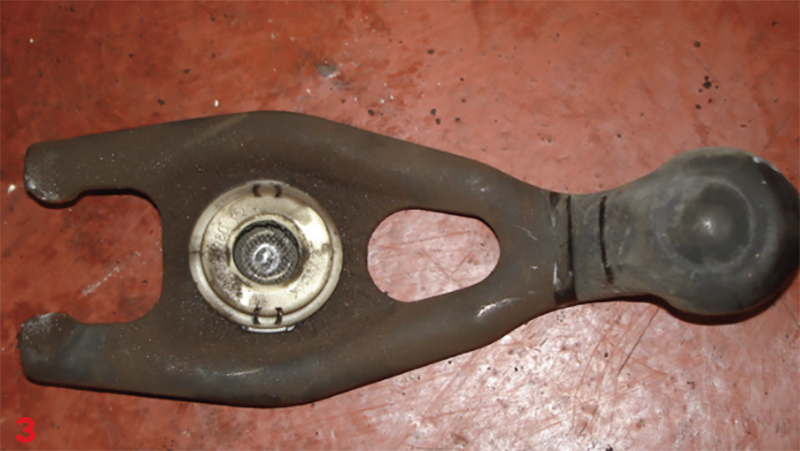
Remove the release arm from its mounting and ensure the release arm is gently removed from the metal ball joint/pivot. In this instance, the release arm was worn and the plastic ball socket/mounting (which fits over the metal ball joint) was damaged (Fig.3).
Remove the clutch assembly from the flywheel, check the flywheel for surface/heat damage or signs of wear and thoroughly examine the flywheel and check its integrity (hotspots/cracks etc). If in doubt, replace the flywheel.
Root cause
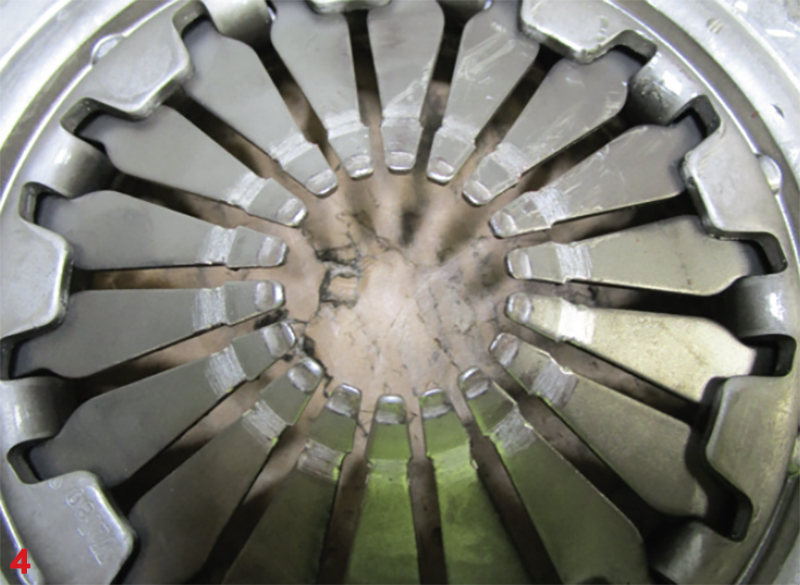
In this instance the flywheel is a solid flywheel used on the vehicle since manufacturer launch and was in good condition, a testament to the durability of the solid flywheel. During the removal of the clutch, the Stewart identified excessive ‘preload wear’ to the fingers on the pressure plate, a direct consequence of the defective release arm (Fig.4).
At this stage, Stewart and the garage technician contacted the customer and shared video footage of the release arm and gained authorisation from the customer to replace the release arm.
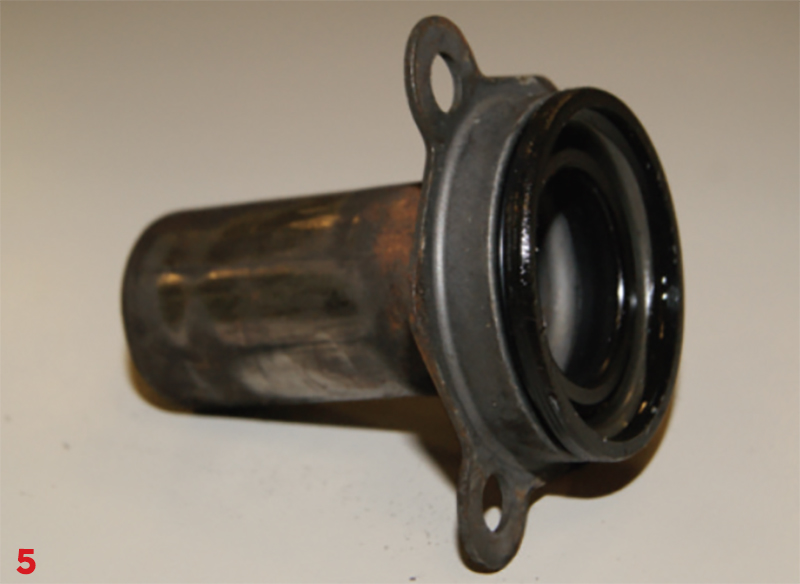
It is also recommended to replace the guide tube clutch replacement because of the amount of wear and tear that can occur on the cylindrical tube (Fig.5).
Before proceeding with the fitment of the clutch, clean the gearbox of dust and debris and clean the input shaft with a soft wire brush. Next spray brake cleaner onto a clean cloth and wipe the input shaft so it is clean. Open the sachet of grease provided and empty it out onto some clean paper or card (please note there is no need to use all the grease provided). If no grease is provided use a high pressure, high temperature grease such as BR2 type grease (do not use a copper based grease).
Using a fine brush lubricate the gearbox input shaft with grease. Do not apply grease on to the input shaft using your fingers as this will cause excessive grease to radiate outwards when the clutch is in use. Do not apply grease directly to the clutch friction plate as this will also cause excessive grease to radiate outwards.
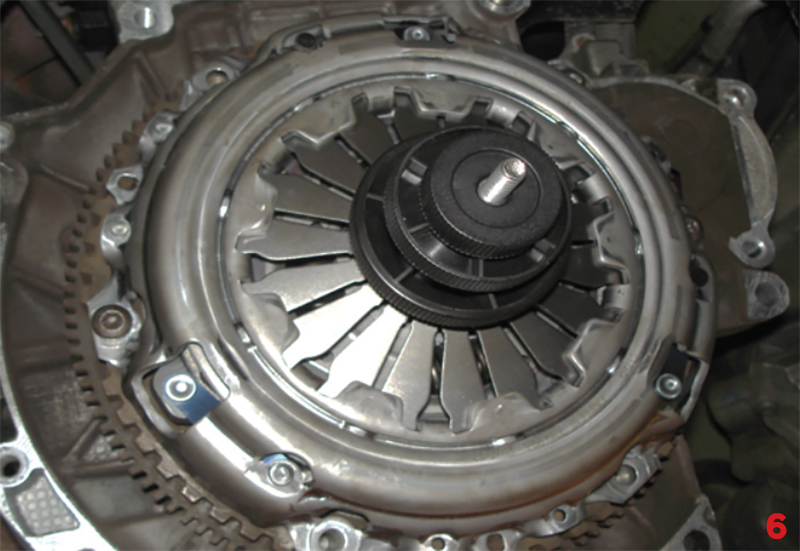
Using a clutch alignment tool (or one that is supplied with the clutch), mount the drive plate to the clutch pressure plate and bolt the clutch assembly to the flywheel. Torque the bolts (according to vehicle manufacturer specifications) in an even and sequential order to ensure a correct installation (Fig.6).
Refit the gearbox and rebuild in reverse order. Refill gearbox oil according to the manufacturer’s specification. Please refer to the specific gear oil recommended for the transmission otherwise difficult gear selection issues can occur. Once the vehicle is on the ground, re-torque the hub nuts and wheel nuts to manufacturers specification. Once the repair is complete carry out a road test to ensure the clutch and gear change operations are correct.
Top tips from the TechCare Engineer:
- To reduce the risk of potential spine damage please ensure the correct clutch alignment tool is used during the course of replacing the clutch assembly and the gearbox is fitted in line with the engine
- Ensure the guide tube is renewed during clutch replacement
- It is critical to ensure the correct gear oil that is specified by the manufacturer is used
- Check the integrity of the release arm; specifically the plastic molded ball socket that pivots on the gearbox mounting. Replace any wearing parts, bushes etc


