This month, REPXPERT Alistair Mason replaces the clutch assembly in a 2014 2WD Nissan Qashqai, which had covered more than 88,000 miles.
In the lead up to this clutch replacement, the customer had complained that the clutch bite point was very high and it slipped on hills, which was confirmed during a road test.
The repair time for this procedure is four-and-a-half hours, with the following workshop equipment required: two-post vehicle lift, engine support, transmission jack, clutch alignment tool, and vacuum brake and clutch bleeder. The workshop instructions were obtained from REPXPERT, Schaeffler’s workshop information portal.
Step-by-step procedure –gearbox removal
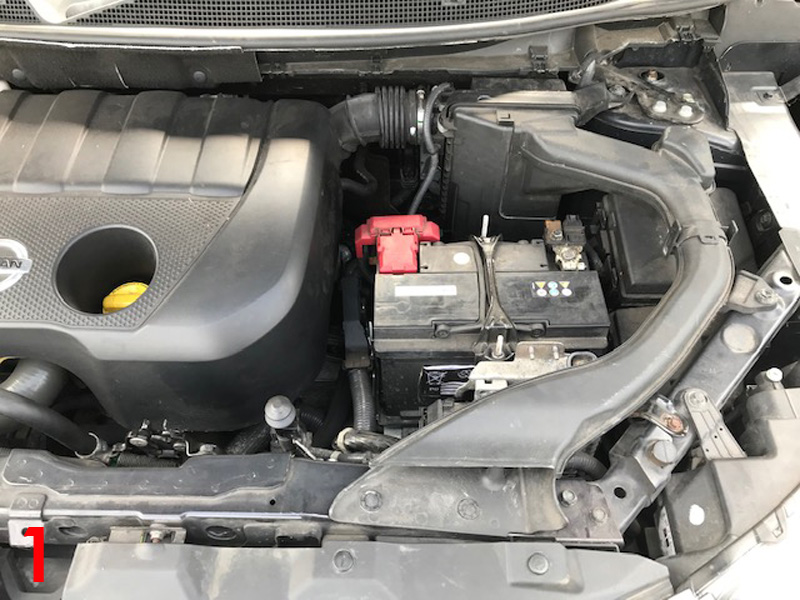
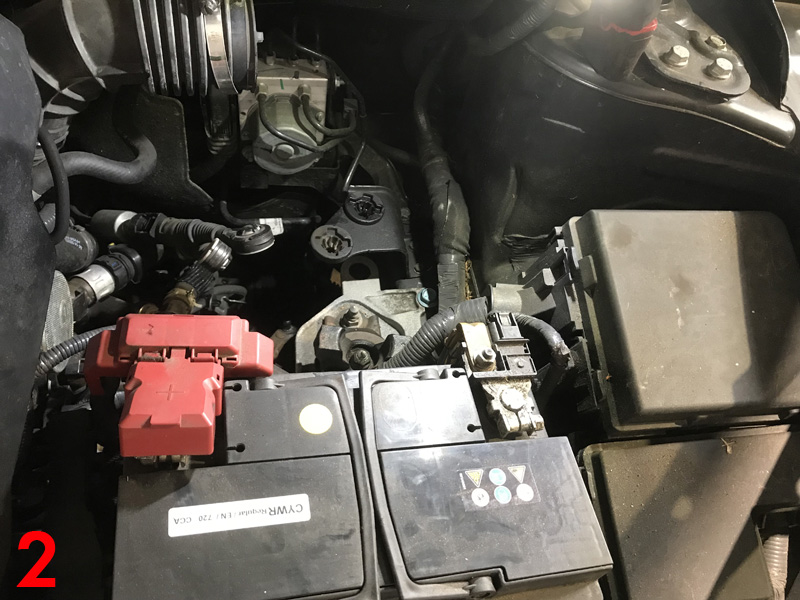
Place the vehicle on the lift and open the bonnet (Fig 1). Remove the engine cover, the air filter assembly and ducting (Fig 2), then disconnect the battery, battery carrier, multiplugs and remove the engine control unit, which will provide good access to the gearbox area.
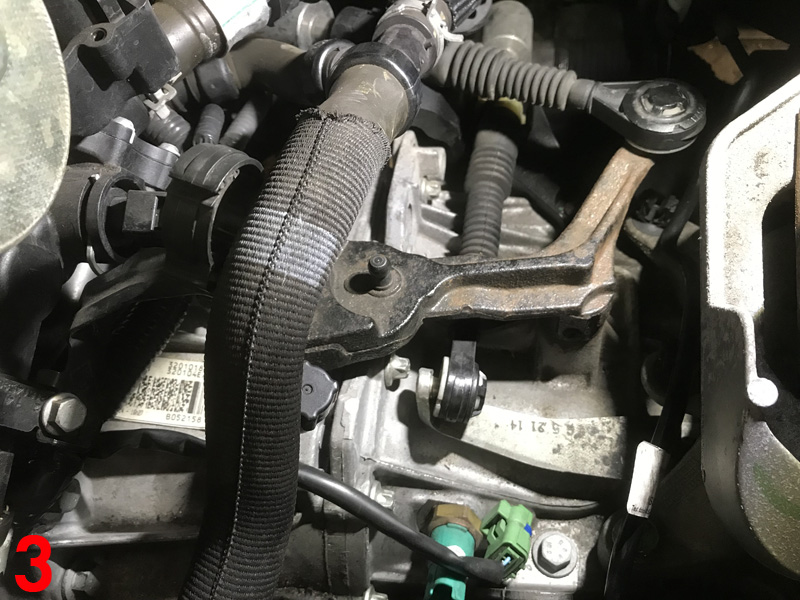
Next, remove the crank position sensor located at the top of the bell housing, reverse light switch multiplug (Fig 3) and gearbox earth cable. The gear change cables can now be disconnected from the gearbox by compressing the retaining tabs on the ball joint and lifting up.
Disconnect the outer cables by removing the locking pins and stowing them in the bulkhead area. The upper bell housing bolts can now be removed. Detach the wiring loom from the gearbox, disconnect the hydraulic clutch pipe at the bell housing and seal to stop the fluid running out.
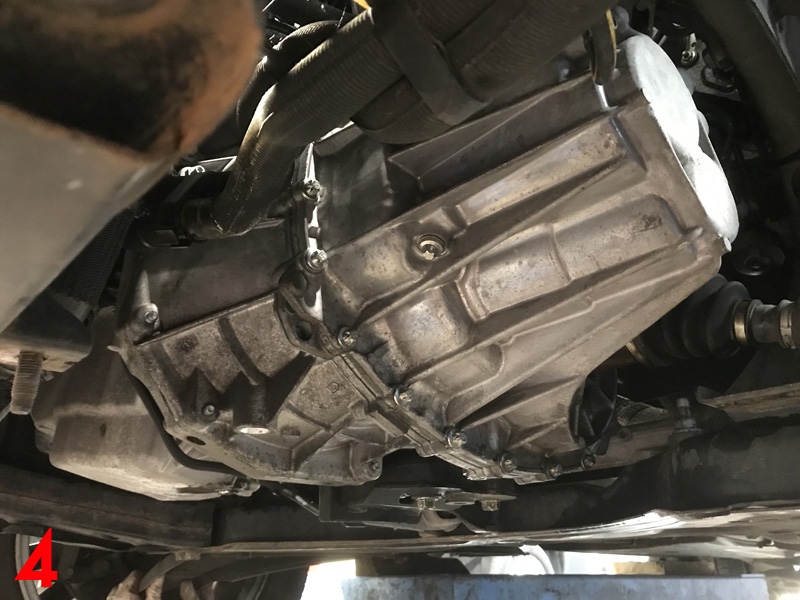
Before raising the vehicle, slacken both front wheels and hub nuts, and then raise the vehicle to gain access to the underside and remove the undertray. At this point, drain the gearbox oil, then lower the vehicle to waist height and remove front wheels and hub nuts, the N/S/F plastic splash guard and N/S/F chassis leg (Fig 4).
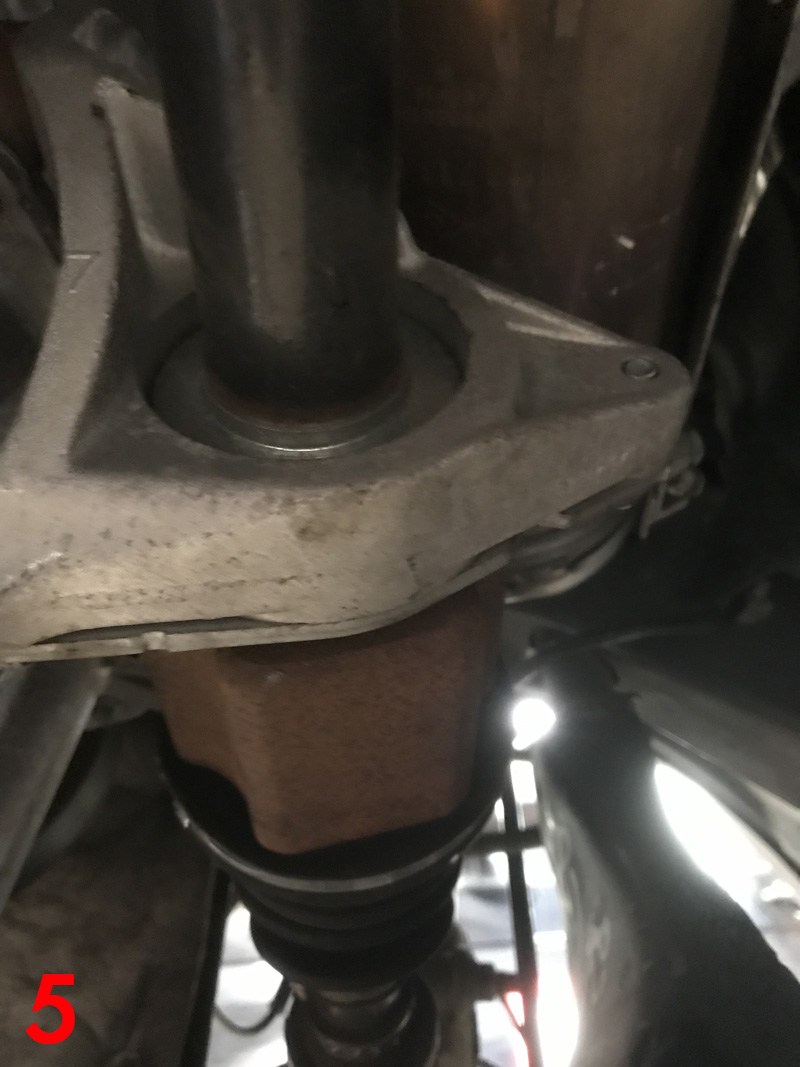
Next, undo both bottom ball joint pinch bolts; it can be very difficult to pull the bottom arms down far enough to release the ball joints and if this is the case, lower the sub-frame slightly to gain additional movement. Remove the N/S driveshaft, detach the O/S driveshaft centre bearing (Fig 5) and the driveshaft itself.
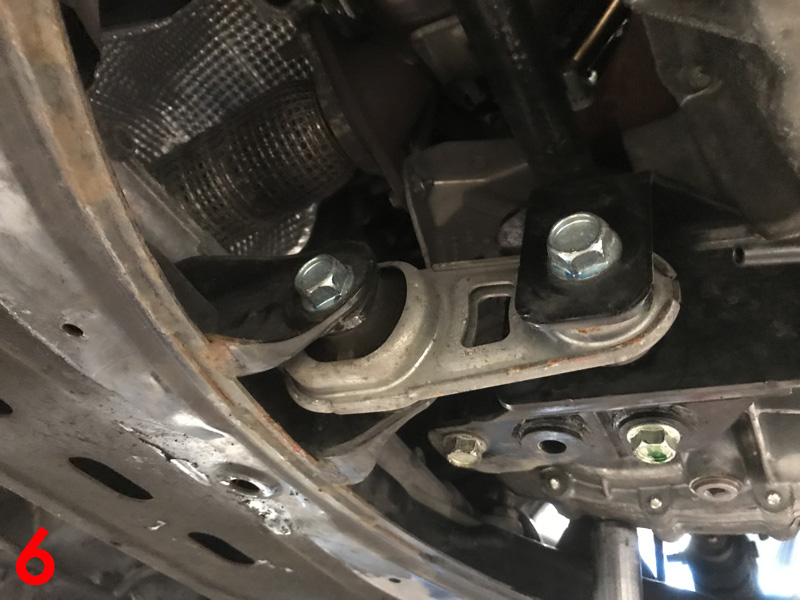
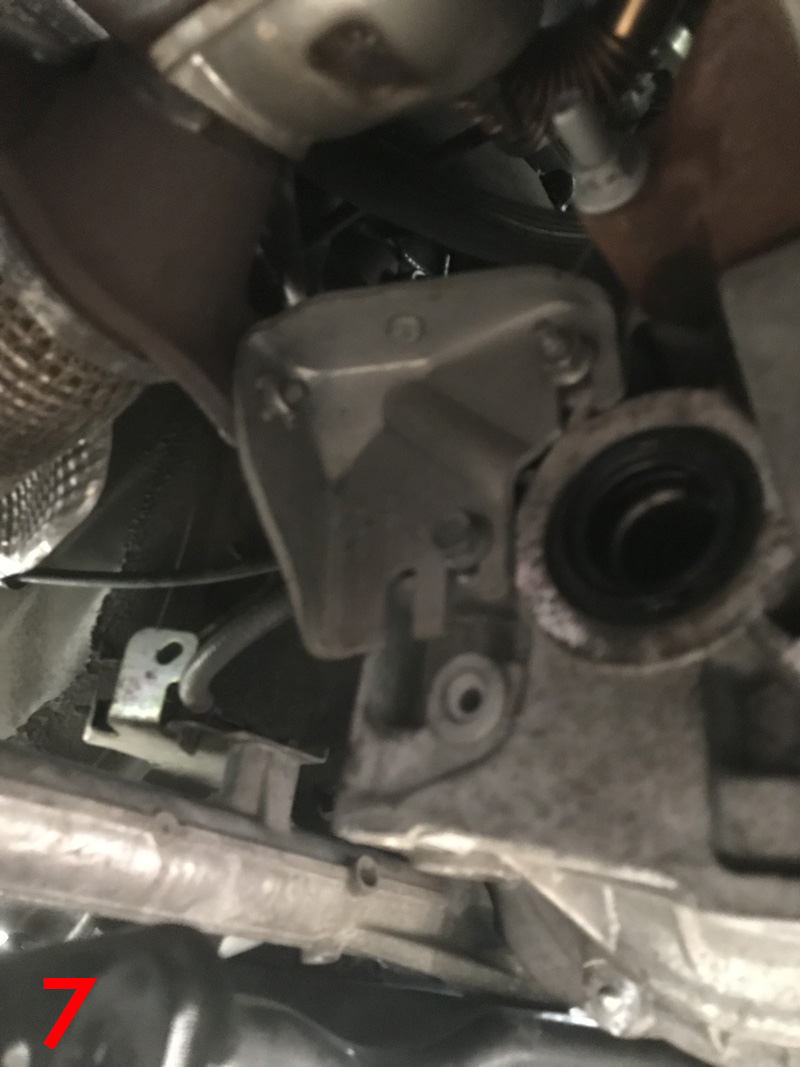
Disconnect the gearbox to sub-frame pendulum mount (Fig 6), then the exhaust front pipe bracket/mounting (Fig 7), before unscrewing the lower bell housing bolts and leaving two easily accessible ones as support until ready to remove the gearbox.
Support the engine from the underside and the gearbox using a transmission jack. Access the engine bay, remove the gearbox mounting, lower the transmission jacks slightly to gain clearance, undo the final bell housing bolts, ease the gearbox away from the engine, then, once clear, lower the transmission jack, remove the gearbox and place it in a safe area.
Clutch replacement
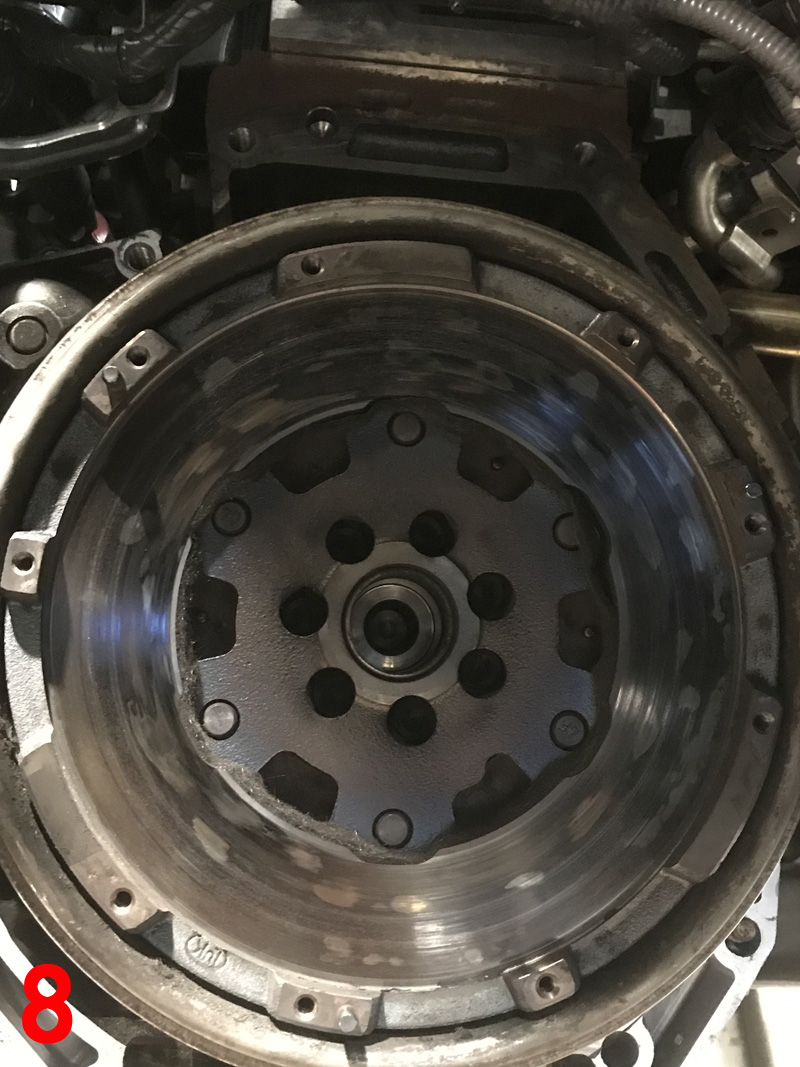
Remove the clutch assembly from the dual mass flywheel (DMF). In this case, evidence of clutch slip was present by the ‘blueing’ on the DMF face (Fig 8), so a flywheel replacement was advised and authorisation given.
First, remove the DMF and check for any leaks on the back of the engine, rectifying if required, and then clean the back of the engine with brake and clutch dust cleaner. Mount the new flywheel, using new bolts, then tighten and torque to the manufacturer’s specification – Schaeffler’s REPXPERT app provides a quick reference for this information. Once torqued, degrease the flywheel face.
Back to the gearbox
After removing the concentric slave cylinder (CSC) and ensuring there are no oil leaks from the input shaft oil seal, clean the bell housing using brake and clutch dust cleaner, and position the new CSC, confirming the mounting face is clean. When fitting and torqueing the retaining bolts, ensure they torque correctly, as they can sometimes bind on old thread lock.
Apply a very light smear of high-melting point grease on the gearbox input shaft and mount the clutch plate, as this will confirm fitment and will evenly distribute the grease – wipe off any excess grease.
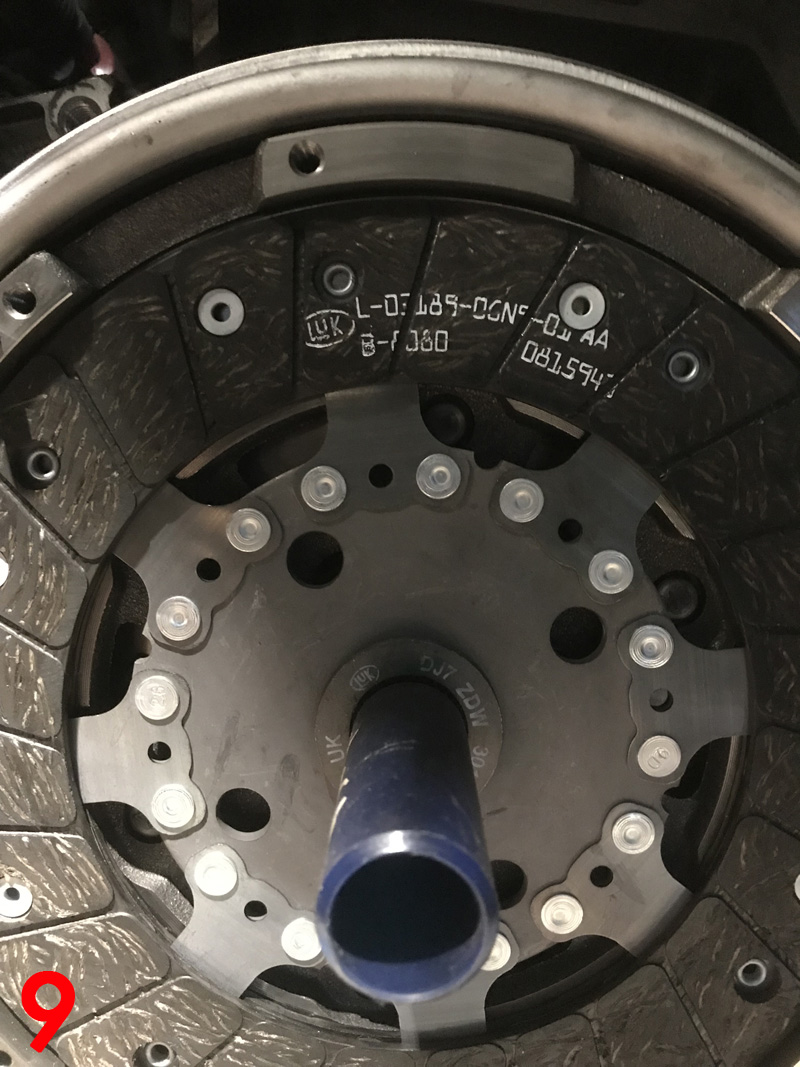
Using a clutch alignment tool (Fig 9), mount the clutch plate onto the flywheel, ensuring the centre hub is facing the correct component, usually marked ‘Gearbox Side’. Degrease the surface of the pressure plate, mount the pressure plate aligning on the flywheel dowels, tighten the bolts evenly and sequentially, before, finally, torqueing to the manufacturer’s specification.
Before refitting the gearbox, allow the old clutch fluid to drain out of the hydraulic system and flush through with new fluid, as this will ensure the new CSC does not become contaminated and cause the seal to fail. Next, ensure all cables are clear of the bell housing area and that the gearbox alignment dowels are installed correctly.
Gearbox replacement
Place the gearbox on the transmission jack, ease it into position and ensure it locates on the alignment dowels. When in position, fit two easily accessible bell housing bolts and tighten, before refitting all other components in reverse order of removal and torqueing all bolts to the manufacturer’s specification.
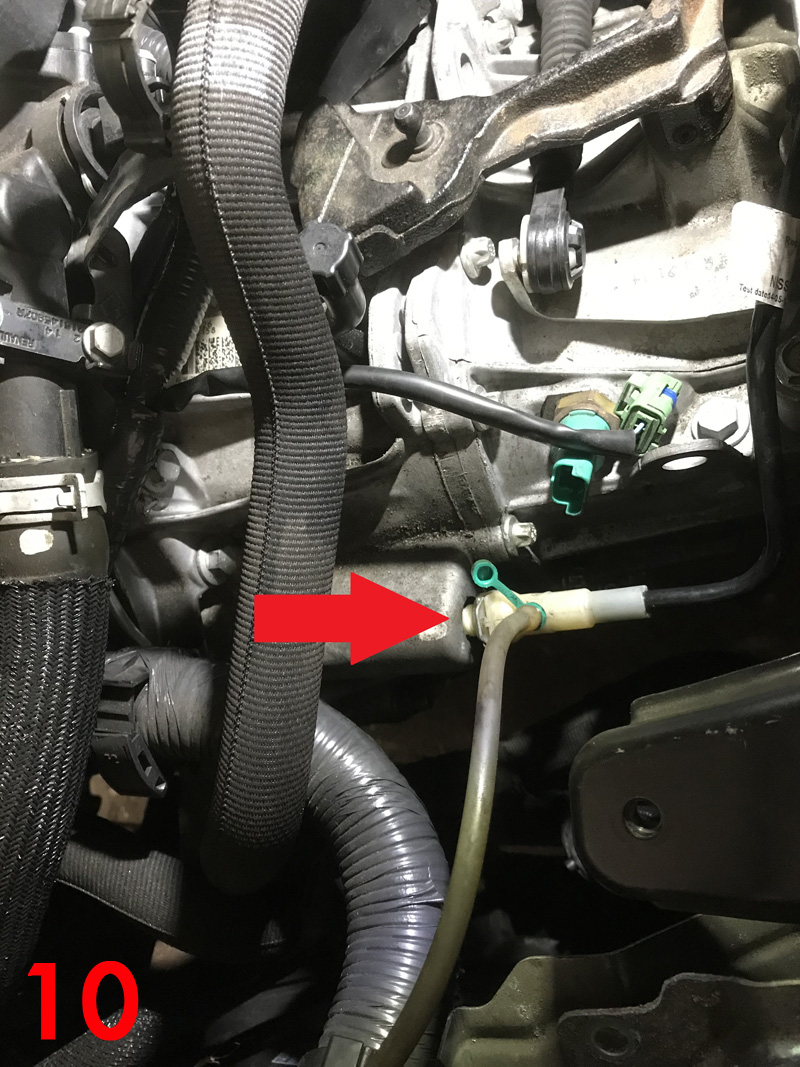
When bleeding the clutch, the pipe to CSC connection has two positions; the first clip position is the bleed position and the second clip is the closed/operating position. In this instance, Alistair ‘vacuum bled’ the clutch hydraulic system (Fig 10). After the battery lead has been reconnected, reset all electrical consumers. Always carry out a road test to ensure a quality repair.