Dayco sets out the process required to accurately replace a timing belt and the auxiliary drive system on a Volvo D5.
The 2.0 and 2.4L diesel D5 engines used by Volvo in almost every variant in the manufacture’s range, but notably in the popular XC60 and XC90, feature a timing belt driven water pump. As belt replacement also requires the auxiliary drive system to be removed, Dayco’s best practice guidelines recommend that all the system’s components – both primary and auxiliary drive – are replaced at the same time.
This step-by-step technical guide will help technicians through the process, avoiding complications and ensuring a first-rate, professional job. As with all primary drive system jobs, the work should be undertaken when the engine is cold, therefore the vehicle should not have run for at least four hours prior to carrying out the installation.
The procedure
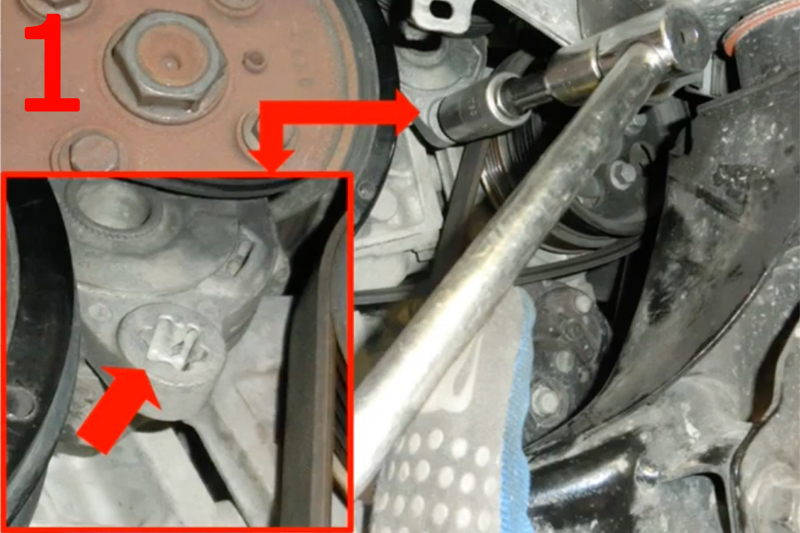
Start by removing the engine cover, then the front right wheel and cowling to expose the two belts of the auxiliary drive system. Use the special slot to slacken off the belt tensioner (Fig 1), remove the belt, followed by the five crankshaft pulley bolts. Then, detach the ride height detector, remove the crankshaft pulley, followed by the tensioner.
From underneath, take off the engineshield, securely support the engine and remove its lower links. Returning to the top, remove the cooling fluid reservoir, the upper engine support rod and mounting plate. Remove the two fasteners that support the hydraulic pipe by the timing belt cover, release the retaining clips and remove the cover. Using the central crankshaft pulley bolt, rotate the crankshaft so that the crankshaft and camshaft pulley timing references align, then loosen the timing belt tensioner and remove the belt, followed by the tensioner.
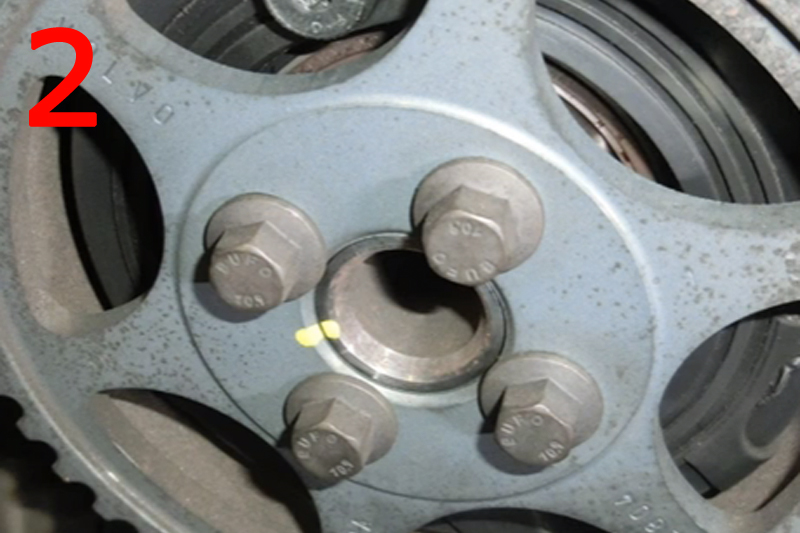
As the camshaft pulley is not fitted directly on the shaft and its holes are slotted, to ensure it is refitted in the correct position, mark its position with paint before removing it (Fig 2). Once the camshaft pulley is detached, take off the idler and then the rear timing belt cover to allow the removal of the water pump.
After flushing out the cooling system to remove any debris, cover both sides of the gasket with a thin layer of sealant before carefully positioning it in relation to the two pins in the housing before fitting the new water pump from Dayco kit KTBWP5920.
Now is the ideal time to replace the alternator pulley. Remove the bolts securing the alternator and the water hose above it, which will allow you to turn the alternator in order to remove and replace the alternator pulley with Dayco ALP2409 and fit the protective cap. Refit the alternator and reattach the hose.
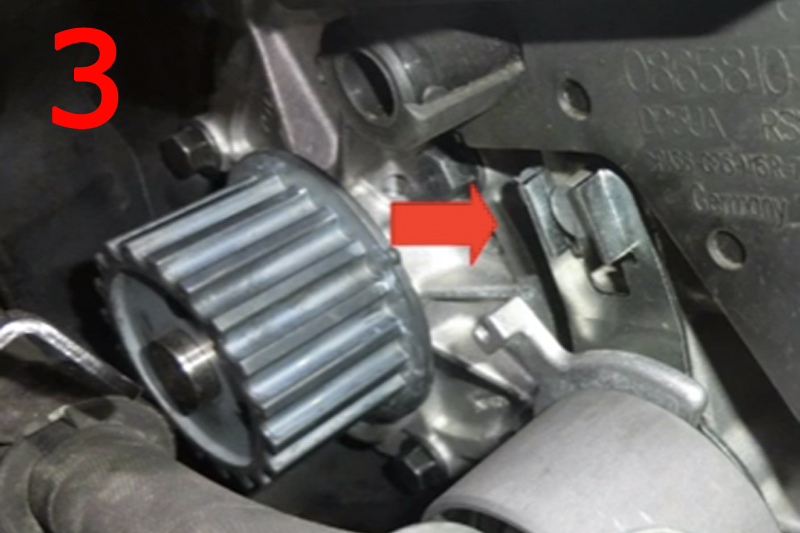
Refit the rear timing belt case and position the new belt tensioner from the kit, paying particular attention as its slot must be located in the corresponding lug on the engine (Fig 3). Then, fit the new idler and tighten the bolt to 25Nm.
Using the mark painted on earlier, refit the camshaft pulley, followed by the new Dayco timing belt, ensuring its correct direction of rotation and leaving the slack section facing the tensioner.
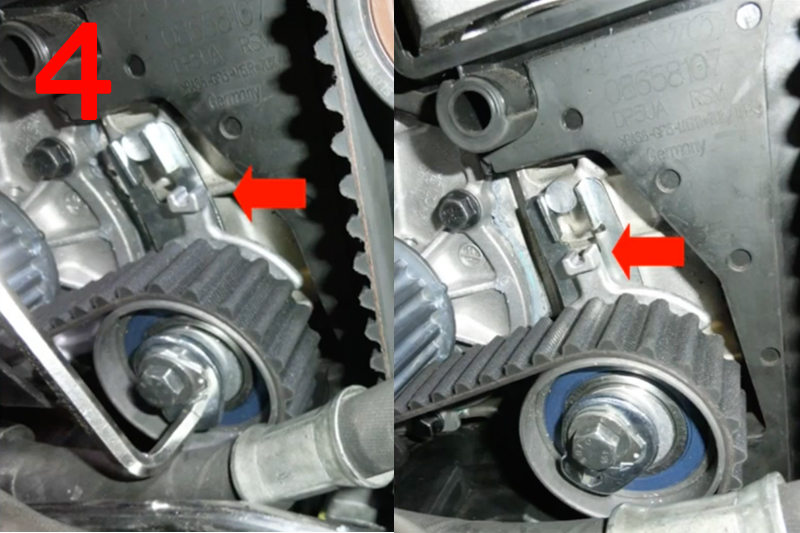
With an Allen key, first position the pointer slightly past the right hand flange of its slot, before moving it so it points at the lug (Fig 4), and tighten the belt tensioner bolt to between 24 and 27Nm, dependent on the engine variant.
Turn the crankshaft through two rotations and check the engine timing remains correct.
Providing it is, refit the crankshaft pulley, tightening its central bolt to 300Nm and four side bolts to 35Nm + 50°. Refit the remaining components in reverse order of removal but check and, if necessary, replace the auxiliary belt tensioner with Dayco APV2756. However, Dayco recommends that the auxiliary belts 5PK628EE (an elastic belt) and 5PK1121S are always replaced.
Finally, refill the cooling system, start the engine, check carefully for leaks and ensure the radiator fan is operating correctly.


