In this month’s Schaeffler LuK Clutch Clinic, REPXPERT Alistair Mason is replacing the clutch and dual mass flywheel (DMF) in a 2012 Ford Focus 1.6 EcoBoost that has covered more than 86,000 miles. The customer reported that the vehicle was difficult to get into gear and the initial diagnosis indicated a clutch disengagement problem, so the customer was advised that gearbox removal was required to pinpoint the exact cause and their authorisation was given.
Vehicle Information
Manufacturer: Ford
Model: Focus
Year: 2012
Engine 1.6 EcoBoost
Mileage: 86,000
Schedule time: 4.3 hours

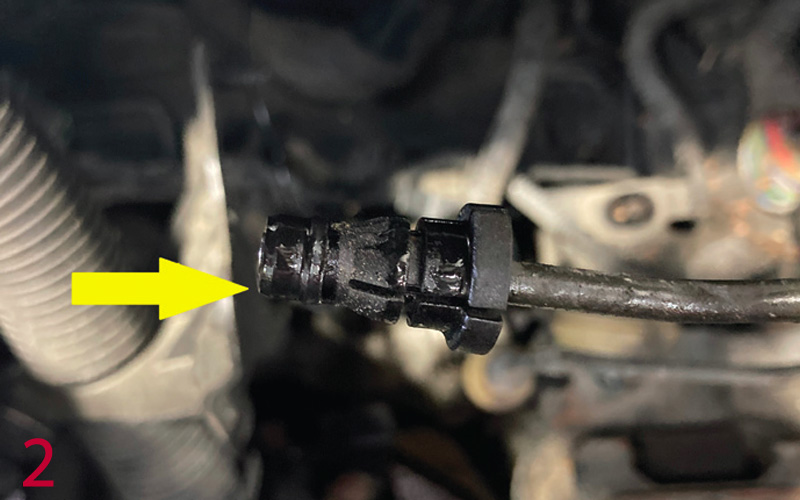
Gearbox removal If it’s required, after locating the locking wheel bolt key, place the vehicle on the lift, open the bonnet and remove the engine cover and complete air filter assembly, then disconnect and remove the battery, battery tray and carrier (Fig.1), which provides good access to the top of the gearbox. Ease the gear change cables off the selectors, unbolt the cable bracket and stow against the bulkhead. Remove the upper bellhousing bolts, disconnect the hydraulic clutch pipe at the concentric slave cylinder (CSC), but make sure the rubber seal stays on the pipe and blank the pipe to stop the fluid running out (Fig.2).
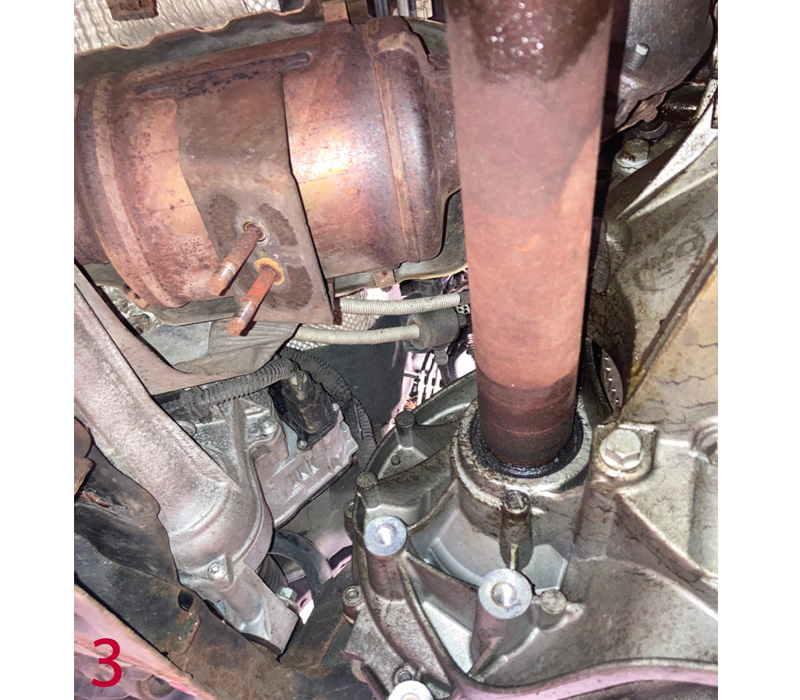
Raise the lift to waist height and remove the N/S/F wheel and wheel arch liner, raise the lift to gain access to the underside, and remove the engine undertray. Drain the gearbox oil and whilst the oil is draining remove the catalytic converter supporting bracket (Fig.3) and the lower gearbox pendulum mounting. Remove the N/S bottom ball joint pinch bolt, ease the ball joint out of the hub carrier, push the hub assembly outwards and remove the N/S driveshaft from the gearbox, but the O/S driveshaft will stay in place when removing the gearbox. Remove the lower bellhousing bolts and starter motor bolts, leaving two, easily accessible bolts to support the gearbox until the point of removal.
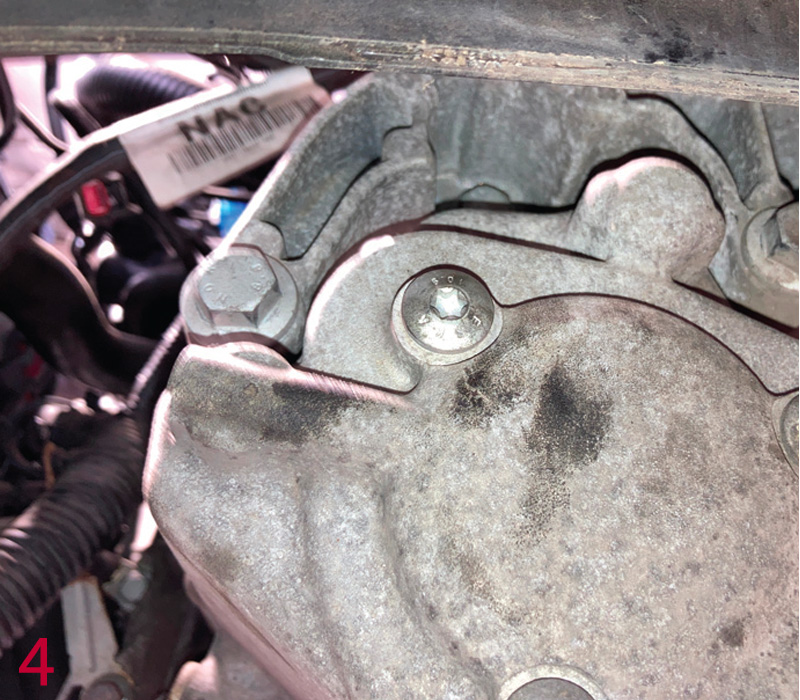
Support the engine using either an engine support or a second transmission jack, access the engine bay and remove the top gearbox mounting bolts, then lower the engine slightly and remove the gearbox mounting bolts that are accessed from the N/S wheel arch (Fig.4), then remove the mounting. Support the gearbox with a transmission jack, remove the final bellhousing bolts, ease the gearbox away from the engine, and when clear, remove the gearbox from the vehicle and stow in a safe area.
Diagnosis and clutch replacement
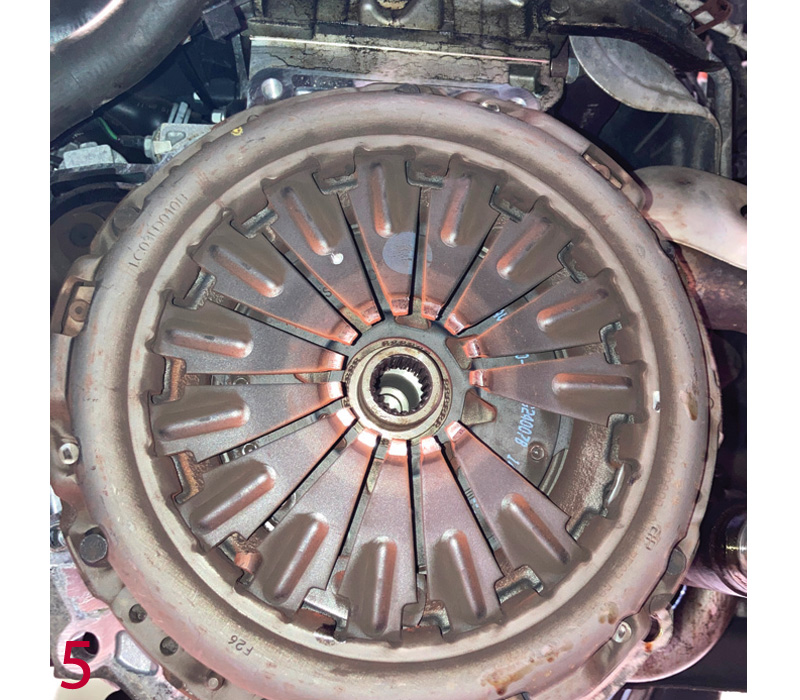
With the gearbox removed, the fault was clear: a finger of the diaphragm spring had broken off restricting the movement of the clutch (Fig.5). With a clutch replacement required and a new DMF advised, authorisation was given for the complete repair.
With the clutch and DMF removed from the car, inspect the back of the engine for any leaks that could potentially contaminate the new components, and scan the QR code on the LuK replacement box with the REPXPERT app to obtain the service information and technical bulletins, as well as the fitting instructions and torque settings.
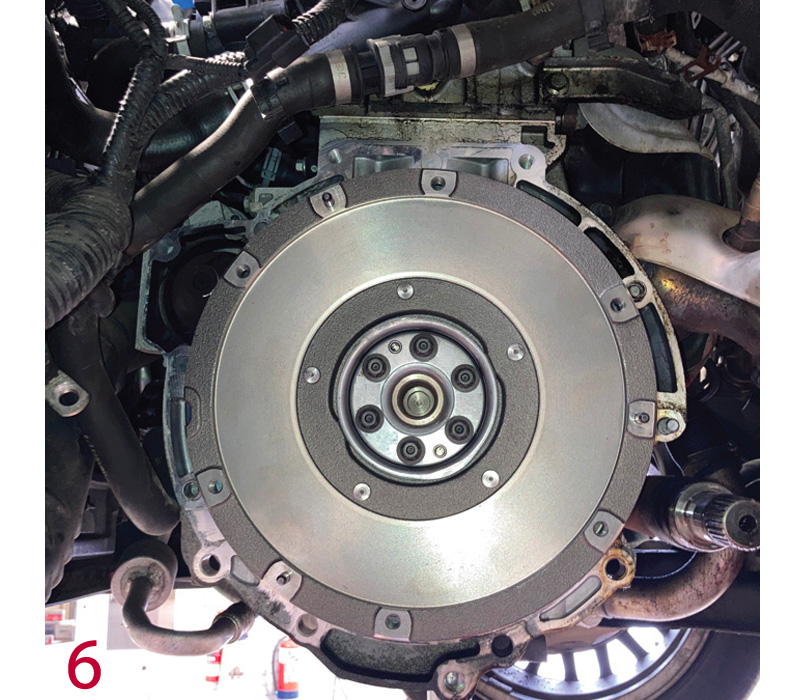
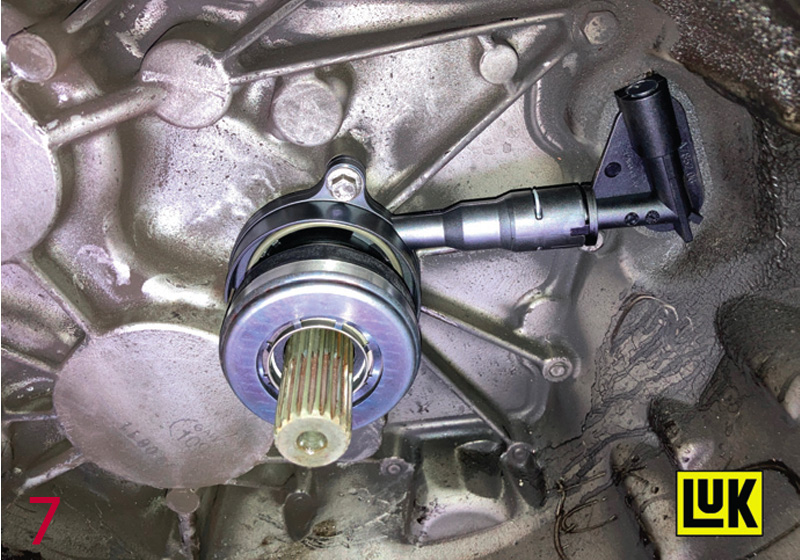
Mount the new DMF onto the crankshaft, install the new bolts and torque to the manufacturer’s specification (Fig.6) and degrease the DMF face with clutch and brake dust cleaner. Turning to the gearbox, remove the CSC, clean the bellhousing area so that the old clutch dust does not contaminate the new clutch and DMF, and carefully fit the new CSC, ensuring it is located and tightened correctly (Fig.7). Apply a light smear of high melting point grease onto the gearbox input shaft splines, mount the clutch plate onto the input shaft to evenly distribute the grease and also confirm the correct fitment of the clutch plate, then remove the clutch plate from the input shaft, and wipe off any excess grease.
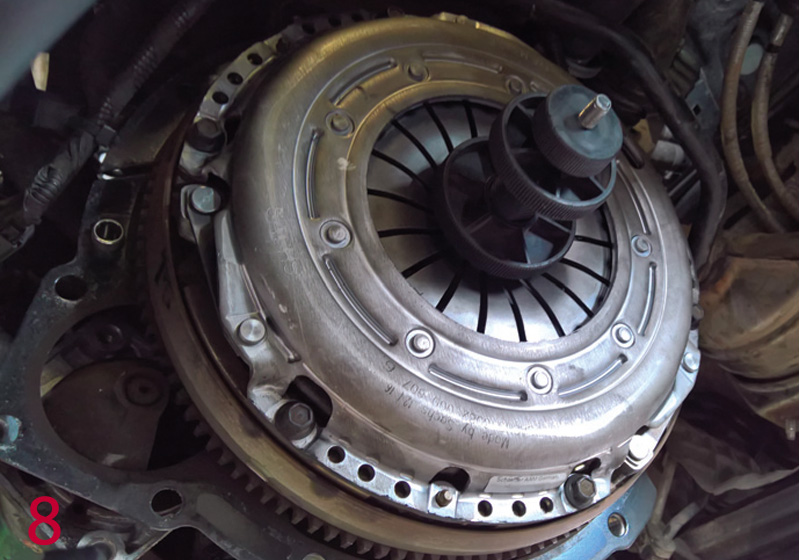
Mount the new clutch onto the DMF using the clutch alignment tool (Fig.8), but make sure the clutch plate is the correct way around, indicated by “Gearbox side” facing the gearbox. Degrease the clutch pressure plate surface using clutch and brake dust cleaner, tighten the bolts in an even and sequential manner, and torque to the manufacturer’s specification.
Before refitting the gearbox, place a drainer under the clutch pipe and flush out the old clutch fluid, before replacing it with new fluid of the correct specification, because old, contaminated fluid, can cause the new seal in the CSC to swell and fail. In this instance, the clutch system was bled using a vacuum bleeder.
Check the gearbox alignment dowels are located correctly and that the bellhousing area is clear of cables etc., so not to foul or get caught when installing the gearbox.
Gearbox installation
With the aid of a transmission jack, bring the gearbox close to the engine, take time to align the gearbox correctly. Bring into line the O/S driveshaft, ease the gearbox input shaft into the clutch and then ensure the gearbox locates onto the alignment dowels. Insert two bellhousing bolts and tighten, then fit the upper gearbox mounting and tighten in position. Refit all other bolts and components in reverse order of their removal and refill the gearbox with oil.
After the battery lead has been reconnected, reset all electrical consumers and carry out a full road test to ensure that the repair has been successfully completed.


