
REPXPERT Alistair Mason replaced the clutch assembly and dual mass flywheel (DMF) on a 2009 Audi TT 2.0 TDI Quattro, which has covered more than 85,000 miles.
The customer reported that the clutch was slipping when accelerating, and a short road test confirmed that the clutch had reached the end of its service life and that a replacement was needed.
With a recommended book time of seven hours and all repair information available through Schaeffler’s information portal, REPXPERT, this is a great repair for any independent workshop.
Before starting the job, ensure that you have the following workshop equipment to hand; a two-post vehicle lift, engine support, transmission jack, clutch alignment tool and brake/clutch pressure bleeder. Technicians might also need a locking wheel bolt key and radio code.
Gearbox removal
With the vehicle placed on the lift, open the bonnet and boot, disconnect the battery located in the boot, obtain the locking wheel bolt key and then slacken the locking wheel bolts on both front wheels.
Working in the engine bay, remove the engine cover, disconnect the air mass meter and vacuum pipe, and then remove the air filter assembly and carrier, which will provide good access to the top of the gearbox.
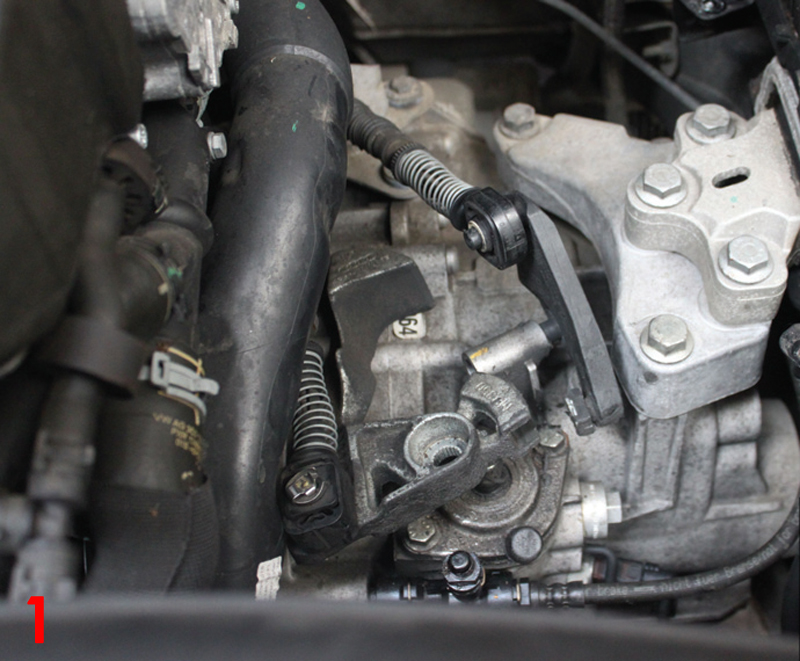
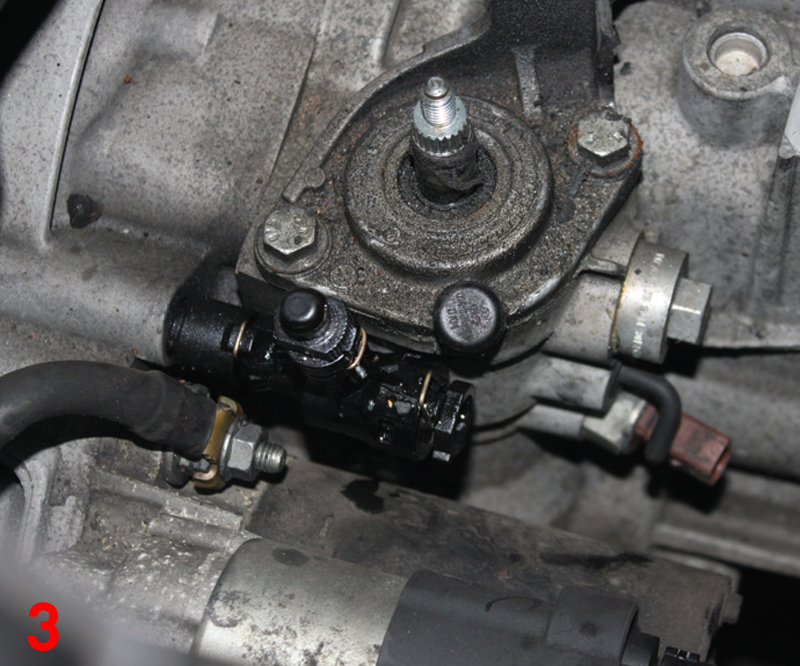
Remove the gear change cables, selector lever weight assembly and cable retaining bracket (Figs 1 and 2), clamp the flexible hydraulic clutch pipe, and then disconnect the pipe from the concentric slave cylinder (CSC) connection (Fig 3).

Next, disconnect the wiring from the starter motor and detach the earth lead from the starter motor top retaining bolt. Then undo the top starter motor retaining bolt, disconnect the reverse light switch multiplug, and remove the top bell housing bolts.
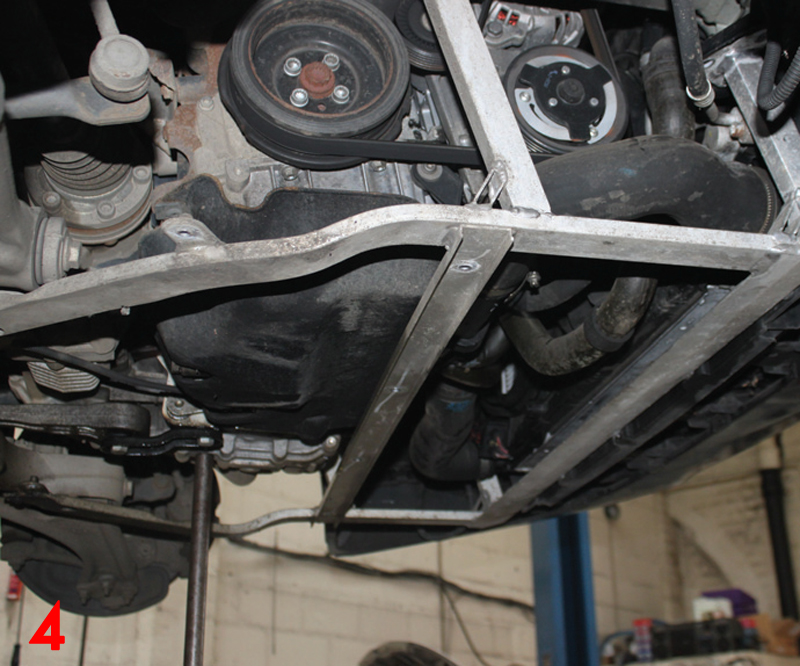
Raise the vehicle to gain access to the underside, and remove the engine undertray. Then lower the vehicle to waist height and remove both front wheels as well as the inner wheel arch liners. Following this, raise the lift and remove the alloy under guard framework (Fig 4).
Remove the front driveshafts by unscrewing the hub nuts and spline bolts retaining the inner CV joints, and then release both bottom ball joints.
Take away the transfer box from the gearbox and mark the position of the propshaft on the transfer box. Unclip the oil level sensor wiring loom from the retaining clip, disconnect the exhaust front pipe sleeves, and remove the rubber mounting assembly.
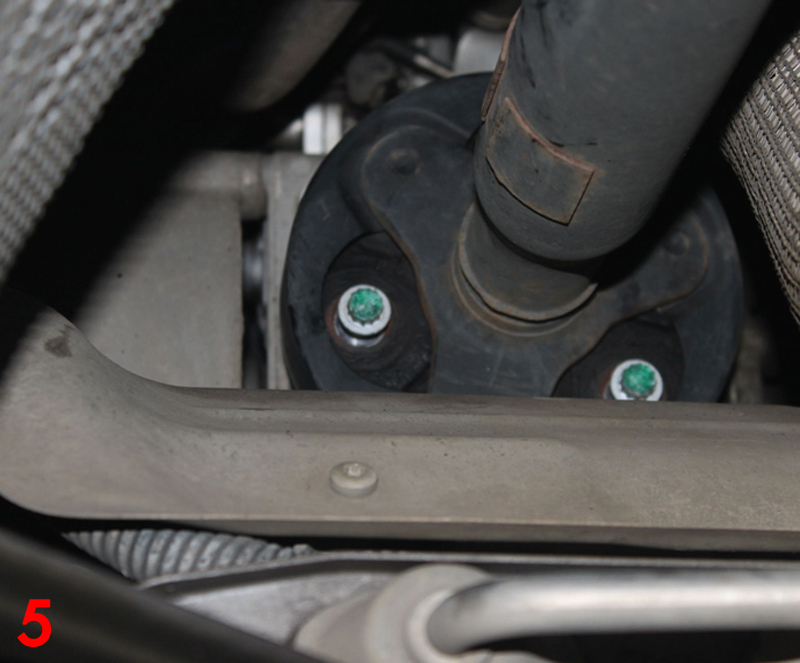
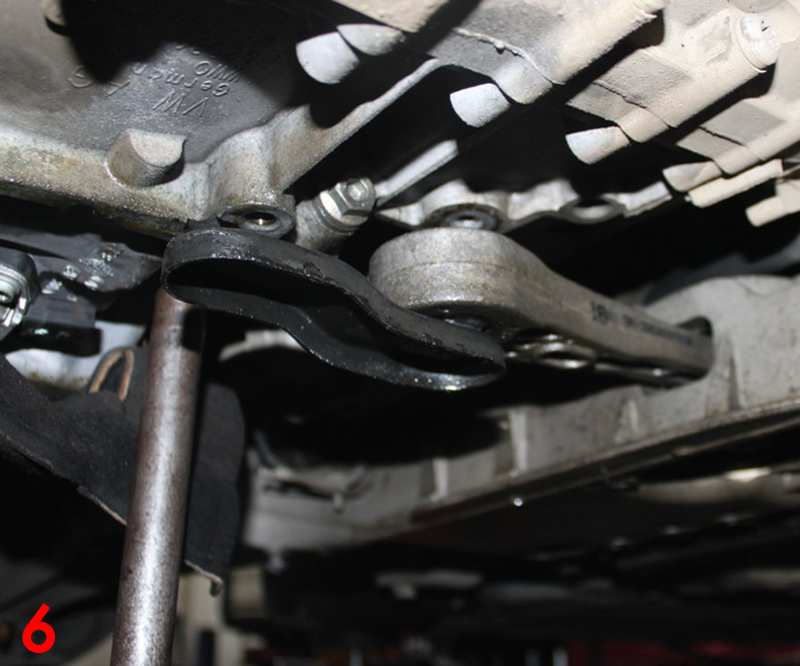
Next, undo the three 12-point bolts from the transfer box to cushion drive assembly (Fig 5) and remove the lower gearbox pendulum mounting (Fig 6). Ease the engine and gearbox forward and disconnect the propshaft from the transfer box and support as required.
Drain the gearbox oil and then undo the O/S/F driveshaft flange using a long 6mm Allen key. Disconnect the transfer box retaining bracket bolts, and then the four main body securing bolts. At this point, the transfer box can be removed and secured.
Then undo the lower bell housing bolts, leaving two easily-accessible bolts in position to retain the gearbox, and remove the starter motor. Support the engine using either a brace bar, sub-frame support, or second transmission jack. Then remove the gearbox mounting, lower the engine/transmission assembly to aid gearbox removal, support the gearbox using a transmission jack, undo the final bell housing bolts, and ease the gearbox away from the engine. Once clear, lower the transmission jack and place the gearbox in a safe area.
Clutch replacement
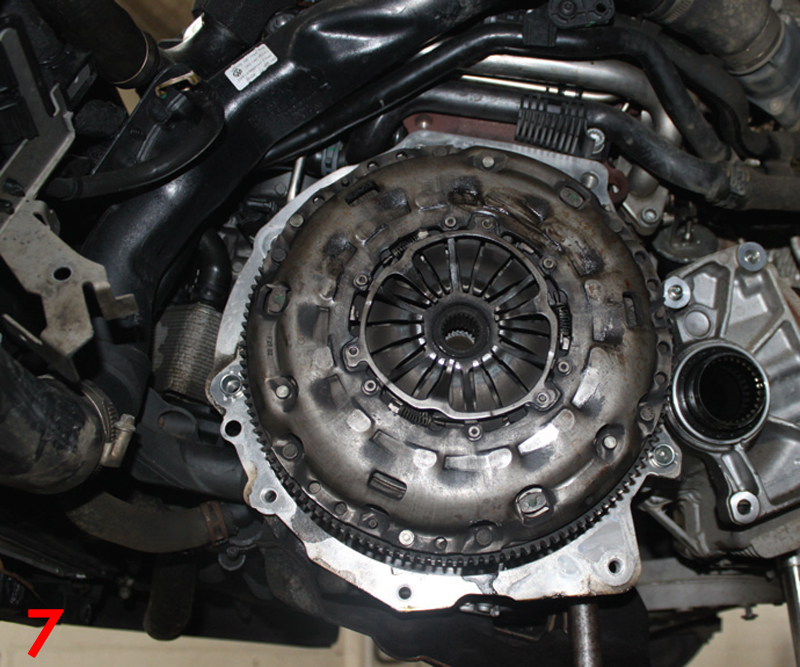
Undo the six clutch retaining bolts (Fig 7) and remove the clutch cover and plate assembly. Upon inspecting the clutch plate, it was confirmed that the clutch had reached the end of its service life – the friction material had worn close to the rivets.
In this case, the DMF was replaced upon the customer’s request. With the DMF removed, inspect the back of the engine for any oil leaks and rectify as required. Clean the back of the engine with clutch and brake dust cleaner before mounting the new DMF.
While doing so, insert the new bolts and tighten to the manufacturer’s torque specifications – available via both the REPXPERT website and app – and finally de-grease the clutch surface on the flywheel.
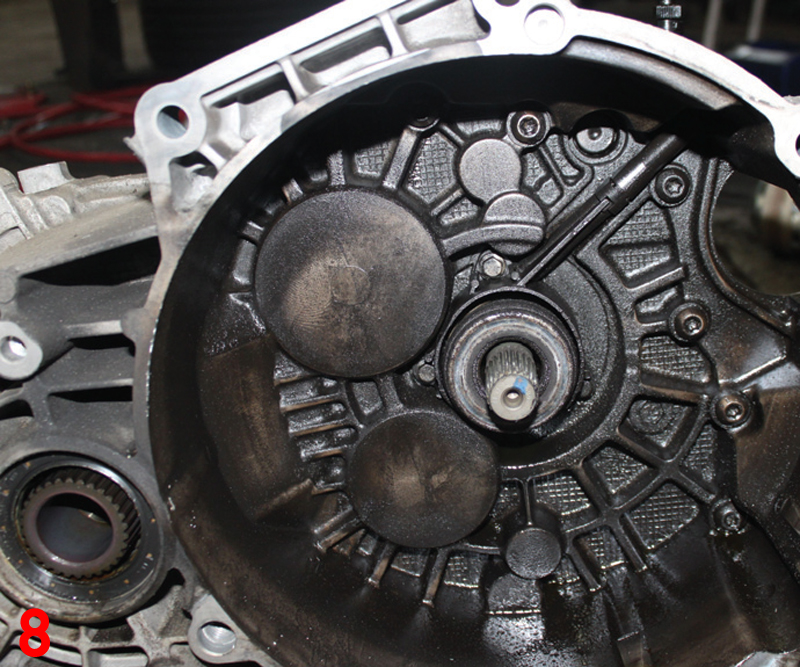
Focusing on the gearbox (Fig 8), remove the CSC, inspect the bell housing area for any oil leaks and rectify as required. Clean the bell housing area, confirm that the CSC mounting surface is clean, mount it, and ensure the retaining bolts have been tightened correctly. However, do not operate or squeeze the CSC, as this could damage it.
Apply a light smear of high-melting point grease to the gearbox input shaft splines, mount the new clutch plate onto them, and evenly distribute the grease. Remove the clutch plate and wipe off any excess grease.
De-grease the clutch pressure plate surface, then, using a clutch alignment tool, mount the new clutch onto the DMF. Next, fit the clutch bolts and torque to the manufacturer’s specification.
Before re-fitting the gearbox, it is always good practice to flush out the old clutch fluid and replace it with new fluid. Also ensure that the gearbox alignment dowels are located correctly.


