In the latest Belt Focus, Schaeffler REPXPERT Alistair Mason replaces the timing belt and water pump on a 2010 Ford Kuga 2.0 TDCi that has covered 82,000 miles.
Scheduled time: 3 hours
Workshop equipment required:
- Vehicle lift (two-post is ideal)
- Engine support
- Engine timing/locking kit
- Coolant vacuum bleeder
The timing belt replacement interval for this vehicle is 125,000 miles or 10 years, and as the vehicle had reached its 10-year birthday, the vehicle was booked in for the job, at which point the replacement of the water pump was also advised. An INA timing belt and water pump kit was the obvious choice for this repair, as it contains all the components required to successfully complete the installation.
To further assist independent workshops undertake a profitable repair, the full repair instructions, torque settings and repair times are available on the REPXPERT information portal and app, and as the same 2.0 TDCi engine is also used by Citroën, Fiat, Peugeot and Toyota, there are many opportunities for this repair. It is essential with every timing belt installation, to always follow Schaeffler’s 4T rule:
- Temperature – Always carry out timing belt replacement on an engine that is at ambient temperature, as this can affect belt tension
- Tools – Timing/locking tools are essential for correct and accurate timing on today’s engines
- Torque – Ensure all bolts are torqued to the manufacturer’s specifications
- Tension – Always tension the belt correctly, ensure the tensioner is fastened in the correct rotation, the tension marks align and pulley movement is available where required
Timing belt removal process
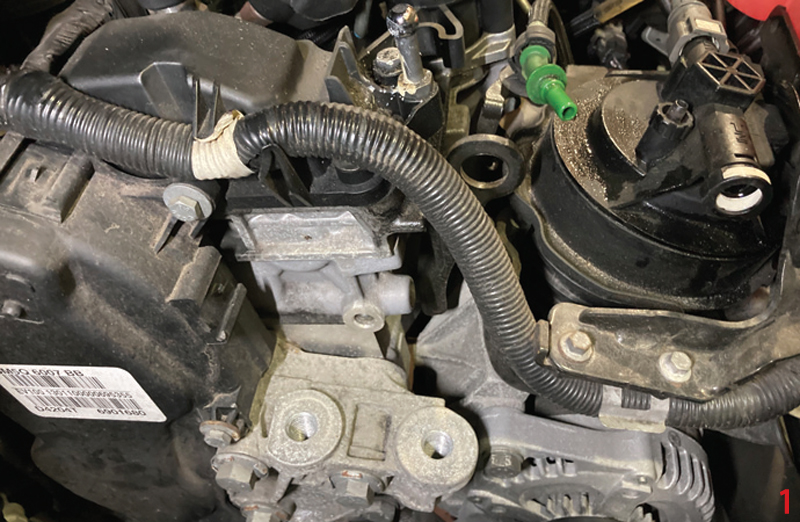
With the vehicle placed on the lift, open the bonnet, remove the engine cover, unclip the coolant expansion tank and stow on top of the engine, then disconnect and remove the two plastic fuel pipes by the upper timing belt cover. A spanner can now be placed on the auxiliary belt tensioner to release the belt tension and allow the belt to be taken off the alternator and tensioner pulleys. Now mount the engine support and remove the O/S engine mounting (Fig 1) followed by the upper timing belt cover.
Slacken the O/S/F locking wheel bolt, raise the vehicle lift, remove the O/S/F wheel and wheel arch liner (Fig 2), and then the auxiliary drive belt and inspect for wear and replace if necessary. Remove the bottom pulley bolt, which can be done using either an air gun or by holding the flywheel ring gear and slackening the bolt with a socket and bar, then with the bolt removed, take off the bottom pulley and engine speed/position sensor ring.
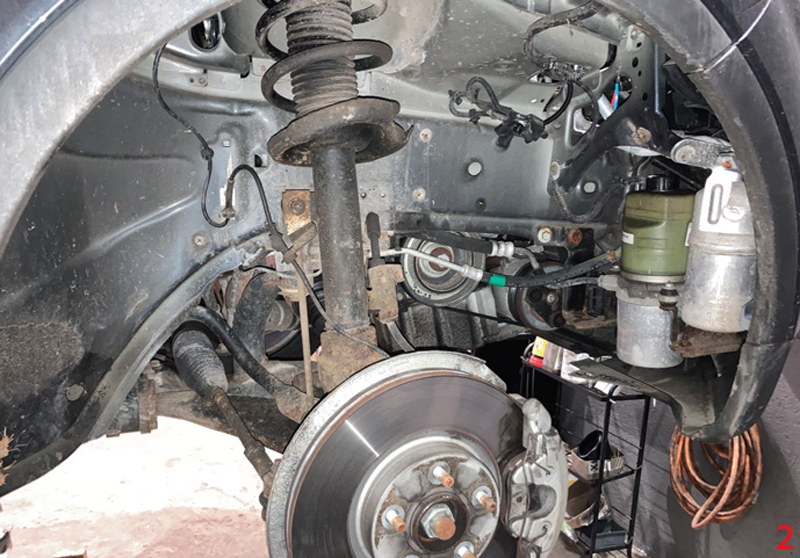
At this point, it is now possible to see that the keyway in the timing belt crankshaft pulley is wider than the key in the crank (Fig 3), this is to allow the belt to tension correctly without moving the cam or crankshaft.
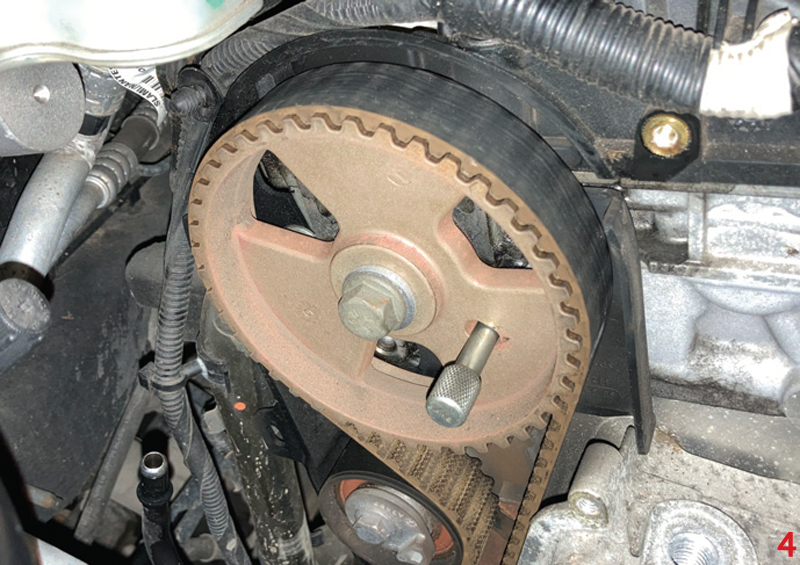
Remove the lower section of the timing belt cover, refit the bottom pulley bolt and rotate the engine until the camshaft locking pin can be inserted to lock the camshaft (Fig 4), then insert the crankshaft locking pin by the starter motor (Fig 5) and slacken the bottom bolt.

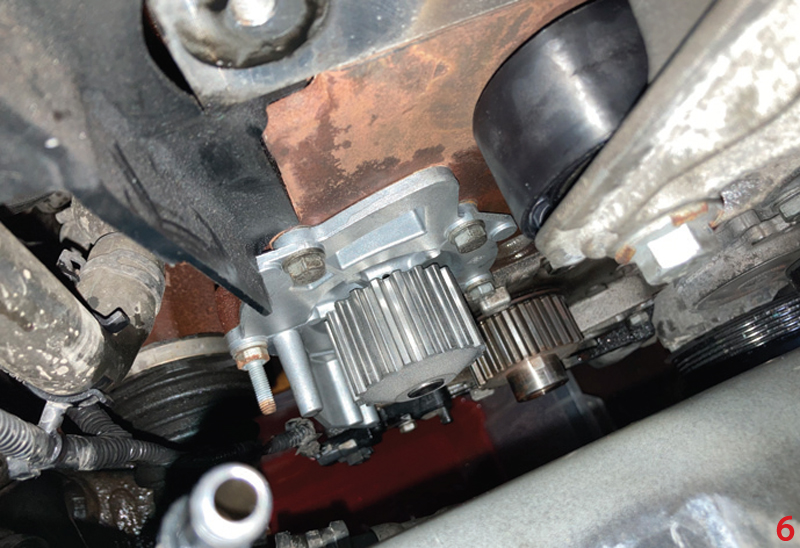
With the camshaft and crankshaft locked, slacken the timing belt tensioner and remove the belt. Remove and replace the idler supplied in the timing belt kit and torque to the manufacturer’s specification. Drain the coolant using the radiator drain plug and once empty, remove and replace the water pump assembly (Fig 6), using only the new paper gasket supplied – the gasket does not require any sealer as it may contaminate the new water pump seal.
Timing belt installation
Ensure the timing belt area is dry and free from contamination. Fit the new tensioner and bolt, ensuring the tensioner is located correctly (Fig 7), then tighten the bolt finger tight, so that the tensioner is still free to be adjusted.

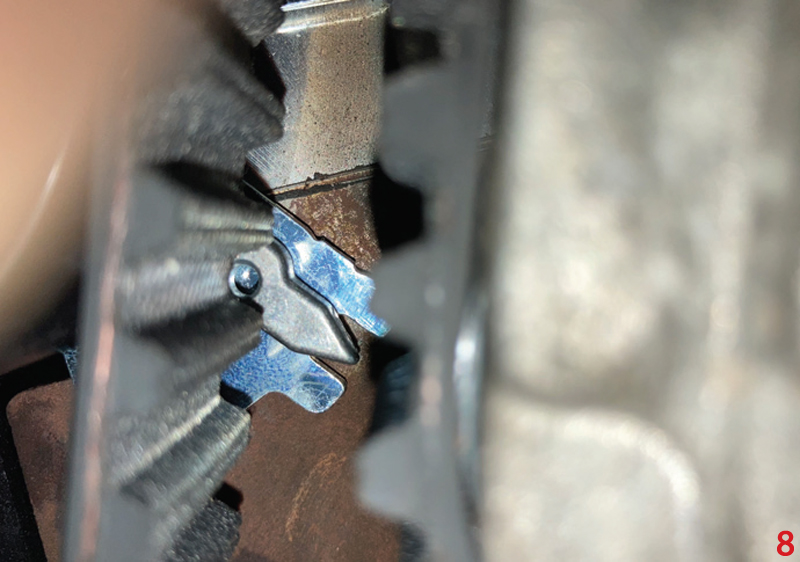
Install the new timing belt starting at the crankshaft, ensuring that the crankshaft pulley free play is rotated anti-clockwise, then fit the timing belt to the water pump pulley and idler pulley. Finish this off by easing the timing belt onto the cam pulley and tensioner pulley. When fully aligned, tension the tensioner in an anti-clockwise direction until the pointer aligns with the cut out on the tensioner (Fig 8). Once aligned, tighten and torque the tensioner bolt to the manufacturer’s specification.
Fit the lower timing belt cover, remove the bottom pulley bolt and fit the engine speed/position sensor ring and bottom pulley, and then the new bottom pulley bolt and torque to the manufacturer’s specification.
Remove the cam and crankshaft locking tools, rotate the engine four times, check the tensioner is still in the correct position and refit the locking tools to ensure the timing is correct.
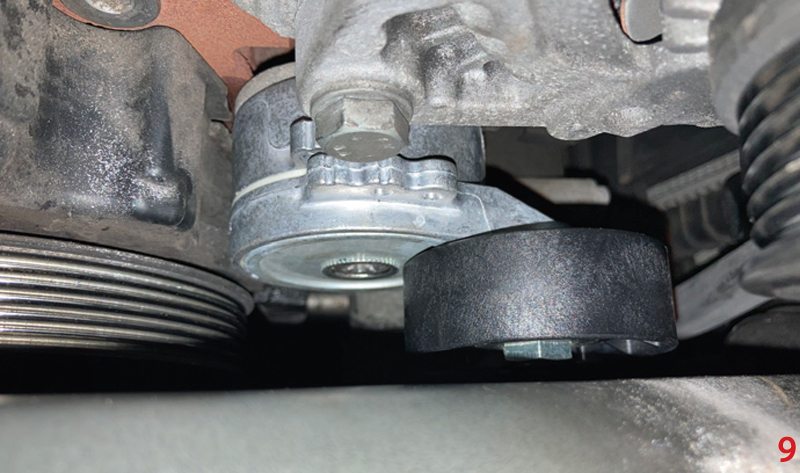
The remaining installation is in reverse order of the removal, but in this instance, following best practice, we replaced the auxiliary belt and tensioner (Fig 9). Finally, vacuum fill and bleed the cooling system with new coolant. Always carry out a full road test to ensure the heater works correctly and the correct coolant level remains.