Blue Print provides the PMM audience with a comprehensive guide on how to replace the clutch on a Ford Transit.
Vehicle Information
Make: Ford
Model: Transit
Year: 2002
Engine: 2.4 TDCi, diesel
Transmission: Rear Wheel Drive
Mileage: 160,000
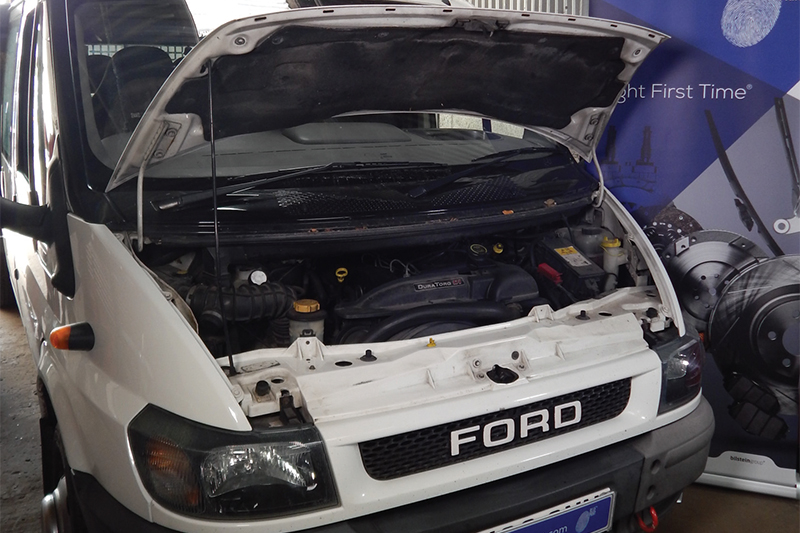
The Ford Transit is a popular choice for many businesses as they seek to take care of their light commercial needs. Since its introduction in 1965, the Transit has changed and evolved, and numerous variants have been produced – including panel van, tipper, minibus and many other special applications.
It has been reincarnated over the years, according to market demands and technology, and is still a very popular vehicle choice for business operators large and small.
The Transit featured in this article is a 2002 350 long-wheelbase tipper model which was still putting in many hard days of work after 160,000 miles (260,000km). However, a ‘rattling’/knocking noise was reported to be coming from the clutch area and an oil leak was discovered between the engine and the transmission. This was possibly due to a faulty dual-mass flywheel and a leaking engine rear main oil seal, which would require the gearbox to be removed along with the clutch assembly and flywheel. A full inspection would be necessary to diagnose the fault and rectify it. This vehicle is a rear-wheel drive variant equipped with a 2.4 TDCi diesel engine.
Therefore, to begin the gearbox-removal process, the first job is to remove the gear stick from inside the cab by removing the rubber gaiter and sound insulation around the gear stick (in the ‘neutral’ position), followed by releasing the plunger on the gear stick extension to ‘free’ it from the lower part.
Then, take out the four retaining bolts to the transmission, which will allow the gear stick to be completely removed (Fig.1). While still working in the cab, slide the driver’s seat forward to locate the battery.
Obtain the radio security code (this will be required later), then disconnect the battery. Raise the vehicle and mark the position of the propshaft flanges in relation to the transmission and rear axle. Unbolt the centre supports and drive flanges and remove the complete propshaft from the vehicle. Inspect the propshaft for any ‘wear’ within the joints, centre bearings and flexible disc, then replace the worn parts before reinstalling the propshaft.
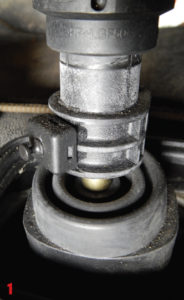
Working around the transmission, locate the clutch slave cylinder, twist to remove it and place it out of the way. Disconnect the wiring connectors for the crankshaft sensor, reverse lamp switch, vehicle-speed sensor and gear lever position sensor, then unclip the wiring harness away from the gearshift-support bracket and detach it from the transmission. The starter motor also needs to be removed.
Once taken out, inspect it for any clutch debris and clean it where necessary. This starter motor can be susceptible to excessive amounts of ferrous dust produced by the gradual deterioration of the dual-mass flywheel, which can cause it to fail by contaminating the motor magnets and the pinion shaft.
Further investigation
Remove the transmission-support insulator to the front-axle crossmember bolts. Now, the transmission is ready for removal from the engine – only the bell housing bolts remain.
However, the transmission will not pass through the gap between the body and the front-axle crossmember.
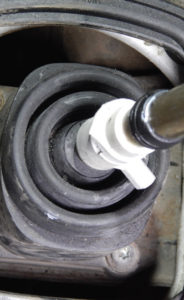
The crossmember, which is also the fixing point for the front steering and suspension components, needs to be lowered but not removed completely. This is to allow enough room for the transmission to pass.
Partially remove the retaining bolts that fix the rear of the crossmember to the chassis, then loosen the front-fixing bolts but do not remove them completely. This results in the crossmember being lowered to give enough clearance for the transmission to be removed from the vehicle (Fig.2).

Whilst supporting the transmission, remove all bell housing bolts. The transmission can now be taken out of the vehicle and lowered to the ground for inspection.
In the case of the Transit featured in this article, after the removal and inspection of the clutch pressure plate, friction disc and flywheel, it was apparent that the root cause of the ‘rattling’ noise was the flywheel. Some of the internal components fell out, so it was clear that the flywheel had suffered an internal material failure.
For this vehicle, Blue Print SMARTFIT Conversion clutch kit ADF123009 was chosen for the replacement. This includes a complete four-piece dual-mass flywheel conversion kit with torsion-damper friction disc, pressure plate, solid flywheel, grease, release bearing and fork, along with all necessary bolts and a SMARTFIT installation sticker.
Replacement
To begin the replacement process, inspect and clean the crankshaft. Replace the rear main oil seal before fitting the new solid flywheel and tighten the new bolts to manufacturer specification.
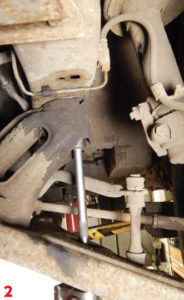
Before fitting the new pressure plate and disc, clean the contact surfaces and align and fit all parts fully against the flywheel – along with the new retaining bolts. Tighten the six pressure plate bolts diagonally to ensure ‘even’ contact and to prevent any damage to the pressure plate and flywheel-centring pins (Fig.3).
![]()
Attention then turns to the release mechanism. Thoroughly clean the bell housing to eliminate all grease, dirt and old fiction fibres from the previous clutch. Then, remove the release fork and inspect it for cracks and/or wear (Fig.4).
Clip the new release bearing into the new release fork, then test the operation of the release mechanism for smoothness. Lightly apply some grease to the input shaft – now, the transmission is ready to be refitted to the engine.Support and lift the transmission and align it to the engine. Then, refit all bell housing bolts and tighten them. Tighten all crossmember-retaining bolts and relocate the transmission-support insulator.
![]()
With the transmission reinstalled, all auxiliary parts can now be refitted – including the starter motor, clutch slave cylinder and transmission wiring harness.
The propshaft can then be aligned and installed back in place. Now, the vehicle is ready to be lowered to the ground.
Once on the ground, head towards the cab and pull the gear-selector shaft completely to the rear, with the clamp bolt remaining in the horizontal position. The transmission should be in third gear when installing the gear stick. Failure to follow this instruction may result in gear-selection issues.
Reinstall the gear stick along with the sound insulation and rubber gaiter. Reconnect the battery, input the radio code and reset the clock. Then, test the clutch operation before carrying out a full road test.
In the case of the Transit featured here, the clutch fault was now fixed – proven by a very smooth pedal ‘feel’ and operation.
The vibration and rattle felt throughout the vehicle had gone, demonstrating that the perfectly-coordinated combination of a rigid flywheel and clutch disc (with torsion damper) gives excellent vibration dampening and a high degree of driving comfort. The vibrations generated by the engine are also filtered out (in all driving conditions), noise is reduced, and the service life of the clutch is prolonged by means of low-wear clutch linings.


