
Please note: this procedure is specifically for use with the Pichler extraction toolkit (p/n 603 83 200/603 83 220). Before commencing any work, these tools should be only used by skilled and trained technicians.
1. Prepare the vehicle according to the manufacturer’s specifications so that the valve cover is freely accessible (e.g. remove covers etc).
2. Remove all electric and fuel lines. Also remove any other part which could be in the way.
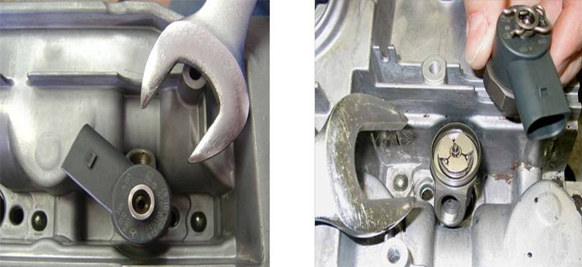
3. Remove the solenoid by unscrewing the lock nut underneath with a spanner or a pair of multi-grip pliers (see images below).
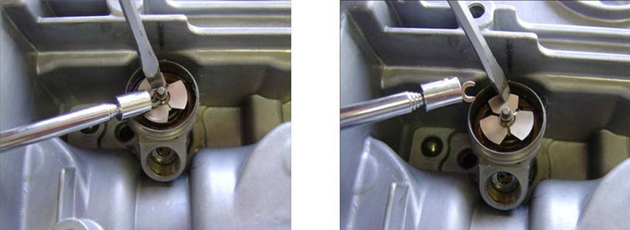
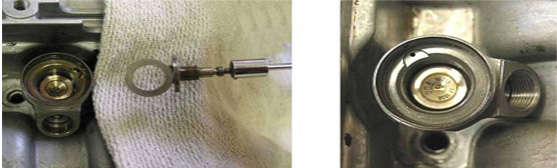
4. Dismantle the injector by pushing down the “three leaf” with a screwdriver until the ‘c’ clip comes free. Using a magnet, remove the ‘c’ clip from the shaft (see images below).
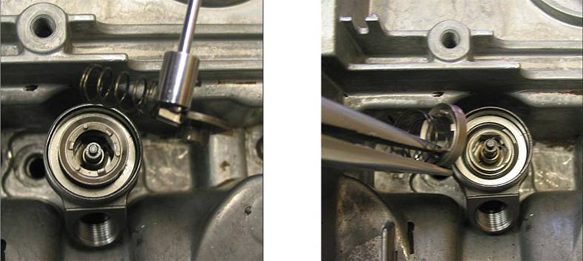
5. Remove the parts by using a magnet and/or a pair of longnosed pliers (see images below).
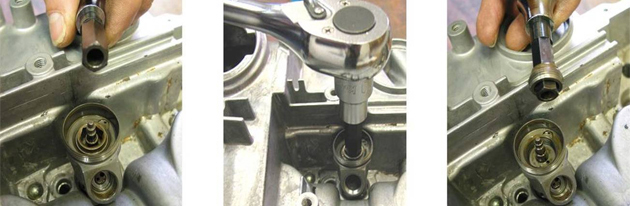
6. Unscrew and remove the hexagon socket nut using the 10mm allen socket (see images below).
7. Remove the parts underneath by using a magnet and/or a pair of long-nosed pliers in order to reach the maximum depth for the adapter (see images below).
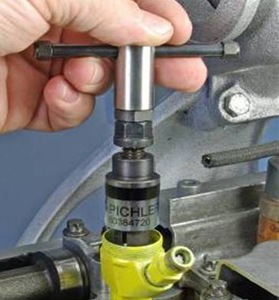
8. Remove the pilot valve and spindle using the extractor (p/n 60384720). It is possible to increase the depth of the thread by using the tap (p/n 60383317) (see image below).
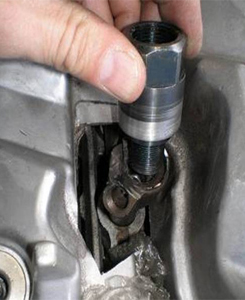
9. Screw the adapter into the injector with a socket and tighten slightly (see image below).
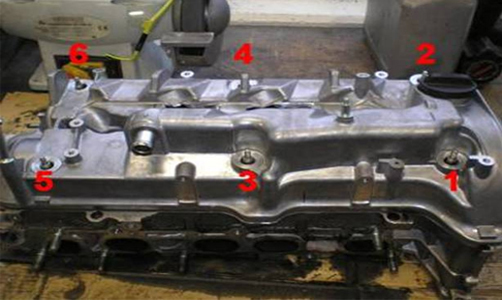
10. Remove the washers and nuts holding the valve cover. Mount the supporting feet on the studs, paying attention to the different heights of the supporting feet (long on pos. 1, 2, 3 short on pos. 4, 5, 6 starting front left) and tighten these by hand.
11. Now place the extraction plate (it fits only one way) and screw it on with the screws and washers (see image below).
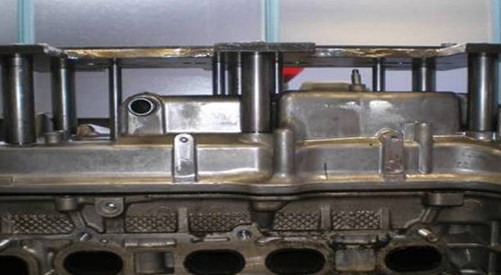
12. Guide the extraction spindle with the piston adapter through the hollow core cylinder with the piston of the cylinder facing upward to the nut. Put the spindle through the hole in the plate and screw it into the extraction adapter on the injector and tighten it by hand (see image below).

13. Attach the hydraulic cylinder to the extraction plate with the safety cable.
14. Attach the hydraulic hose along with a ball valve to the hydraulic cylinder and attach it to the hydraulic pump. By operating the pump, extract the injector. Please note: do not exceed the maximum stroke of the cylinder.
15. When the maximum stroke of the cylinder is reached open the valve until the piston has returned completely. Close the valve, screw down the piston adapter until it touches the piston and repeat the operation. Repeat these steps until the injector can easily be removed by hand.
16. Unscrew the injector from the extraction spindle and remove spindle, cylinder, extraction plate, supporting feet and the extracted injector.
17. To remove the sealing ring and to clean the injector shaft you could use the cleaning and milling kit (p/n 90391200) with the additional cutter (p/n 9039043).


