
This month, Charles Figgins, Technical Marketing Manager at Blue Print, replaced the clutch in a 2006 Škoda Roomster, which was fitted with a 1.2L TSi engine and a five-speed manual gearbox.
The vehicle was reported to have an issue with the smoothness of its clutch pedal operation. This required the gearbox to be removed and the clutch inspected to diagnose the fault and fix it.
Gearbox removal
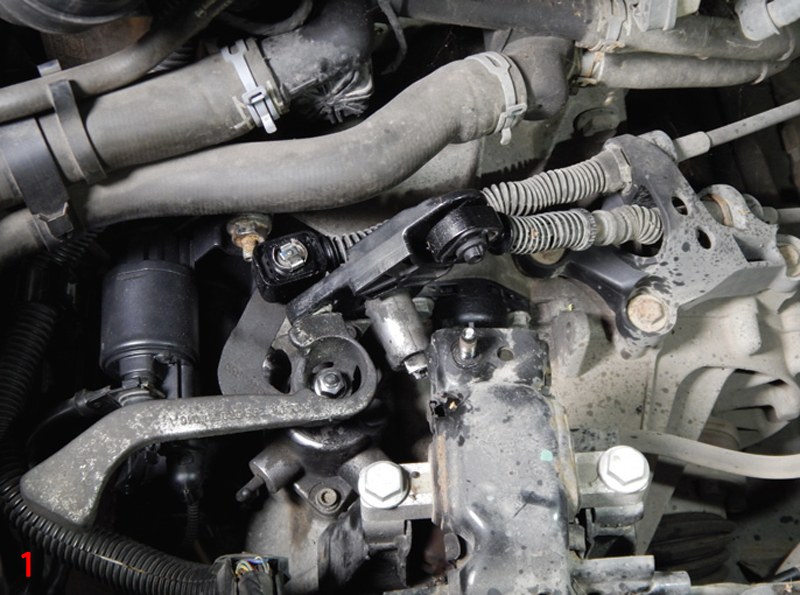
Once in the workshop, open the bonnet and remove the battery, battery tray and air cleaner assembly to provide access to the top of the gearbox. This will reveal the gear selector, clutch slave cylinder, starter motor, and gearbox mounting (Fig 1).
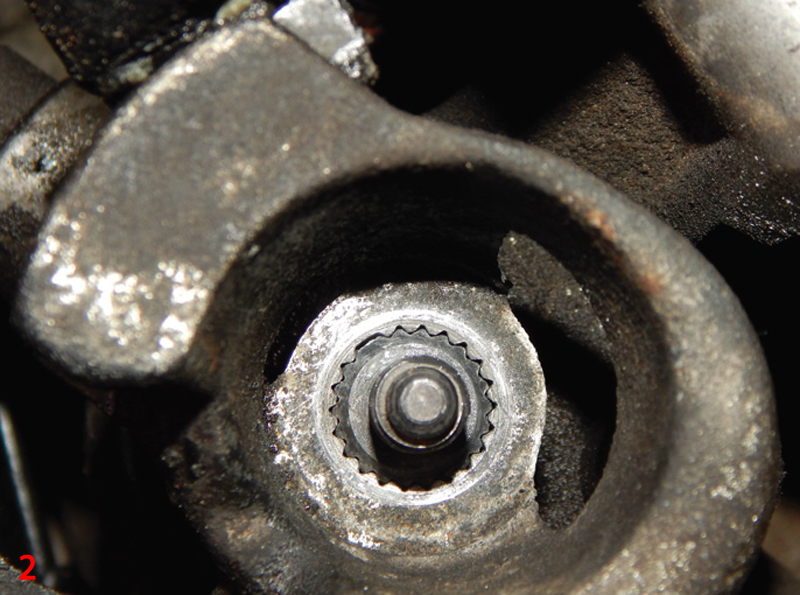
First, unclip the gear selector cables from the selector levers. Then, remove the three retaining bolts from the cable bracket, and put the cables to one side. Next, carefully remove the plastic clip retaining the relay lever. Following this, remove and unbolt the selector lever. With this lever removed, the starter motor can be taken out. This provides extra clearance when removing the gearbox. The lever shaft has a master spline – when it comes to refitting the lever, it can only be fitted in one position (Fig 2).
Then unbolt and secure the clutch slave cylinder, followed by the reverse lamp switch wiring harness, leaving only the gearbox retaining bolts to be removed.
Following this, support the engine with an engine brace before removing the two bolts that hold the gearbox mount in place. Then, raise the vehicle to a working height.
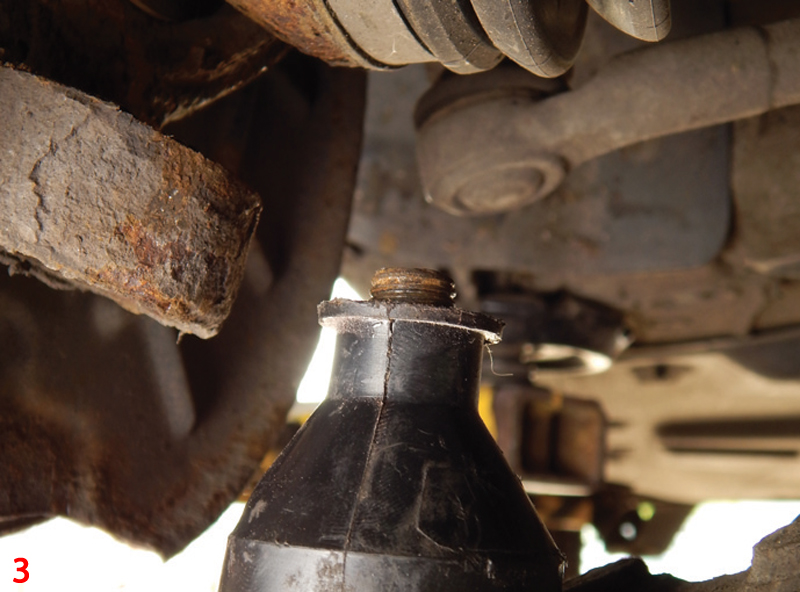
Remove the front wheels. Then, remove both lower suspension arm swivel joint retaining bolts. Free the joints from the hub assemblies, and cover with a plastic cap to protect the rubber boot and thread from any potential damage (Fig 3). Follow this with the left-hand wheel arch liner.
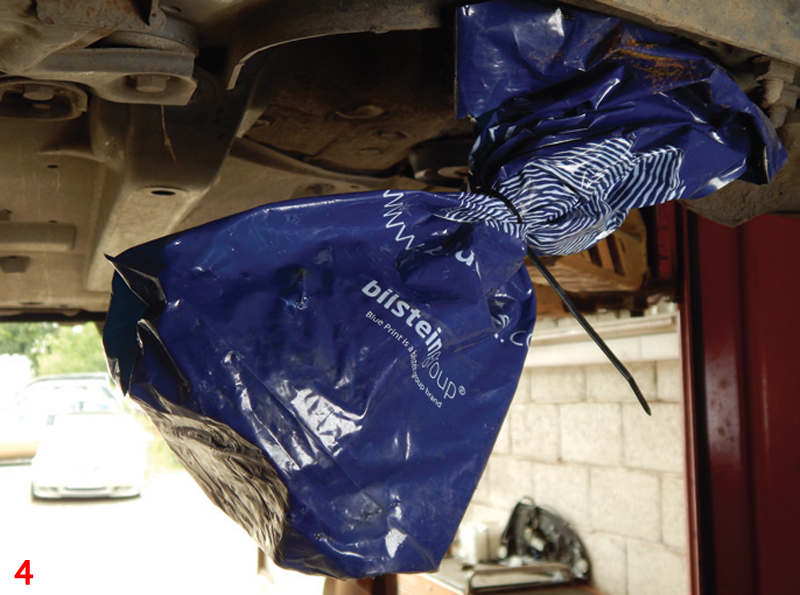
Unbolt the inner driveshaft joint retaining bolts. The driveshafts can then be pulled free from the drive flanges to provide ample clearance for the removal of the gearbox. Wrap the exposed driveshaft joints in a plastic bag to stop any grit from entering the joint until they are ready to be refitted (Fig 4).
Working underneath the vehicle, remove the exhaust hangers, followed by the rear gearbox mounting and the lower gearbox shield. Then, remove the upper gearbox retaining bracket and the lower gearbox retaining bolts. The engine and gearbox should then be lowered to an appropriate position, and the mounting bracket removed. With the gearbox supported, the last retaining bolts can be removed, and the gearbox lowered from the vehicle.
Clutch replacement
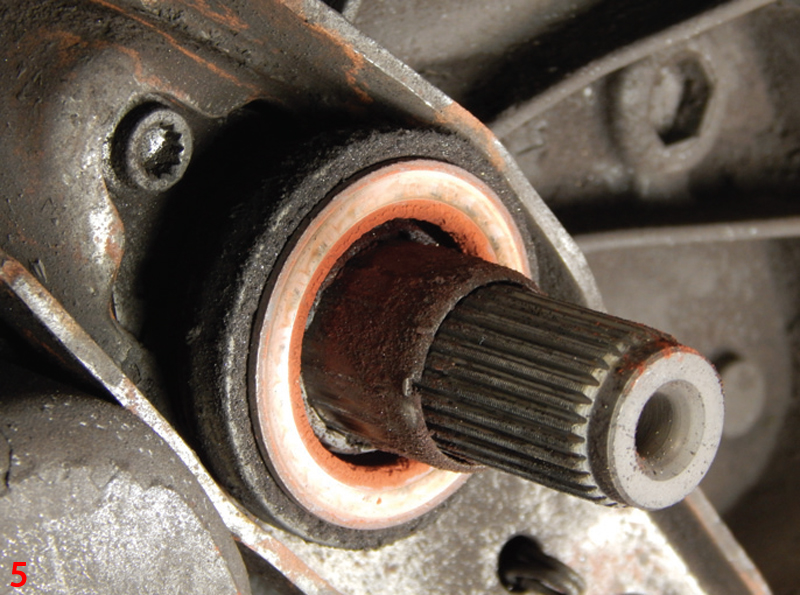
The clutch pressure plate and disc should then be removed from the flywheel and inspected. In this case, 80% of the material was worn and would have needed to be renewed soon. Upon inspection of the release bearing, it had become worn and sticky during operation; this was the root cause of the stiff operation of the clutch pedal (Fig 5). The conclusion was that the clutch kit required replacement. Blue Print clutch kit ADV183056 was used. Included in the kit is a pressure plate, disc, release bearing, release lever and a guide tube.
Clean and inspect the flywheel for any heat spots or cracks before fitting the new pressure plate and disc. When fitting the new pressure plate and disc, it is essential to make sure that the contact surfaces of the pressure plate are positioned correctly and that the clutch disc lining is aligned and fitted fully against the flywheel before the retaining bolts are inserted. The six pressure plate bolts should be tightened diagonally and evenly to ensure even contact and to prevent any damage to the pressure plate centring hole and flywheel centring pins.
Turning our attention to the release mechanism, the two bolts to remove the clutch release arm should be taken out, complete with the guide tube and bearing. This will reveal the input shaft seal, which needs to be inspected for any oil leaks.
Clean the surface area before fitting the new parts. Grease the pivot points, and install the new release arm, bearing and guide tube. Tighten the retaining bolts and rotate the new release bearing until the catch pegs can be pushed into the release arm. Conduct a test to check the smoothness of operation (Fig 6).

Then refit the gearbox to the engine, using some of the retaining bolts to hold it in place, followed by the gearbox mounting bracket. The engine should then be raised using the support brace and put back into position. Refit the gearbox and exhaust mountings. Then, fit the driveshafts, suspension joints and wheels, ensuring all fixings are tightened to manufacturer specifications.
Working from the top of the gearbox, refit the gearbox mounting and remove the engine brace. Refit the starter motor and wiring harness for the reverse lamp switch. Then, reassemble the gear selector levers while all mating surfaces are cleaned and lubricated with grease – this will help improve the smoothness of operation. Reconnect the clutch slave cylinder, selector cables, air filter and the battery. The clock and the one-touch window operation should then be reset. Finally, test the clutch operation and carry out a road test.


