
In part three of this series, Autel runs through the procedure for the Autel ADAS VW Night Vision (NV) System calibration.
There are four primary reasons why a NV system requires calibration: if a NV camera, bumper or radiator grill is replaced or installed; the vehicle chassis is adjusted; the height of the vehicle is changed; or the NV camera’s position on the vehicle has changed.
Vehicle preparation
Set up and perform the calibration frame levelling procedure by following these steps:
- Park vehicle on a flat and level surface with front wheels pointing straight
- Unload, and ensure coolant and engine oil are at recommended levels and fuel tank is full
- Apply parking brake, close doors and turn off lights
- Adjust tyre pressure to recommended value
- Ensure vehicle is kept in a cold state
- Check battery for sufficient power. If not, connect a battery charger
- Ensure NV camera is in position (near front grill or vehicle emblem) with unobstructed view
- Replace the protective window of the NV camera if damaged
Calibration stand setup
- Attach VCI and diagnostic tool to vehicle
- Tap Auto VIN button in top-left of screen to read vehicle ID number, identify vehicle model and equipped systems. Confirm, then select ‘ADAS calibration’, and finally, select ‘Night Vision System’
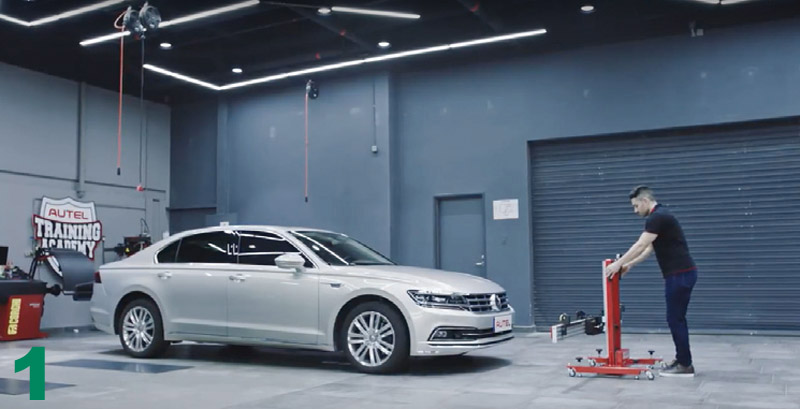
- Place calibration frame on level floor in front of vehicle – no pattern board should be attached (Fig 1)
- Rotate fine-tuning bolt until marked lines align
- Loosen handle and rotate bolt until scale value is zero, then secure the crossbar
- Align sliding plate pointer with marked line. Tighten bolt to secure
- Turn on laser and aim at front-centre of vehicle
- Adjust crossbar height until level with centre of front wheels
- Move frame to reach required distance between vehicle emblem and crossbar sliding plate, keeping laser spot centred
- Ensure both sides of crossbar are equidistance from centre of front wheels
- Turn off laser once positioned, then rotate bolts on base until lightly touching ground
- Securely attach two wheel clamps
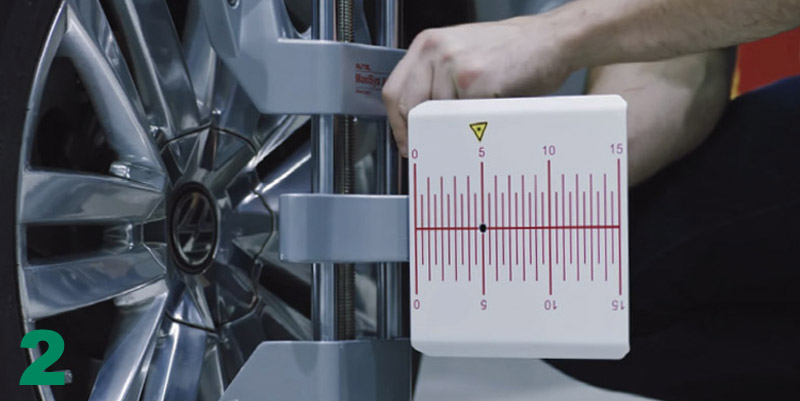
- Insert connecting shaft of laser into clamp port and ensure laser calibration board faces front of vehicle. Then tighten bolt (Fig 2)
- Turn on lasers attached to rear wheels and adjust until point hits rulers on each side of crossbar cover plate
- Rotate fine-tuning bolt until rulers on both sides have same value lit by lasers. Then secure crossbar
- Lift cover plates on both ends of crossbar
- Adjust lasers on rear wheels to control down movement of reflected lasers
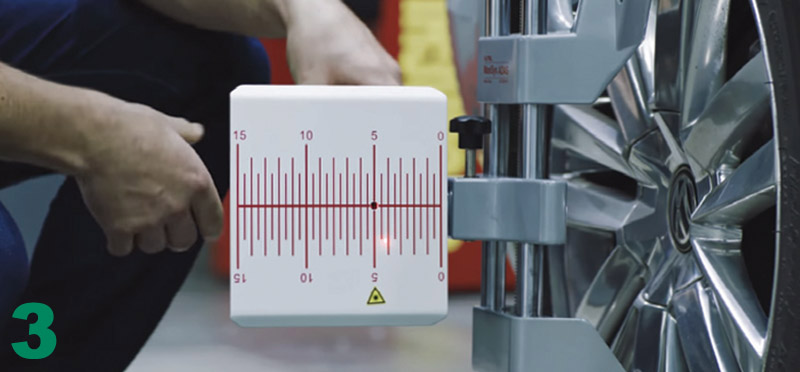
- Reflected laser must shine on scale board of laser-coordinated board on at least one side (Fig 3)
- Rotate centre bolt left/right until scale values lit by reflected beams are same on both sides – now calibration frame is parallel to vehicle
- Close cover plates on both ends of crossbar. Close lasers on wheel clamps then remove
NV calibration
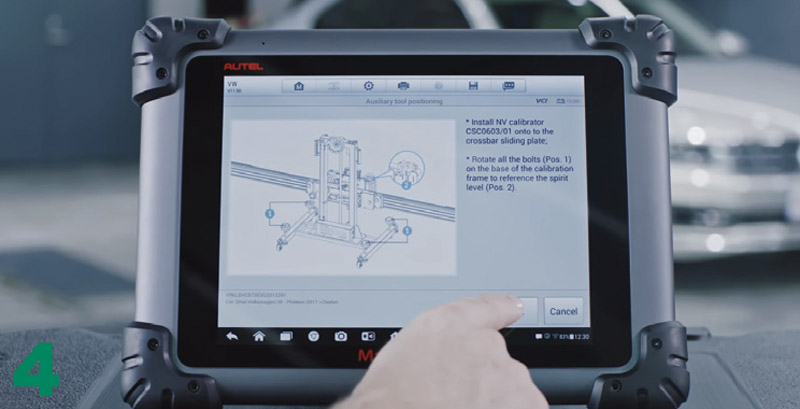
- Install NV calibrator on crossbar sliding plate
- Rotate bolts on base of frame, referencing bubble level to ensure crossbar is level
- Tap ‘OK’ button on tablet (Fig 4)
- Plug included power cord into port on NV calibrator and turn on power switch
- Tap ‘OK’ button on tablet
- Turn on laser by pressing toggle switch on NV calibrator
- Adjust crossbar height until laser is in line with centre of NV camera
- Tap ‘OK’ button on tablet
- Slide NV calibrator to centre of crossbar to align pointer with marked line on frame
- Turn off laser
- Press button on top of NV calibrator for two seconds until buzzer beeps intermittently
- Wait 20 seconds and LED will light green
- Turn on vehicle ignition
- Rotate knobs of NV camera to correct role angle ±0.5° of NV camera
- A message will appear on tablet if role setting is correct
- Tap ‘OK’ button on tablet to initiate auto calibration
- A message will display to say adjustment is complete
- Tap ‘OK’ to read fault memory of the NVS control unit again
For more information, click here.


