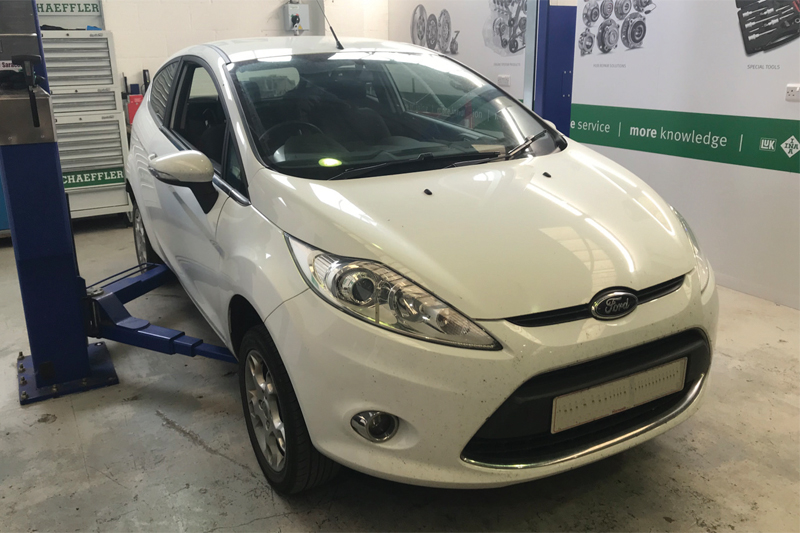
REPXPERT Alistair Mason provides a step-by-step guide on how to replace the front and rear wheel bearings on a 2012 Ford Fiesta.
The front wheel bearing is a standard Generation 1 that requires a press to remove and replace the bearing in the hub assembly, with the ABS encoder ring incorporated into the bearing. In contrast, the rear wheel bearing is as a Generation 3, bolton module that incorporates the mounting plate, bearing, wheel flange and ABS encoder in one unit, which is simply bolted on.
With around two million Ford Fiesta and Ka models that use these bearings on the UK’s roads, this makes a good and likely repair for any independent workshop.
Front wheel bearing replacement
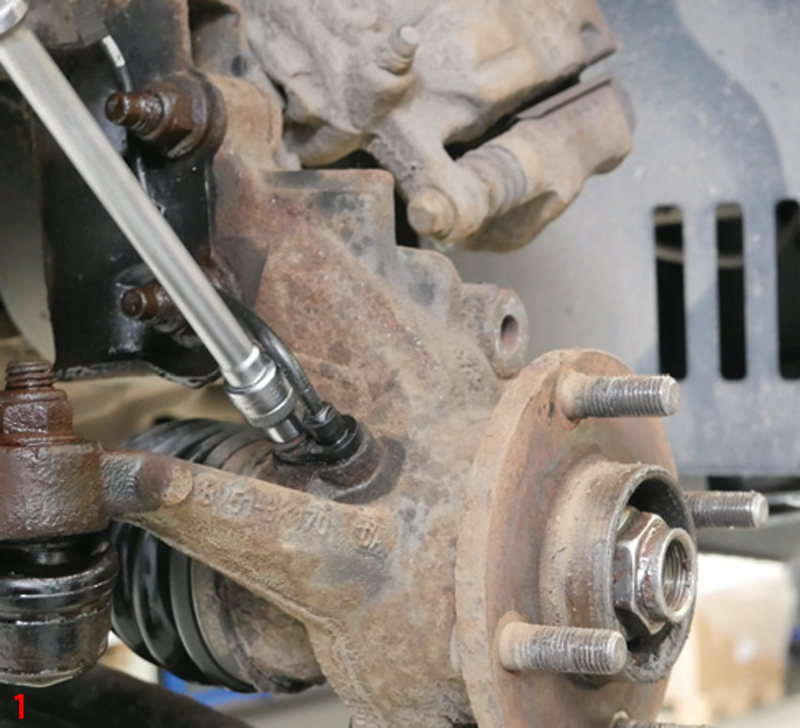
The time needed to complete this procedure is 1.2 hours. With the vehicle placed on the lift, slacken the wheel and hub nuts, raise the lift to waist height, and remove the wheel. Take off the brake calliper carrier assembly and secure it, so as not to strain the flexible brake hose. Then, remove the brake disc, hub nut, and, carefully, the ABS sensor (Fig 1). Detach the track rod end, bottom ball joint, and the two bolts that clamp the hub assembly to the suspension strut – the hub assembly can now be removed whilst easing the CV joint out of the hub assembly.
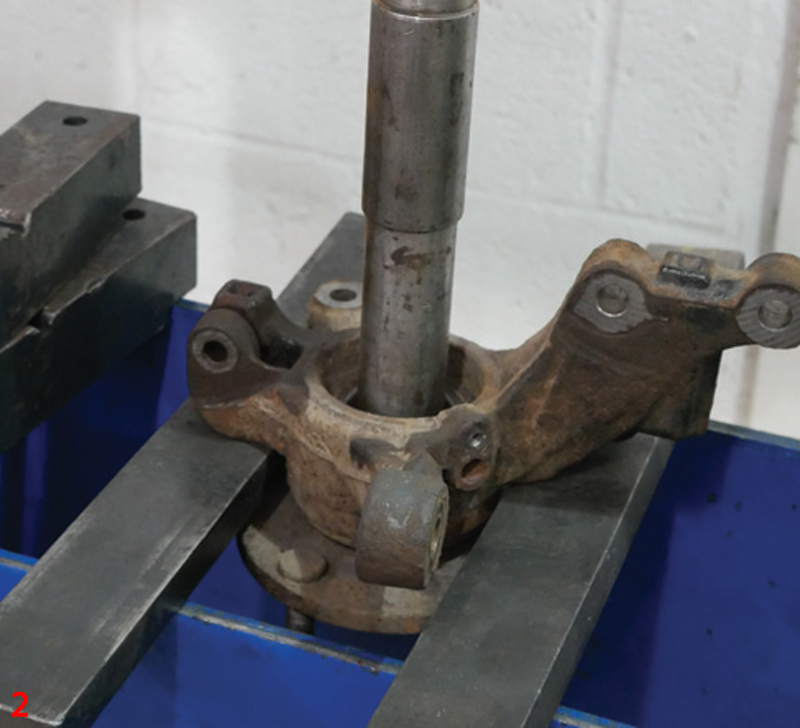
With the hub assembly removed, the drive flange now needs to be pressed out. Support the hub on a press, and using suitable press plates and diameter mandrel, press out the drive flange (Fig 2).
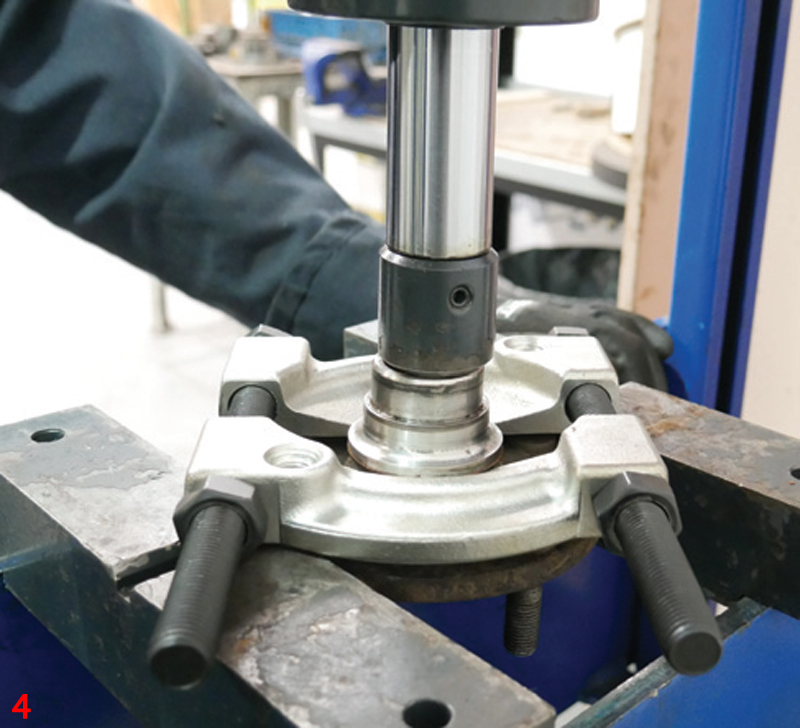
The bearing inner race will probably stay attached to the drive flange, which can be pressed out later. Then remove the retaining circlip, support the hub in the press, and press out the bearing (Fig 3).

Inspect the hub assembly for any wear or damage that may compromise the repair and, if required, clean the bearing and circlip area with a wire brush. Remove the bearing inner race from the drive flange using a suitable tool or puller (Fig 4).
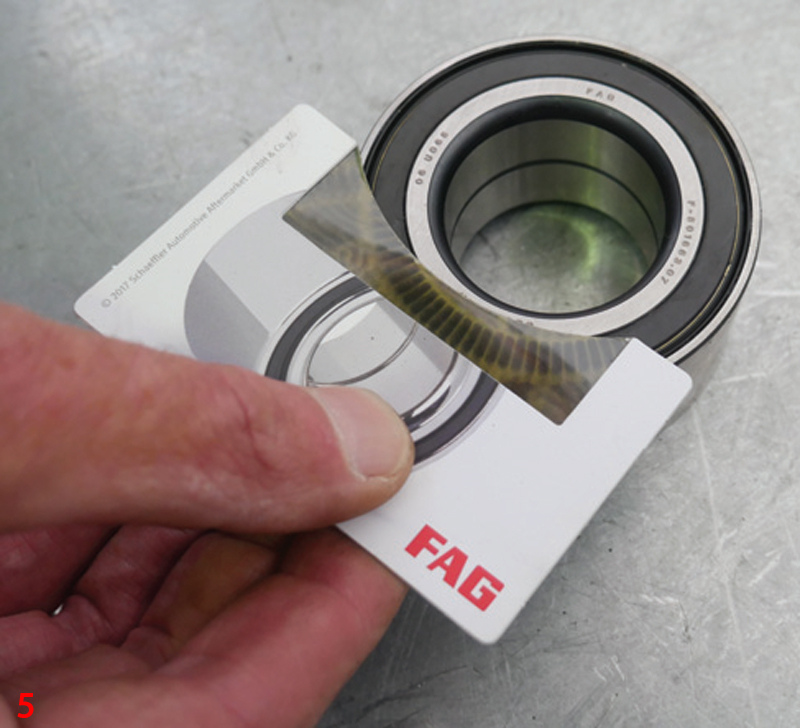
To ensure that the new bearing is installed the right way around, a bulletin is packed in the component box, which indicates that the black bearing face is on the inside, closest to the ABS sensor. This can also be confirmed using a detector card (Fig 5).
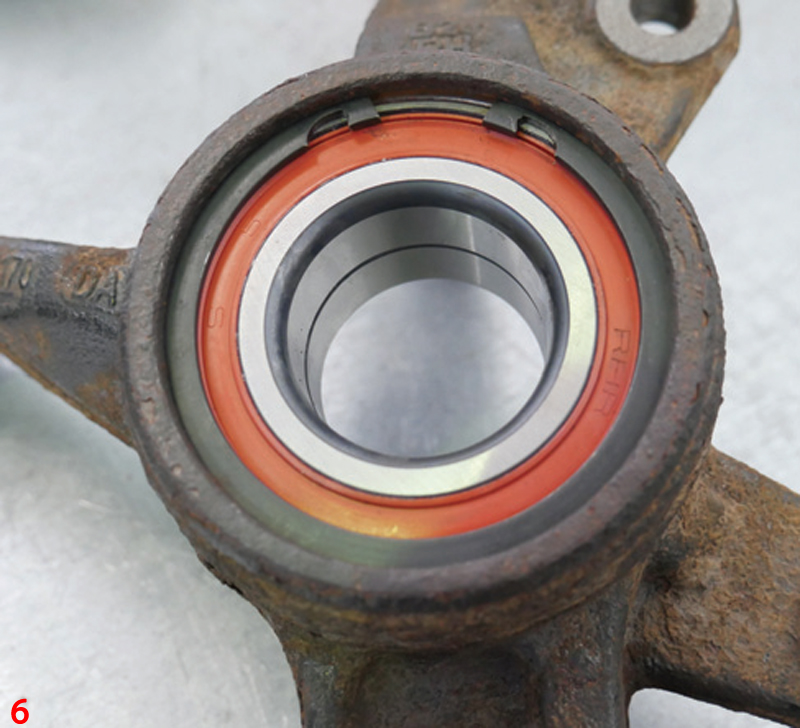
Press the new bearing into the hub assembly but ensure that you press on the outer race of the bearing, so as not to damage the bearing internally. When the bearing is fully in, remove from the press and fit the new circlip supplied (Fig 6).
Now, press the drive flange into the new bearing. With the hub assembly placed on the press, support the underside inner bearing race with a mandrel or press tube, align the drive flange squarely, and press the flange into the bearing until resistance is felt.
Fit the hub assembly back onto the vehicle in reverse order of removal, fit the new hub nut supplied in the bearing kit, and torque all nuts and bolts to the manufacturer’s specification.
Note – remember to press the brake pedal before moving the vehicle, as the front calliper has been removed and may need resetting.
Rear wheel bearing replacement
The time needed to complete this procedure is 0.8 hours. Slacken the wheel nuts, raise the vehicle to waist height, and remove the rear wheel. Then remove the two Torx headed bolts that retain the rear brake drum and the rear brake drum. Using brake cleaner, clear the brake dust from the brake assembly (Fig 7).

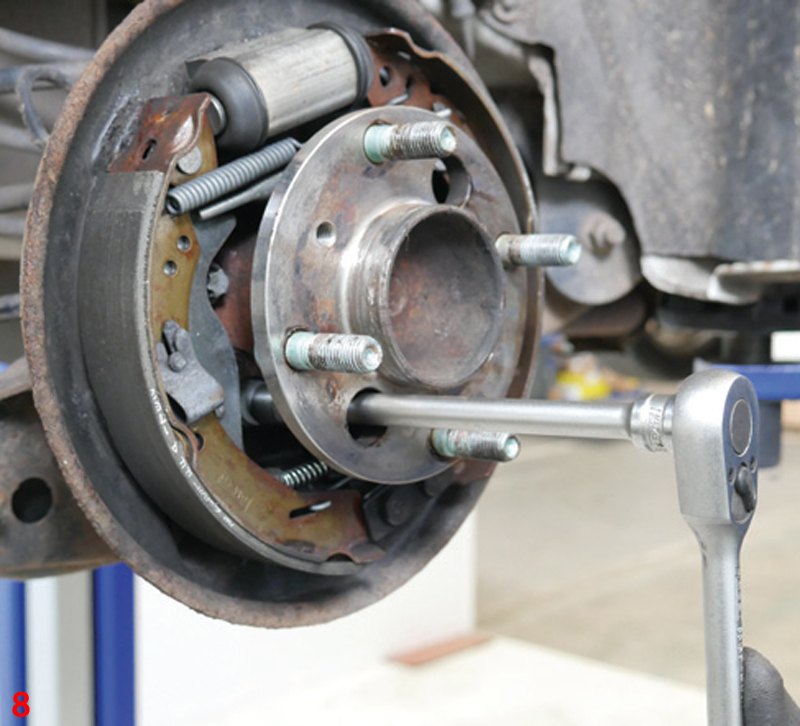
Accessed through the large holes in the hub flange, remove the four Torx head bolts that hold the wheel bearing module to the axle (Fig 8).
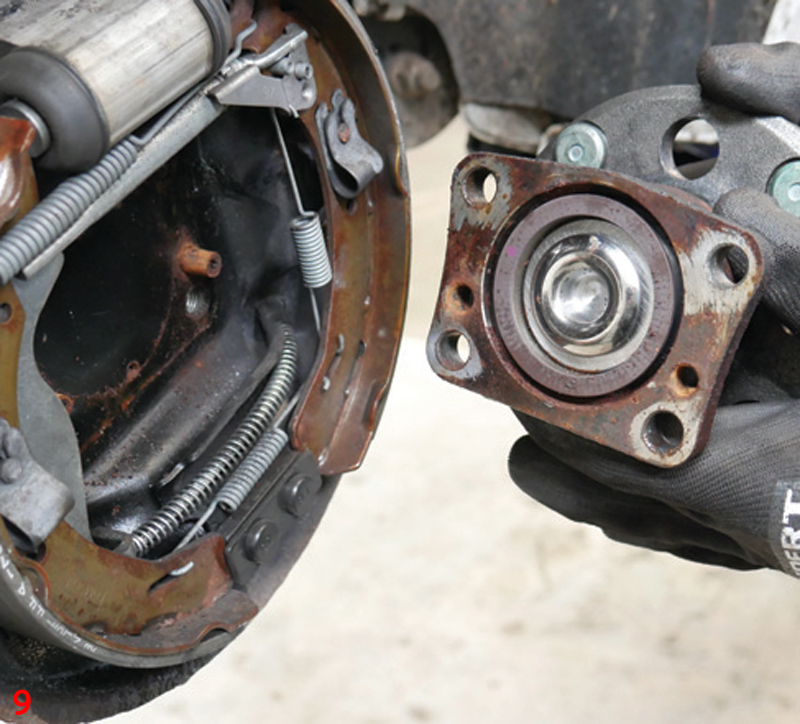
These bolts can be tight, so use a lubricating or penetrating oil where possible. Once the bolts have been removed, ease the bearing module off of the alignment dowels and remove (Fig 9).
Clean the brake backplate area as required and mount the new bearing module onto the dowels (Fig 10), using the new bolts supplied in the bearing kit.

Tighten in an even manner and torque to the manufacturer’s specification. Install the brake drum and rear wheel and press the brake pedal to reset the rear brake. Finally, carry out a road test to confirm the completion of a quality repair.