The experts at ContiTech provide a step-by-step explanation of how to change the timing belt correctly in a Fiat Panda. The manufacturer recommends changing the timing belt every 120,000km/10 years. The labour time is just over one and a half hours.
Preparatory work
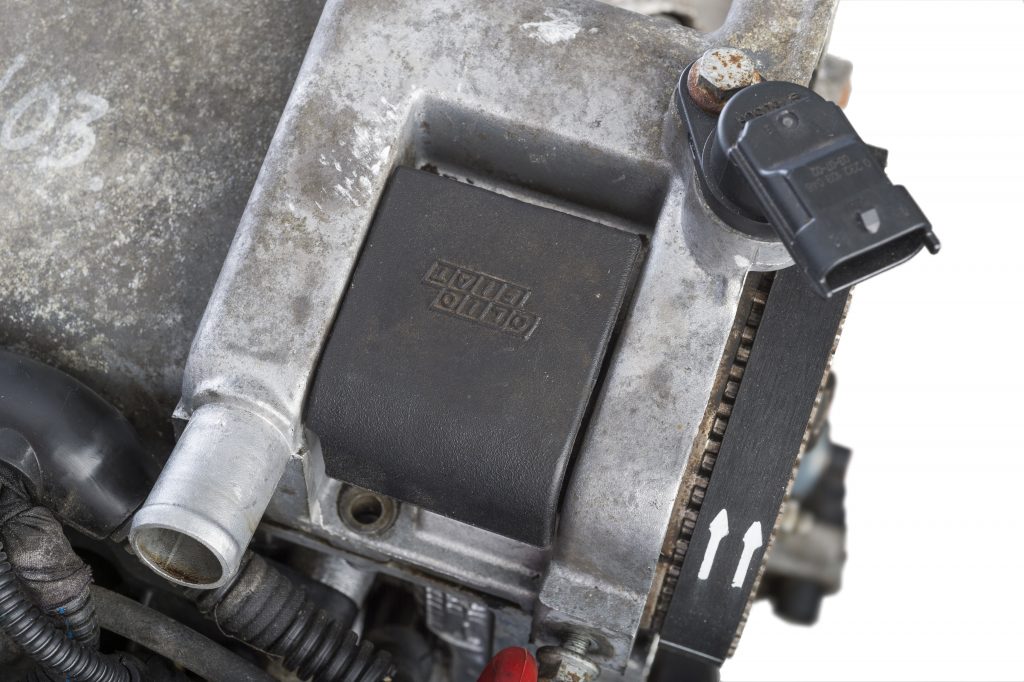
Identify the vehicle using the engine code. Two different engine types may have been fitted. The differentiating feature is the oil filler cap. There are round and square caps. These instructions describe the engine with the square oil filler cap (see below)..
Disconnect the vehicle battery. Do not turn the crankshaft and camshaft once the timing belt has been removed. Turn the engine in the normal direction of rotation (clockwise) unless otherwise specified. Turn the engine only at the crankshaft sprocket and not at other sprockets. Only carry out checks and adjustments when the engine is cold. Avoid contact between the belt and harmful substances, such as engine oil or coolant. Comply with all the tightening torques specified by the vehicle manufacturer.
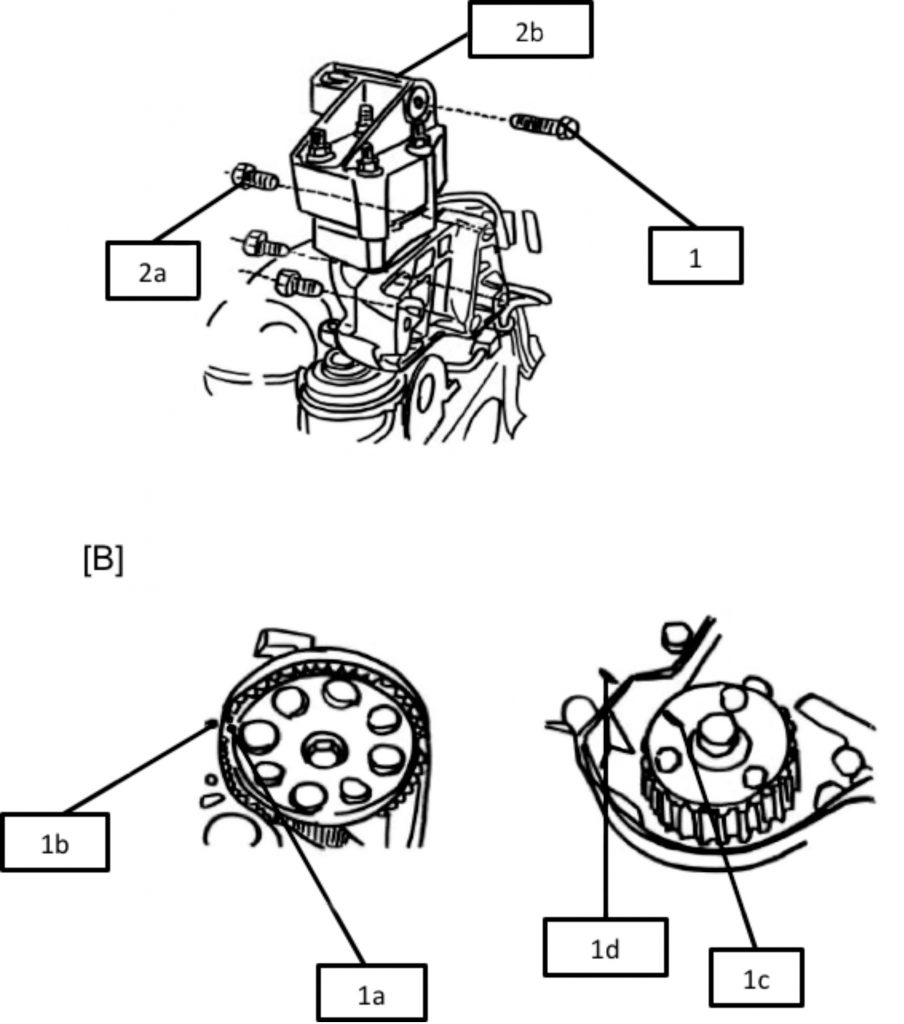
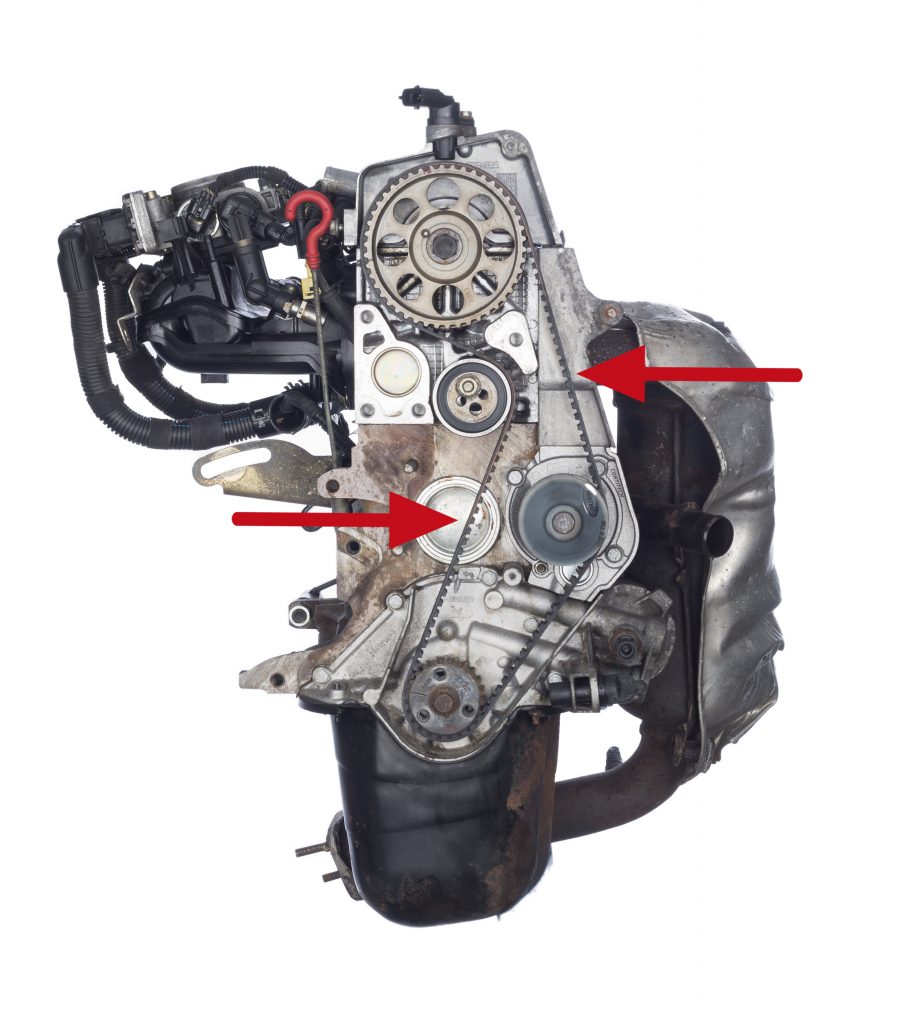
Remove ancillary unit belt, air filter, front right wheel and fender shield, upper and lower timing belt guards, and crankshaft belt pulley. Position the engine support, then secure and support engine. Remove engine mount bolts in the order shown (see below).. Drain cooling water.
Removal – camshaft belt:
1. Set valve timings to TDC mark of cylinder 1.
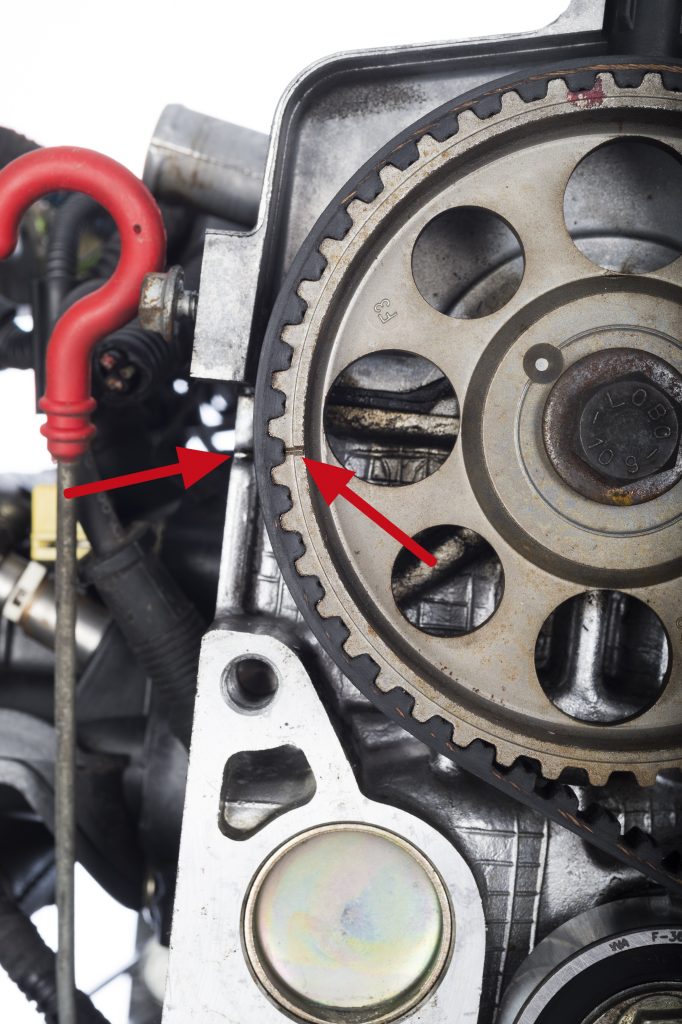
2. The mark (notch) at approx. 9 o’clock position on camshaft sprocket must align with notch in cylinder head (see below)..
3. Check position of crankshaft. Crankshaft sprocket mark (notch) must align with mark (notch) at approx. 9 o’clock position on engine housing (see below)..
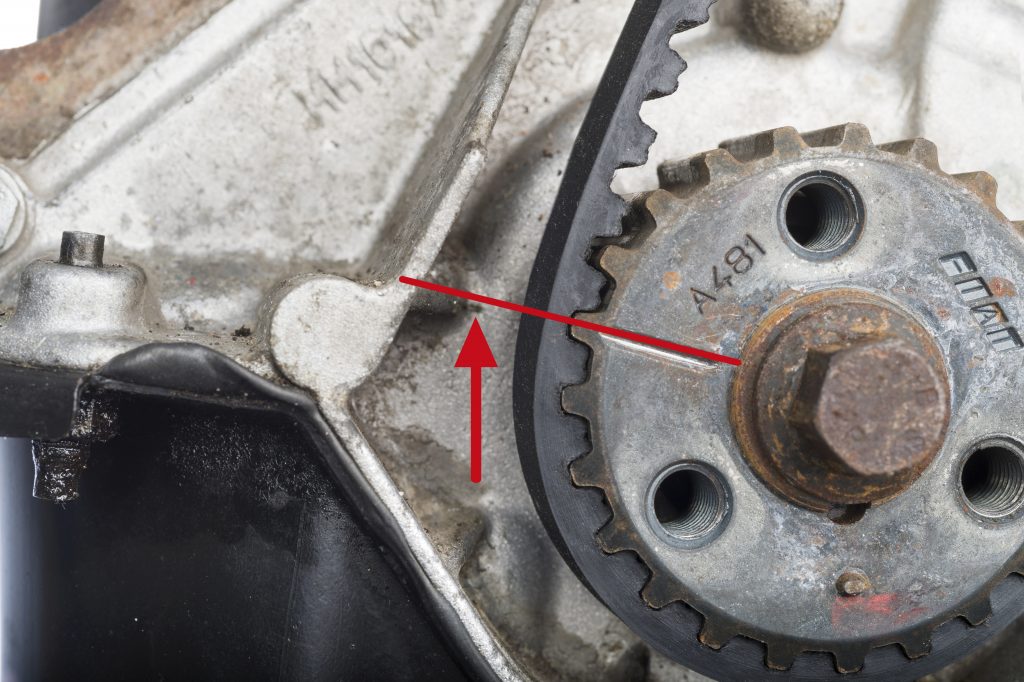
4. Loosen tensioning pulley nut and release tension on timing belt.
5. Timing belt can now be removed.
Installation – camshaft belt:
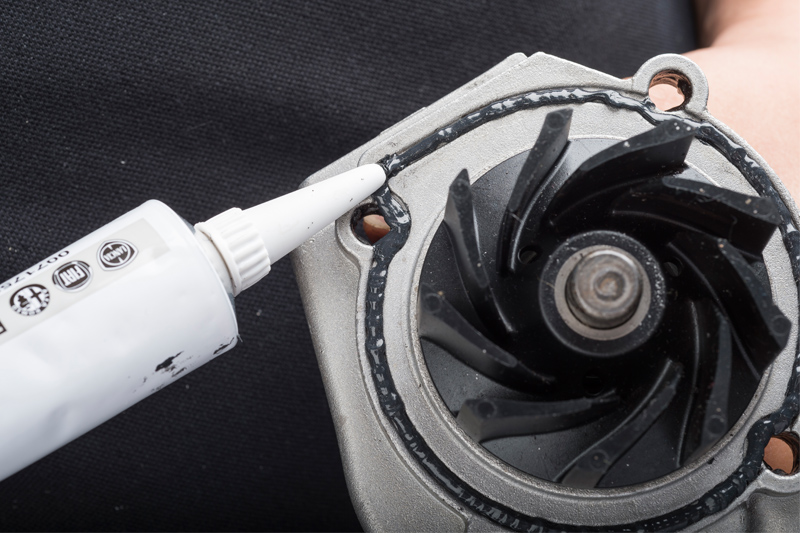
1. Thoroughly clean water pump seal flange on engine block and remove all traces of old sealant. Fit new components from timing belt kit. Sparingly apply sealant to water pump flange groove (see below)..
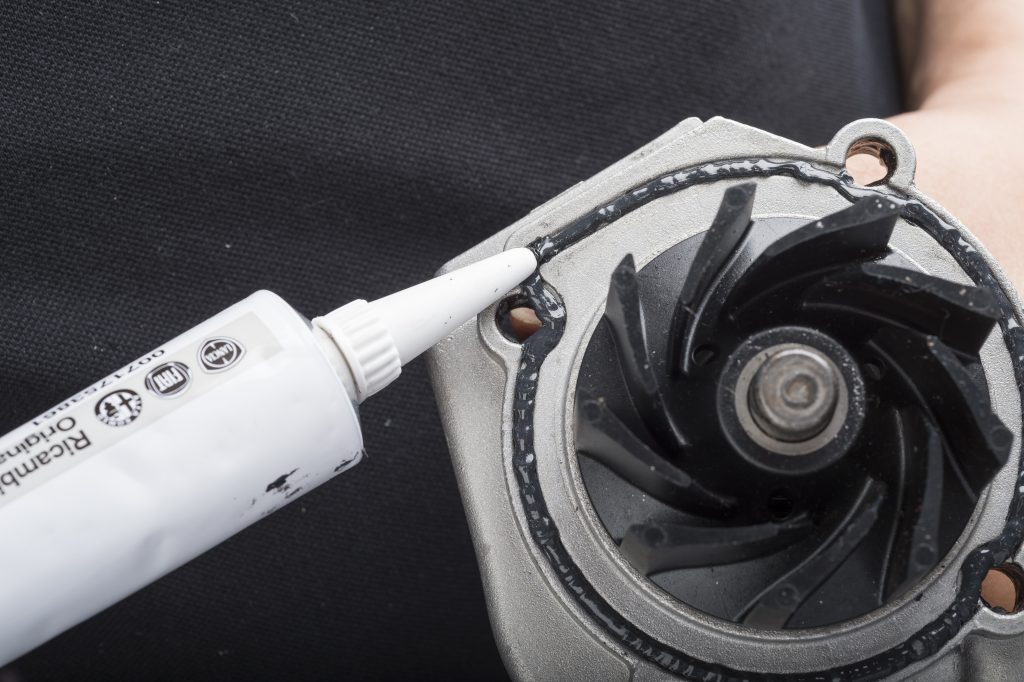
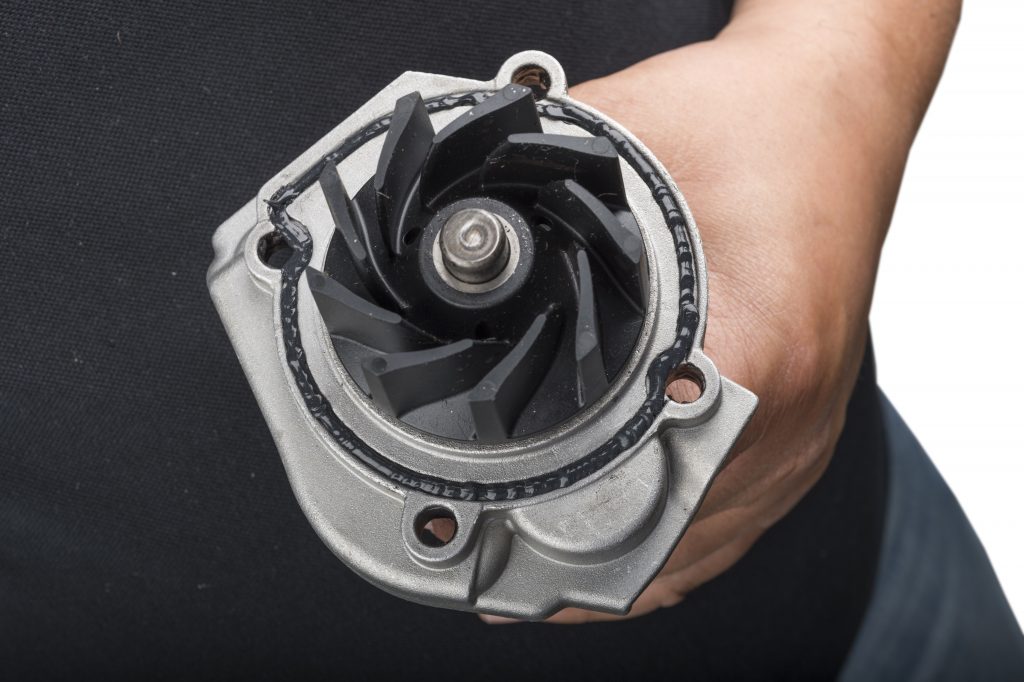
After fitting water pump (10Nm), wait at least one hour before filling with coolant and fitting timing belt (vulcanisation time for adhesive). If this waiting time is not observed, leaks can later occur at water
pump seal surface. Check remaining components such as camshaft sprocket and crankshaft sprocket for damage.
2. Align timing belt at camshaft sprocket with line marked on timing belt and timing marks at approx. 9 o’clock position (notch on cylinder head and notch on camshaft sprocket) and fit on coolant pump, crankshaft sprocket and tensioning pulley in direction of engine rotation (see below)..

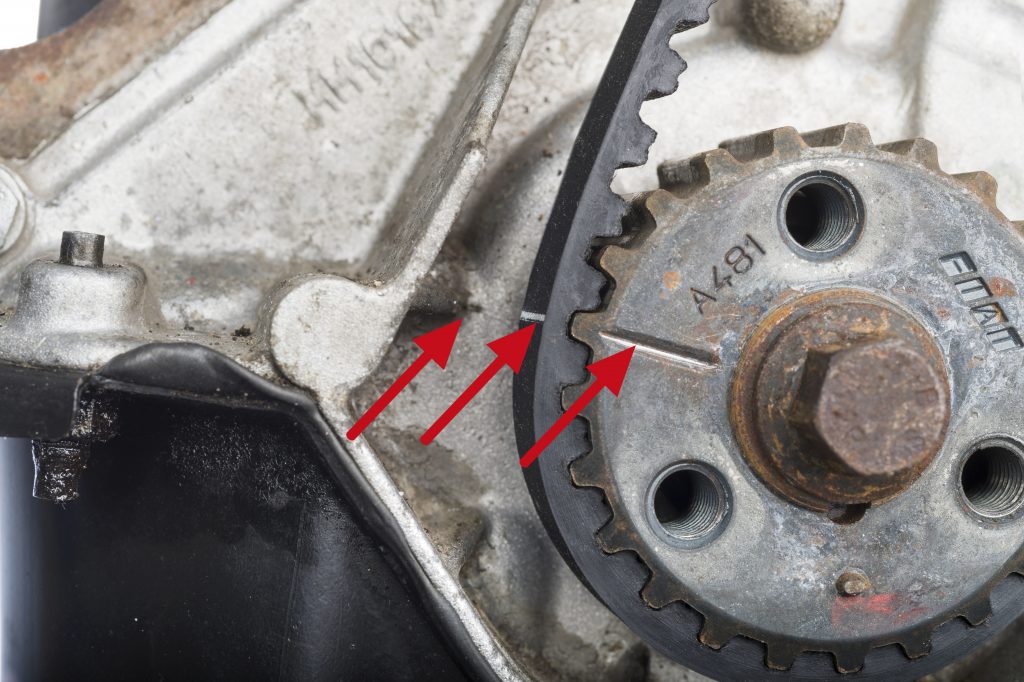
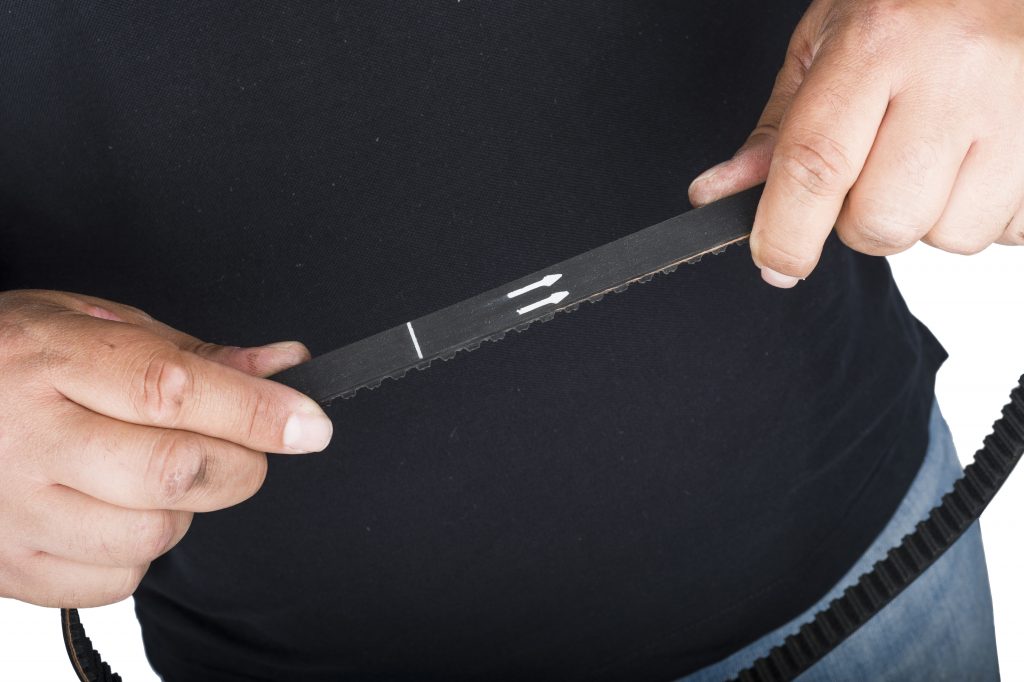
Note the arrow indicating running direction (see below).. Take care to ensure that the timing belt is not kinked during fitting.
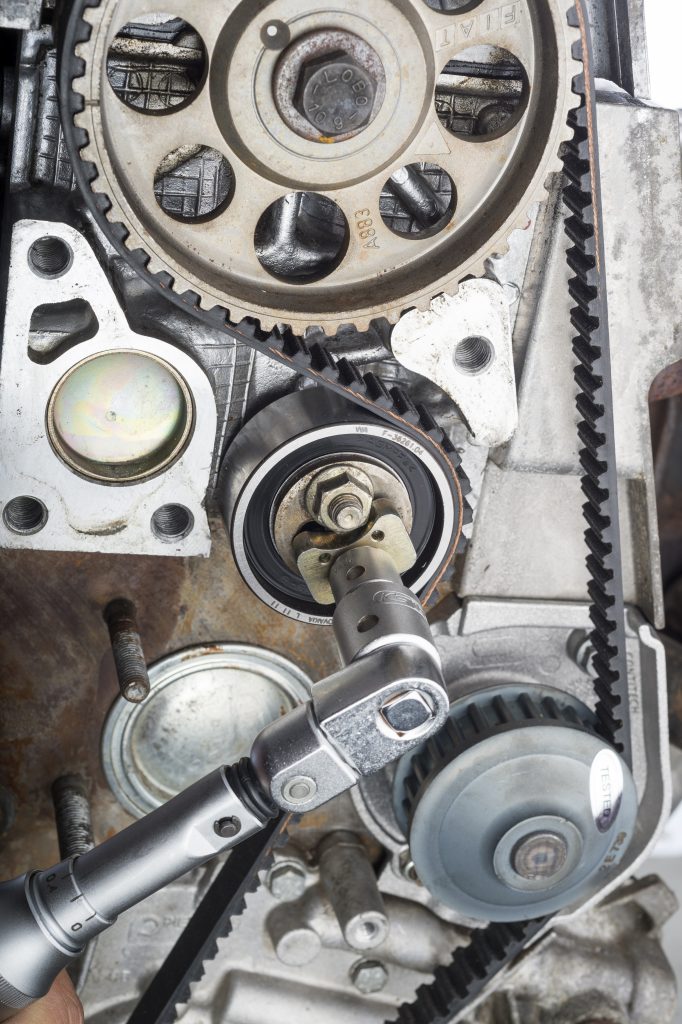
3. Pretension the timing belt via tensioning pulley. To do so, insert tensioning wrench into tensioning pulley, turn tensioning pulley counter clockwise, and tension to either 7Nm (see below). or approx. 250 Hz.
Position measurement head of BTT Hz in correct location approx. 1-2 cm above timing belt. Measure above timing belt (see below). using just one of the measurement head’s microphones – not both, otherwise no reading will be achieved (see below).
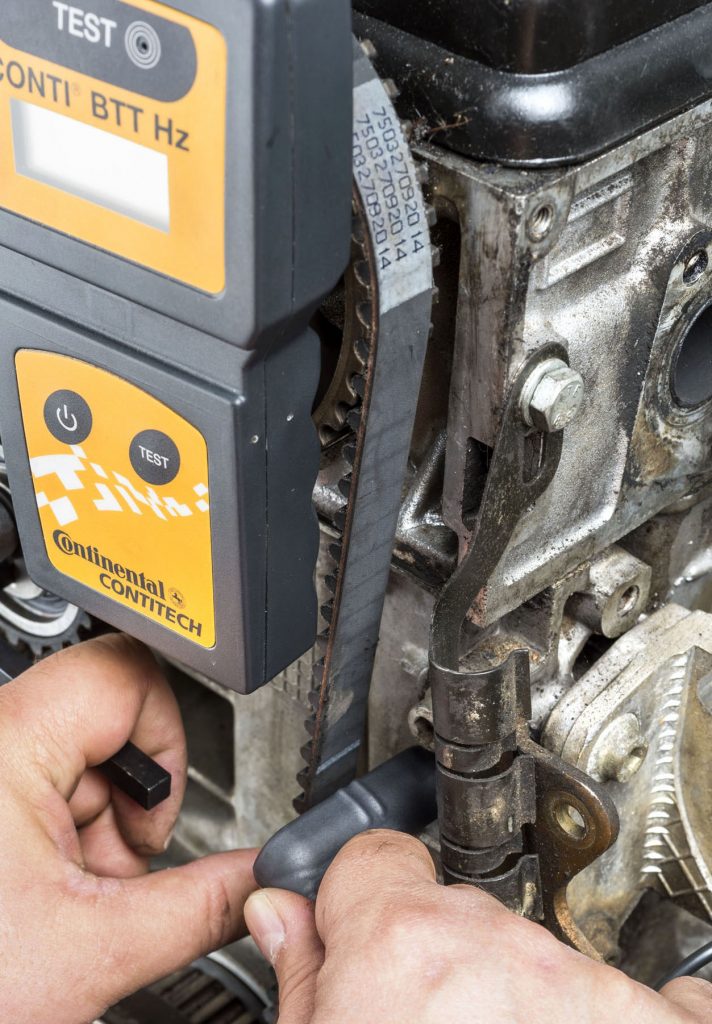
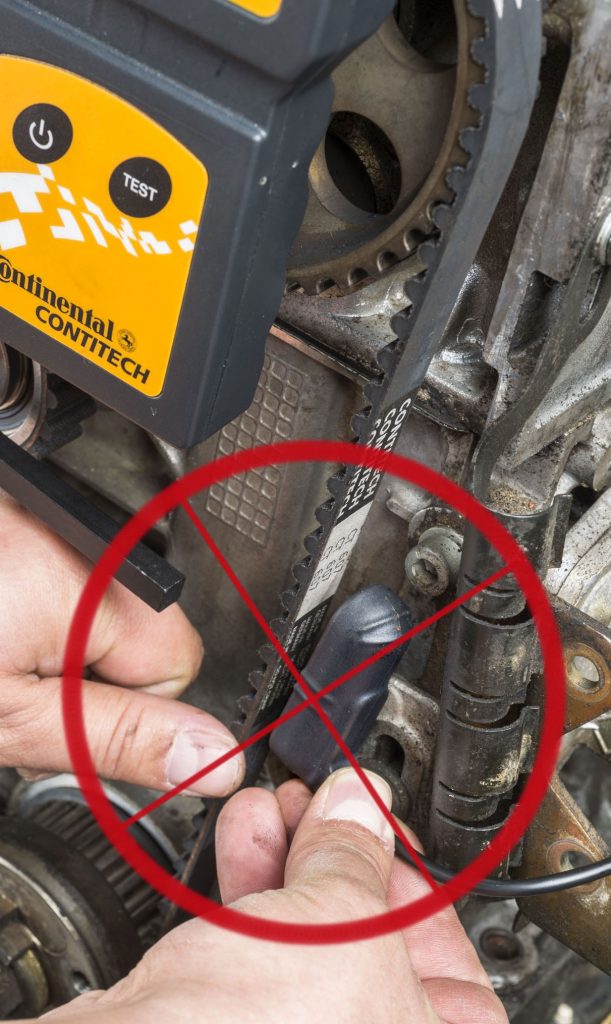
Make timing belt oscillate near measurement head by plucking or flicking it and check hertz reading on BTT Hz display. With this model, two measurements (see below). must be taken and their values then added together (see below).
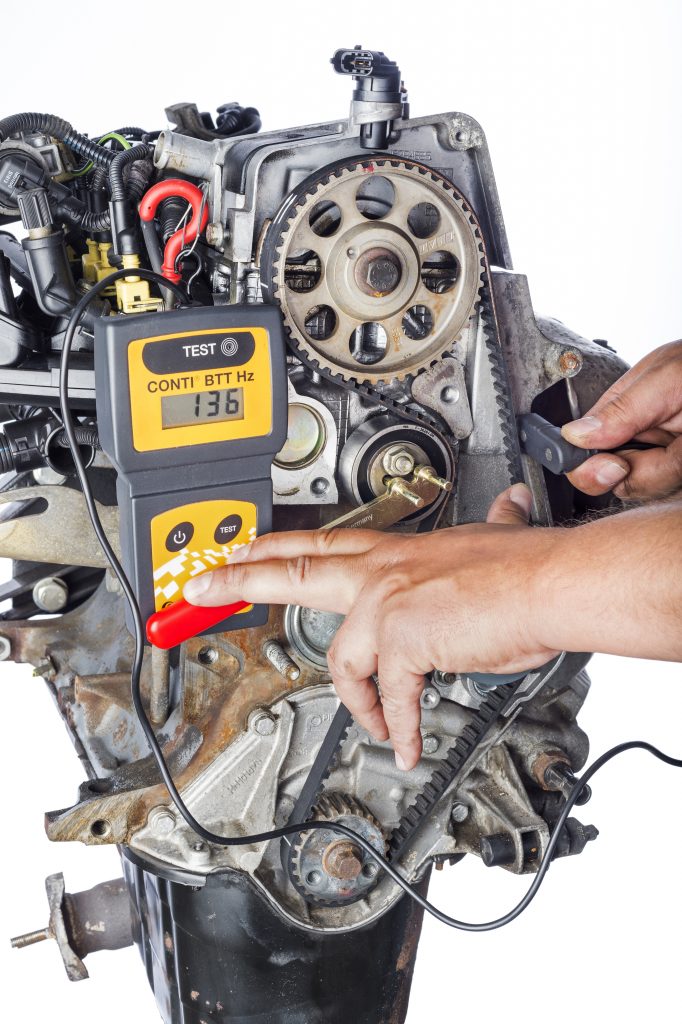
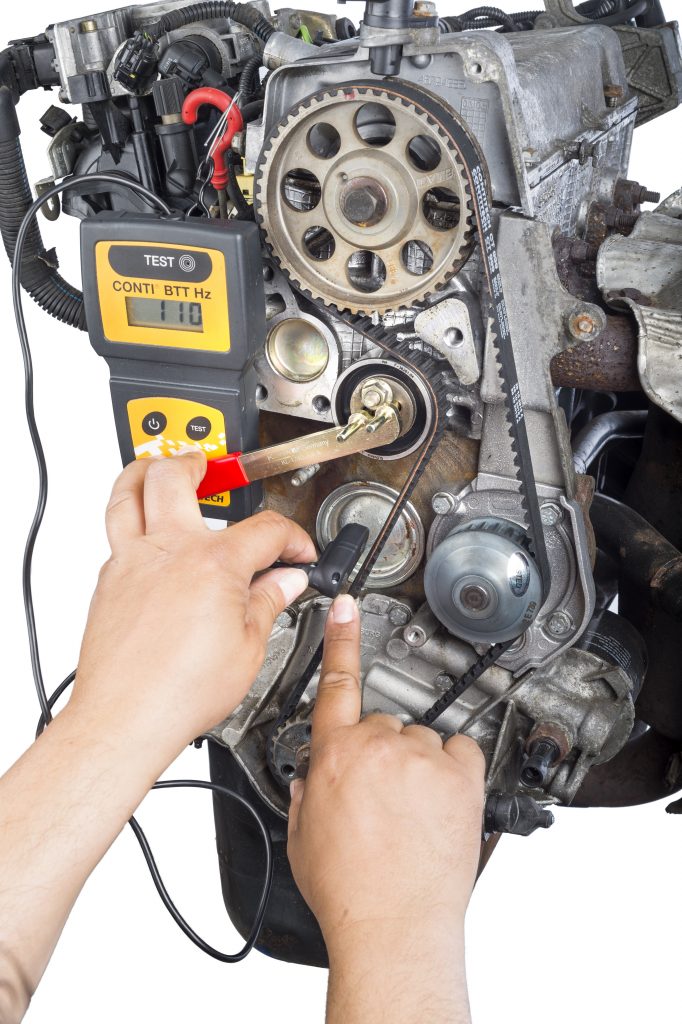
The sum must come to 250Hz. Tighten tensioning pulley nut. Turn crankshaft twice and set to TDC of cylinder 1 again.
4. Once correct tension reading is set, tighten tensioning pulley nut and turn engine through two evolutions in direction of engine rotation.
5. Set valve timings to TDC mark of cylinder 1. The mark (notch) at approx. 9 o’clock position on camshaft sprocket must align with notch in cylinder head. Check position of crankshaft. Crankshaft sprocket mark (notch) must align with mark (notch) at approx. 9 o’clock position on engine housing (see below).
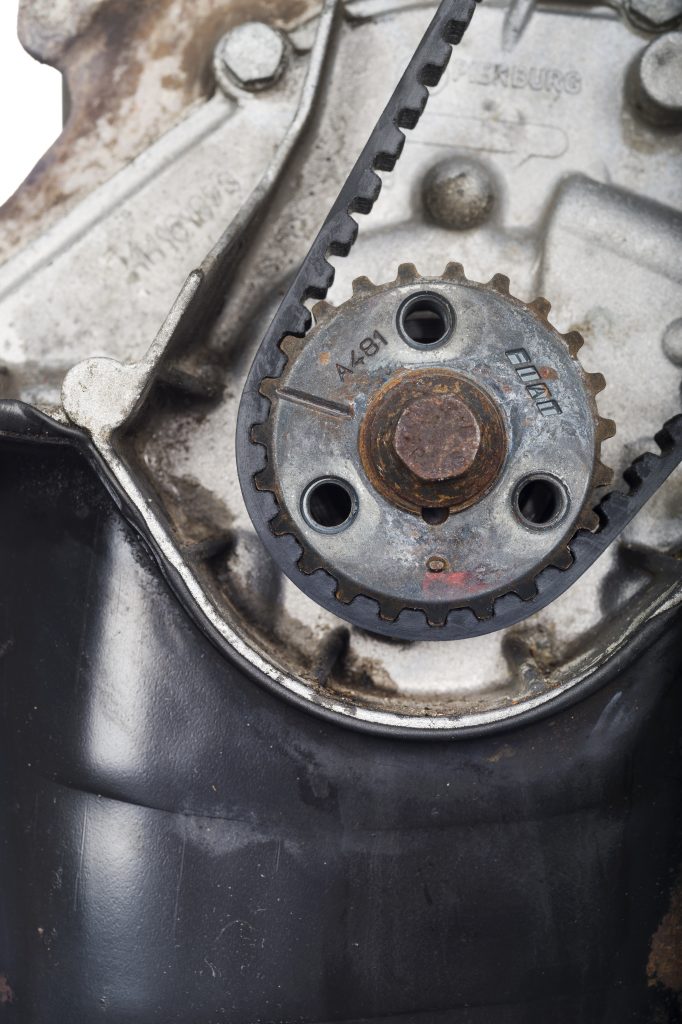
6. Check timing belt tension reading again. Sum of two readings must reach 160-210 Hz. If reading is not correct,turn tensioning pulley counter clockwise until reading isset on display.
7. Tighten tensioning pulley nut.
8. Assembly and finalisation in reverse order of removal. Engine mount tightening torques: M10 x 1.25 = 60Nm, M8 x 1.25 = 22Nm
9. Record changing of original ContiTech timing belt on sticker supplied and stick this in engine compartment (see below).
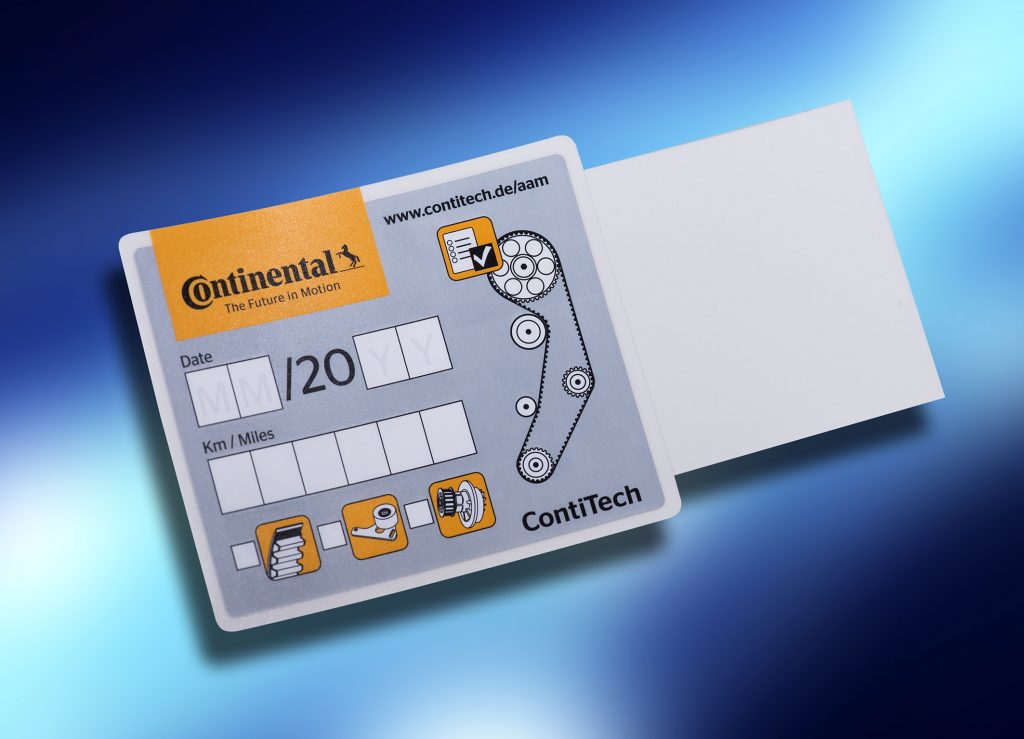
Finally, carry out a test run or test drive.


