
The Skoda Fabia was introduced in 1999 and was built until it was face-lifted in 2007. During this time the Fabia forged itself a reputation for high reliability and quality. The MK1 has sold over 170,000 models in the UK and as a result we are seeing a lot of these models coming into the aftermarket scene. The type of bearing used on the Fabia can be a little tricky to fit because it has to be pressed into the hub and during this process, if done incorrectly, you can damage the bearing prematurely. But don’t worry because the bearing experts at FAG will make it much easier for you with this handy guide.
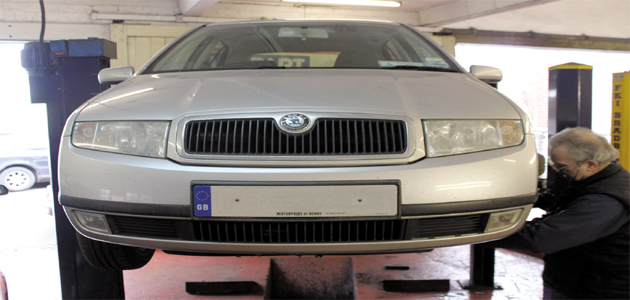
Firstly, check to see if the vehicle has alloy wheels fitted, if it has it may be fitted with anti-theft bolts so you’ll need to find the key. Raise the vehicle on a ramp (although the job could be done on the ground if necessary) and remove the wheel on the relevant side. When possible we recommend that you replace bearings in pairs, as chances are the bearing on the opposite side could be just as worn as the one you are replacing.
Removing the hub
Undo the large hub nut securing the driveshaft and release the shaft from the hub. Undo the two bolts securing the calliper to the hub and remove the assembly and secure it out of the way. Remove the brake disc and the metal bracket securing the brake pipe to the hub.
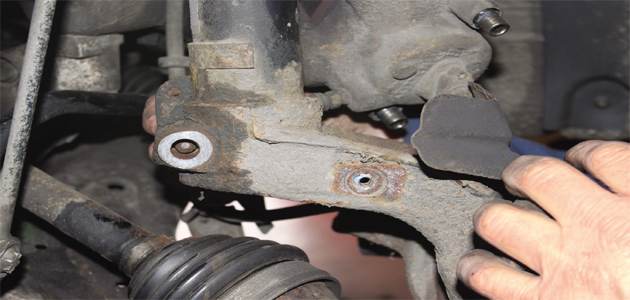
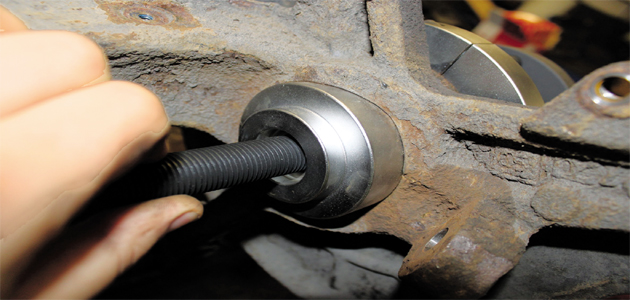
Undo the lower ball joint bolt (pictured below) and release the lower arm from the hub.

Undo the nut securing the steering rack to the hub and release it. Undo the bolt securing the hub to the suspension strut (pictured below) and release it from the strut.
For easier access you can undo the anti-roll bar link attached to the suspension strut as it will enable you to manipulate the strut better.
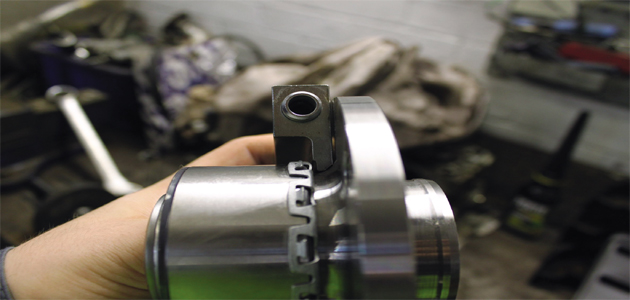
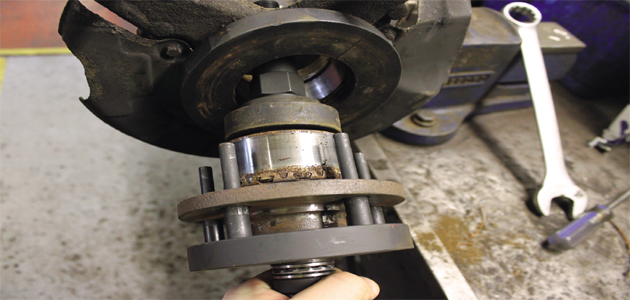
With the hub removed the bearing can now be pressed out of the hub. In this article we are using a special tool which is able to extract the bearing from the hub and press it back in. For safety reasons it’s a good idea to reattach the lower arm if you are using the tool on the vehicle, this will ensure that the hub is more secure. Place the pressing pins into the correct five or four stud arrangement and slide the two-piece collar (pictured below) around the bearing.
Bolt the tool to the hub (pictured below) and start to tighten the tool using a socket or spanner.
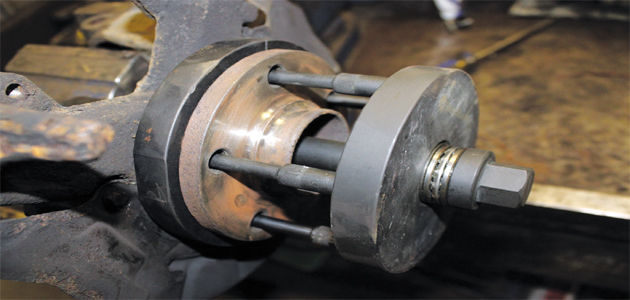
This will start to pull the bearing out of the hub (pictured below).
Important checks
Once the bearing has been removed, take time to check that the hub profile is perfectly round and not damaged. The outer race of a bearing will always take the shape of the hub its being pressed into, so if the hub has been damaged and is not perfectly round this could prematurely wear the bearing over time. You will also notice that the old bearing had a locking ring around the outside which has now broken (pictured below).
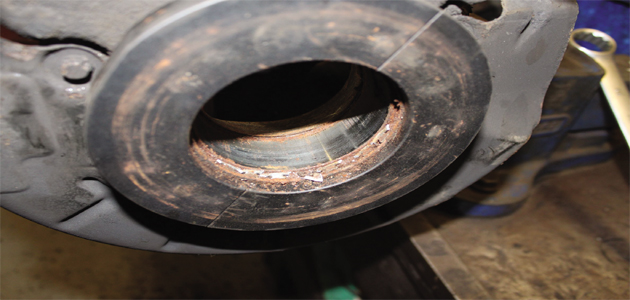
This is completely normal as the new bearing will have a new clip fitted to it. But don’t forget you will need to make sure that all the remnants of the old clip are removed from the hub.
When you fit the bearing into the hub, make sure you press on the outer race and not on the flange. By doing this you ensure that the pressing force is not transmitted through the balls or rollers in the bearing but only through the outer race. In our case, we are using the tool to ensure this happens. To fit the bearing, install the collar around the new bearing and mount the pressing pins onto the ring through the holes in the flange. Offer the bearing up to the hub and bolt the assembly in place (pictured below).
The tightening of the tool will now press the bearing into the hub and you will hear a loud ‘click’ as the locking ring locates into the hub assembly. Fitment of the remainder is the reverse of the removal.


