Introduced in 2003 the Volkswagen Transporter T5 has sold over 63,000 models in the UK. A popular vehicle in the aftermarket, a cam belt replacement on the VW is an ideal repair for the independent garage business. INA (suppliers of OE tensioners and idlers for 90% of the vehicle manufactures in Europe) take a closer look at the Transporter fitted with the BRR diesel engine.
The engine on these vehicles has been identified as an interference type so the likelihood of engine damage if the cambelt breaks is very high. Before carrying out any work, disconnect the battery earth cable. It is important that belt installation is performed on an engine at ambient room temperature. Always turn the engine in the normal direction of rotation only and recommended manufacturer torque values should always be used. It should also be noted that it is recommended to change the tensioners and pulleys when replacing the cambelt.
A two-post ramp is ideal for carrying out the replacement and it is vital that the appropriate timing belt replacement tools are used; these are readily available from most motor factors. If the vehicle is equipped with alloy wheels then chances are it’ll have locking wheel nuts/bolts, so it’s a good idea to locate the adapter key for these before you start.
Removal
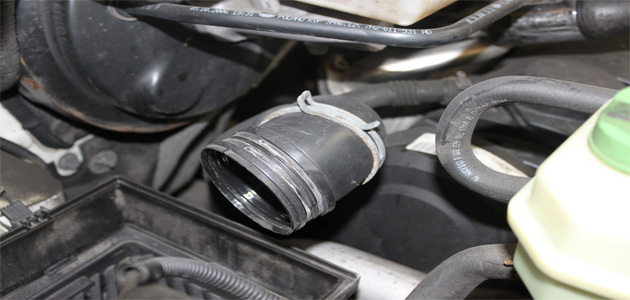
Open the bonnet, remove the engine cover and unplug the MAF sensor near to the airbox. Release the clip (pictured below) from the plastic air intake pipe and disconnect it from the air filter housing.
Unclip the upper part of the air filter housing and remove it. Remove the lower air filter housing by undoing the bolt fixing. Give it a sharp pull to remove it as its attached to the body with push fit rubber fixings (pictured below).
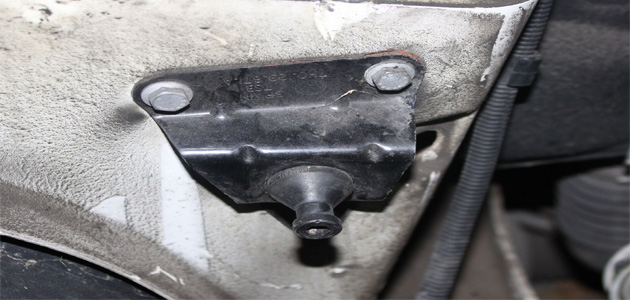
Release the remaining clips connecting the plastic air inlet pipe to the turbo and the cam cover and remove the pipe. Undo the bolt securing the metal inlet pipe and release the clips at either end and remove it. Support the engine and remove both parts of the engine mounting bracket.
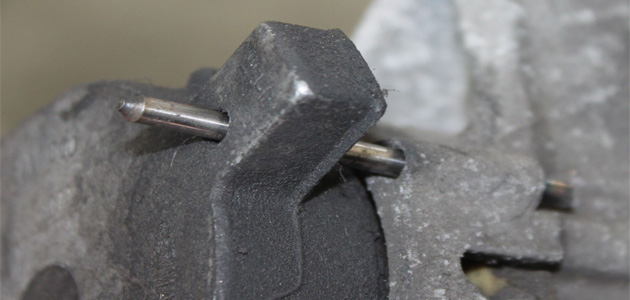
Raise the vehicle in the air and remove the O/S wheel. Undo and remove the engine under-shield and the O/S wheel arch liner for better access. Release the tension on the auxiliary belt and lock the tensioner with a pin (pictured below). Remove the auxiliary belt and the tensioner. Remove the upper cam belt cover and the bolts securing the crankshaft pulley and the pulley itself. Remove the remaining timing belt covers.
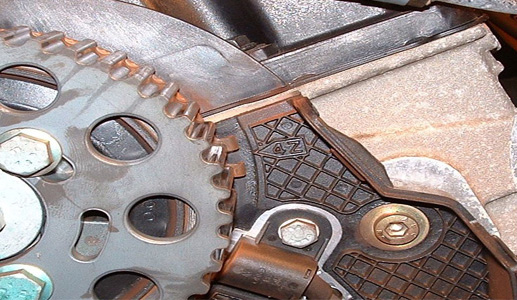
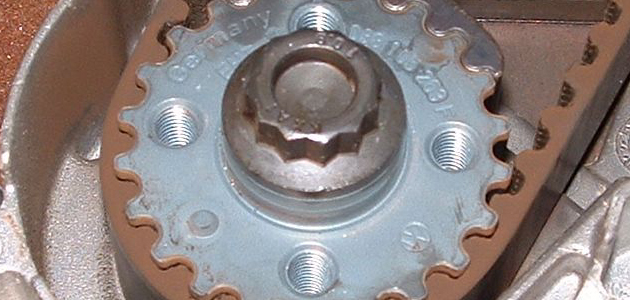
Turn the crankshaft to TDC and ensure that the timing mark is aligned with the notch on the camshaft hub (4Z) (pictured below).
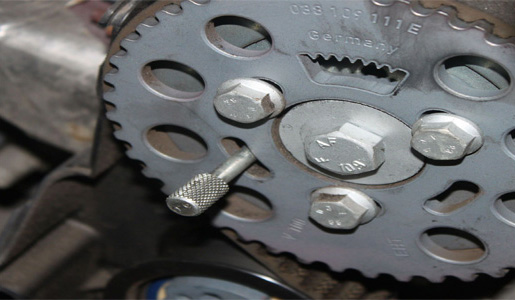
Lock the crankshaft (pictured below, left) and the camshaft (pictured below, right) with the locking tools and check that the marks are aligned. Slacken the camshaft sprocket bolts and the tensioner pulley nut. Turn the tensioner anti-clockwise and remove the timing belt, tensioner and relevant components.
Installation
Ensure the locking pin is fitted to the new tensioner and install it, making sure the lug has located correctly into the back of the timing belt cover. Fit the timing belt clockwise, starting from the crankshaft. While doing this ensure that the bolts remain at the centre of the holes on the camshaft pulley.
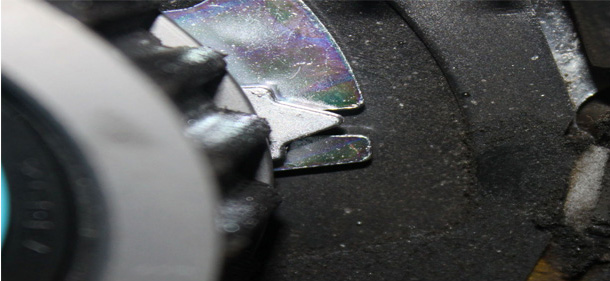
Remove the locking pin and turn the tensioner clockwise until the reference marker reaches the notch (pictured below). Tighten the tensioner to the manufacturer’s recommended torque. While holding the camshaft pulley, tighten the bolts to the correct torque and remove the timing tools. Rotate the engine two turns clockwise, ensuring that the timing tools can be reinserted without a problem. As a final check, make sure that the (4Z) markings on the camshaft and the timing tools all align and that the tensioner is still aligned with the notch. If they don’t you will need to repeat the above process again and re-check until they do.
Installation is the reverse of removal. Before re-fitting the auxiliary drive belt check its condition and all its driven components for excessive wear, and consider replacing them. As with any drive belt replacement, before starting the engine it is advisable to turn the engine in the direction of rotation a few times from the crankshaft to make sure the engine doesn’t lock up or any abnormal noises are heard.