Although perhaps not the most common of vehicles, there are still many Daewoo’s traveling the length and breadth of the country, so they are not infrequent visitors to the service bays of the independent workshop. Therefore technicians need to be aware of one of the peculiarities that can affect a number of engines, including the 1.4 and 1.6 16v in the Aranos/Espero/Kalos/Lacetti/Lanos/Nexia/Nubira/Rezzo/Tacuma model range, when undertaking a timing belt change during a scheduled service.
On these engines the timing bel t tensioner is mounted alongside the water pump and in order to achieve the correct tension of the belt, the adjustment has to be made via the water pump.
Unfortunately it is not uncommon for the replacement belt to be installed at the incorrect tension because although the technician may have gone through the right procedure, they have undertaken the process on a hot engine.
As a result, when the engine is cold the tension of the belt is too low, which means that during the warm up of the engine the belt will ‘flap’ in the drive. This can cause the pointer on the tensioner to make contact with the end stop and break, and result in the failure of the belt, which could also lead to major engine damage. It is therefore vital that timing belt replacement on this engine is undertaken when the unit is cold and Dayco’s technical bulletin (T10143EN), gives technicians some useful installation tips to prevent premature failure from the belts fitted at low tension.
Tensioner assembly and tensioning procedure
Dayco recommends fitting a full timing belt kit and water pump when undertaking a timing belt replacement and the KTBWP5591 is the kit for this application. The timing belt kit will ensure that the technician installs a new tensioner and a new idler with the timing belt; it’s a small cost to bear for an excellent precautionary measure.
Important note: remember to operate on a cold engine.
Make sure the timing notches on the camshaft pulleys and the crankshaft are correctly aligned and thread the timing belt anti-clockwise, starting from the crankshaft pinion, making sure that the belt is properly tensioned. Using th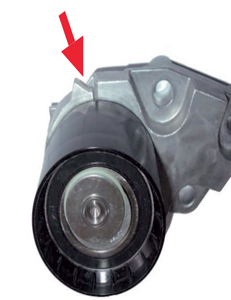 e appropriate tool (J-42492 or KM-421-A), rotate the water pump clockwise to tension the belt. The belt tensioner indicator, in its release position, should rest against the stop on the right (shown right).
Slightly tighten the water pump bolts and then rotate the crankshaft clockwise by two turns and make sure the timing notches are still aligned. Loosen the water pump bolts and rotate the water pump anti-clockwise until the tension indicator is aligned with the matching indicator on the plate (see below, left).
Tighten th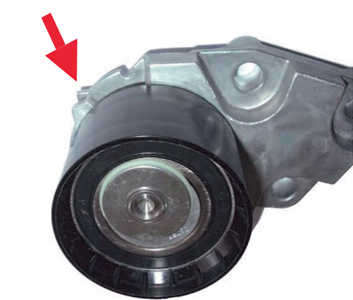 e water pump bolts to a toque of 8-10 Nm and reassemble the other components in the reverse order of their disassembly. Finally, tighten the crankshaft pulley bolt to a torque of 95Nm + 15º/30º.
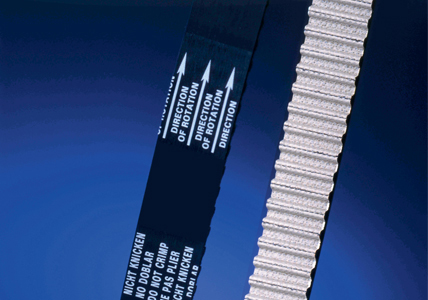
Dayco High Tenacity belts
The Dayco High Tenacity (HT) range incorporates a complex structure that features fabric that is coated with a PTFE film, which is highly resistant to abrasion and is designed to reduce the wear on the lap and sides of the pulley teeth. By adopting this technology, Dayco is able to guarantee the service life of its HT belts for two years. However, by fitting a HT Timing Belt Kit, the workshop can extend the standard warranty from two to three years, providing peace of mind to both the technician and the motorist.
The simple five-step procedure to register for the Long Life + 1 year certified warranty extension couldn’t be easier; just register online, enter the serial number from the HT Kit pack’s label and the details of the vehicle, accept the terms and conditions, confirm the data and print off the extended warranty certificate.


