
Technicians are regularly reminded of the importance of ensuring that a new timing belt is fitted correctly. Unfortunately, the same thought is rarely given to the auxiliary belt, even though the failure of this can sometimes be equally catastrophic.
The auxiliary belt has been integral to the internal combustion engine for the last 100 years and is often overlooked as a product that does not need any particular technical direction or training. The demands of the auxiliary belt are increasing with the growth in ancillary components such as air conditioning compressors and start-stop alternators.
Dayco is committed to promoting best practice, even for the humble auxiliary belt. Although ‘elastic’ belts such as the Poly-V Elastic range need no tension adjustment, it is essential that the technician installs it using the correct tools to avoid causing damage during the fitting process. Historically, many technicians have simply ‘hooked’ these belts onto the pulleys using a screwdriver or a wrench which can cause serious damage, often resulting in the failure of the belt. Although on first thought an auxiliary belt failure might be considered an inconvenience rather than a disaster, it is worth taking a moment to consider that in many cases timing belt failures are caused by a foreign body, such as part of an auxiliary belt entering the timing belt drive.
To avoid damage to the replacement belt, Dayco has introduced an installation tool with the code Tool 6, which covers almost all of the 28 Poly-V Elastic (PVE) belts in the range. However, as an example of its commitment to help guide technicians to use the right tool for the job, it includes a disposable fitting tool with its PVE001 and PVE002 belts, which fit various Ford 1.4, 1.6 petrol Focus/C-Max applications. With the use of these tools, technicians can complete the job without crimping, nicking or causing any other sort of damage to the belt, and without harming the running surface of the pulleys.
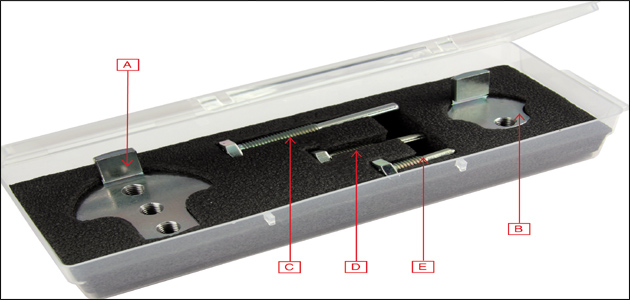
They will also ensure that the replacement is completed in the most time-efficient manner, which saves the workshop money in two ways; a) the job is completed correctly without the fear of a subsequent warranty claim and b) it is quicker, and therefore a more profitable job to undertake. Technicians need to choose the installation tool (A or B) and the pin (C, D or E) that is best suited to the diameter/depth of the pulley onto which the elastic belt is to be installed (see image below).
Installation process
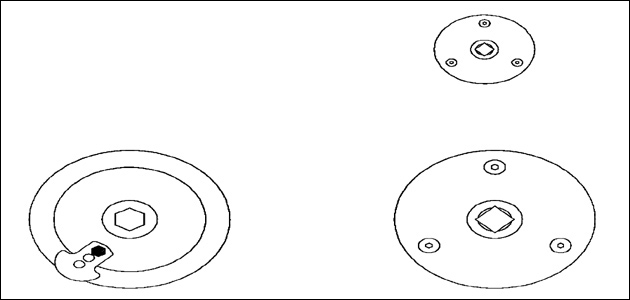
To allow the tool to be securely held on the pulley, fasten the pin in the threaded hole in the installation tool until the installation tool is parallel to the pulley (pictured below).
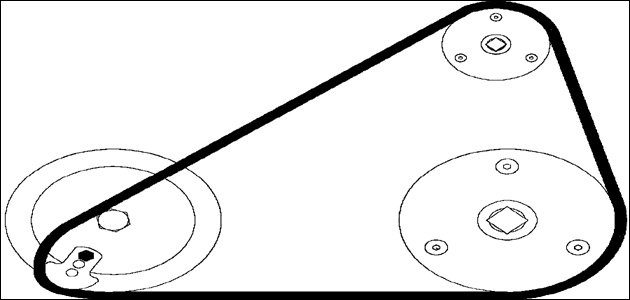
Install the elastic belt on the related pulley, positioning it over the installation tool (pictured below).
Holding the installation tool in position, carefully rotate the pulley with a suitable socket wrench (pictured below).
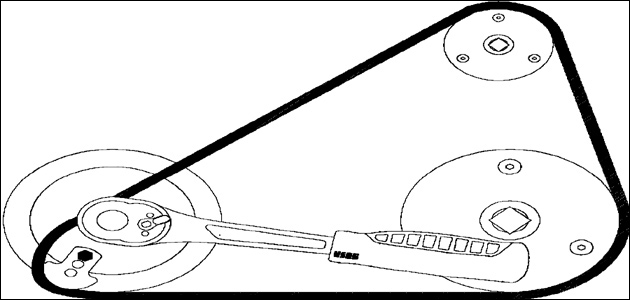
Making sure it does not snag on any protruding components, keep on gently rotating the pulley until the belt is perfectly seated on the pulley and runs parallel to all the pulleys (pictured below).
By following this simple process in conjunction with the right tool, the technician can relax in the knowledge that they have installed the belts quickly and correctly. And by simplifying the tooling process Dayco is able to provide direct benefits to the workshops, as they need just the Tool 6 to cover the same applications that can sometimes require six separate tools.


