
Before replacing any electrical or electro-hydraulic steering systems or their components, you must make sure that you have all of the required diagnostic tools to check and reset the system. Without these tools the system will either suffer limited functionality or not function at all once the repair is made.
Rule 1: Always check the replacement
The first rule is to always make sure you check the replacement parts you have ordered are the correct ones, before you remove any parts from the vehicle. It is best to physically compare the new parts with old parts. If they’re different in any way, discuss with your supplier and do not proceed.
Rule 2: Ensure the fluid is changed
The second rule when changing either a steering rack or pump, or both, is that the fluid must be changed irrespective of its age or condition. All too often, this important step is missed, either for time or cost reasons, but it really is false economy.
Not changing the fluid can result in ‘debris’ from the original failed system being present in the fluid, contaminating the new replacement rack and/or pump. So whenever a new rack and/or pump is fitted, the old fluid must be completely removed/drained, and the system re-filled with new fluid of the correct specification, in accordance with the vehicle manufacturers’ instruction.
The process
1) Make sure the working area is clean – the utmost cleanliness is required when carrying out all work on the hydraulic, electrohydraulic and electrical power steering.
2) Once you have checked the parts are correct and the system has been drained, commence with the disassembly, carefully following the vehicle manufacturer’s schedule. Make a note of the routing of any cables and pipes so that you can put everything back together in the correct order and place.
Disassembly
a) Before removal, move the steering gear into the centre position and secure it to prevent it from turning;
b) Use a suitable pan to collect the hydraulic oil. Do not re-use drained-off hydraulic oil;
c) Remove the steering gear, observing the position of the corresponding parts;
d) Racks being returned for remanufacture should have all ports plugged, return tags attached and be returned in the original packaging;
e) In case of contamination, the hydraulic lines must be flushed using the hydraulic fluid recommended by the manufacturer (do not use compressed air). Always refer to the vehicle manufacturers’ specifications.
Important note: some steering systems have identical thread connections for the pressure and return pipes. In this case it is easy to mistakenly cross the connections – which has
an adverse impact for the steering system because the pressure on the return pipe connection can damage the internal seals. This sort of damage can be avoided if the positions of the connections are clearly marked before disassembling the steering system.
Assembly
Once dismantled, the fitting of the new part is the reverse of the previous procedure, with the following important notes:
■ Check that the rack is set to the straightahead position before installation;
■ Hoses must not have tension and must be aligned to ensure they won’t chafe;
■ Assemble tie rods and axial rods using the torque settings as recommended by the vehicle manufacturer.
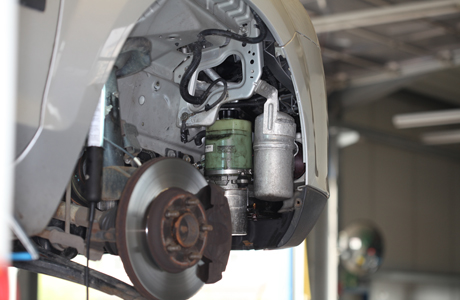 The new steering pump is fitted to the car
Now to the next stage which is very important: Across Europe, TRW hears of more repair issues involving steering systems than for any other TRW component system, and the major problem seems to be related to the correct bleeding of air from the system after replacement and fluid change. Admittedly the procedure takes time and care, and needs the assistance of a colleague, but the individual steps in the process must be carried out carefully. They are as follows:
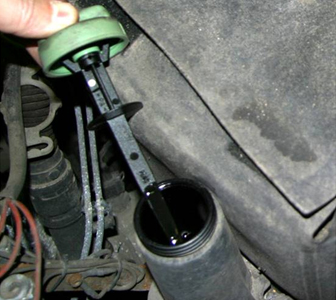
1) Before connecting the pressure and return pipes, new hydraulic fluid is filled into the reservoir, and then run off into a collecting vessel to dispel any old fluid;
2) The return pipe is then closed, the pressure pipe must lead into a collecting vessel, and the equalising tank must be filled with new hydraulic fluid;
3) The starter is then turned, without starting the engine, and at least one litre of hydraulic fluid is added, with constant monitoring of the level;
4) The return pipe is opened again and both pipes are connected to the steering system, using new seals;
5) Fill the reservoir with hydraulic fluid to the maximum mark;
6) Start the engine and run in neutral, paying specific attention to the fluid level;
7) Raise the car so that the front wheels can turn freely;
8) Turn the steering wheel evenly 10 to 15 times from one lock to the other, but do not leave at full lock for more than 5 seconds. During this time a colleague must monitor the fluid level;
9) The colour and consistency of the hydraulic fluid is checked: if the fluid is light brown, light red, cloudy or frothy, this means there is still air in the system. All steps are then repeated. But a waiting time of at least 30 minutes must be adhered to between attempts at bleeding (turn off the engine at this time).
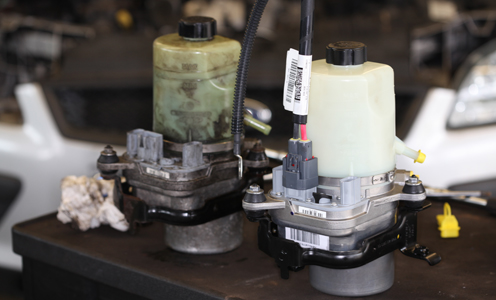 This image shows the old (left) and new (right) steering pumps
Assuming your bleeding procedure has been successful, the next steps then apply:
a) Fill the reservoir with hydraulic fluid to the maximum mark;
b) Clean the areas around the connections of the hoses and pipe (take care to maintain cleanliness at all times when replacing steering system components);
c) If necessary, activate the steering system with the service tester, calibrate it and make a final diagnosis of error codes.
Note: any stored fault codes from the old pump must be cleared before the new pump
will function correctly;
d) Carry out a test drive;
e) Check and adjust the steering geometry if required.
The repair manuals of the motor manufacturer must be followed at all times.
Remember, whenever you purchase a replacement rack or pump, make sure you also obtain some replacement fluid as no rack or pump should be fitted without replacing the fluid!
Other top tips for technicians
■ Clean all hydraulic connections before disassembly;
■ Check the plug contacts for damage and corrosion. Changes to the plug connectors and cables MUST NOT BE MADE;
■ Split pins, port connection sealing/cutting rings and self-locking nuts and bolts must always be replaced;
■ Check existing tab washers and replace if necessary;
■ Thread locking liquid should be applied to the axial rod before assembly to the rack – always follow the instructions of the thread locking liquid manufacturer;
■ Never weld or straighten steering and suspension parts.


