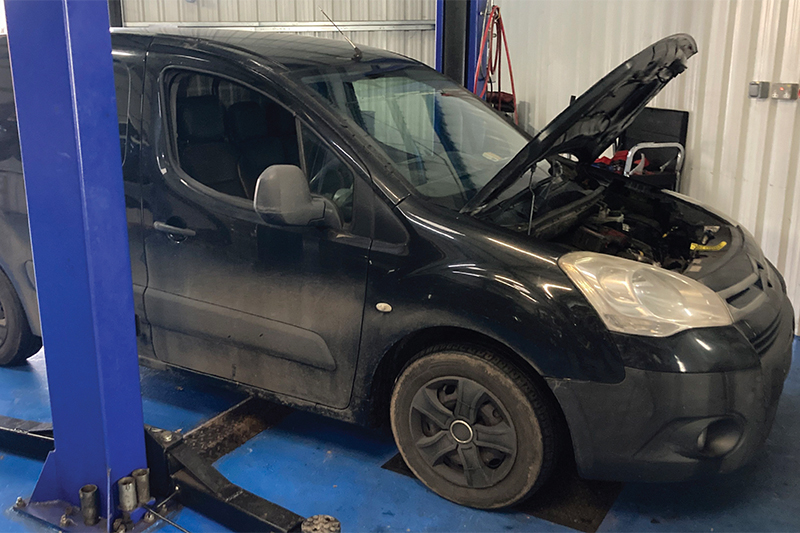
In this month’s Schaeffler LuK Clutch Clinic, REPXPERT Alistair Mason is replacing the clutch in a 2012 Citroën Berlingo van, that has covered nearly 218,000 miles. The customer had reported that the clutch was ‘slipping’, which a short road test confirmed, and the clutch replacement was advised and authorised.
With a scheduled book time of six hours and very little investment in equipment, this makes a profitable repair for any independent workshop.
Gearbox removal
With the vehicle placed on the vehicle lift, open the bonnet, remove the engine cover followed by the battery cover and then disconnect and remove the battery and battery tray.
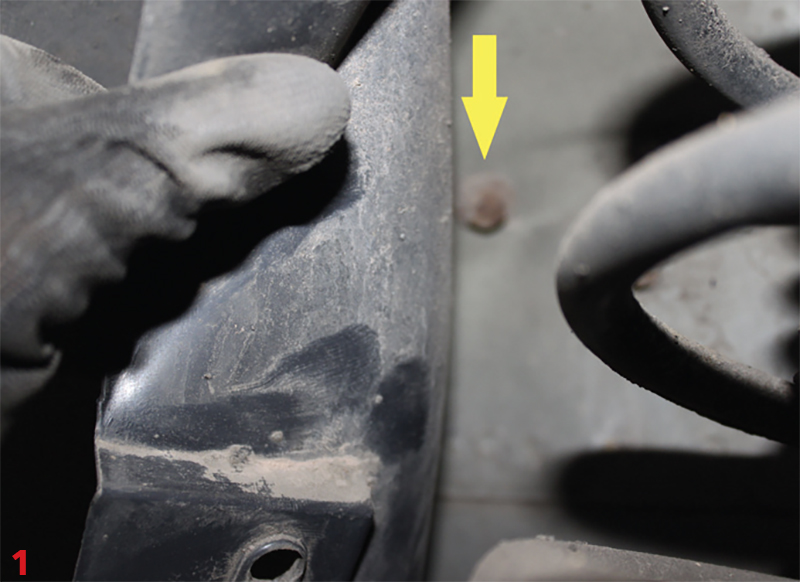
Note – there is a retaining bolt that is accessed from the N/S inner wing hidden behind the plastic wheel arch liner (Fig.1).
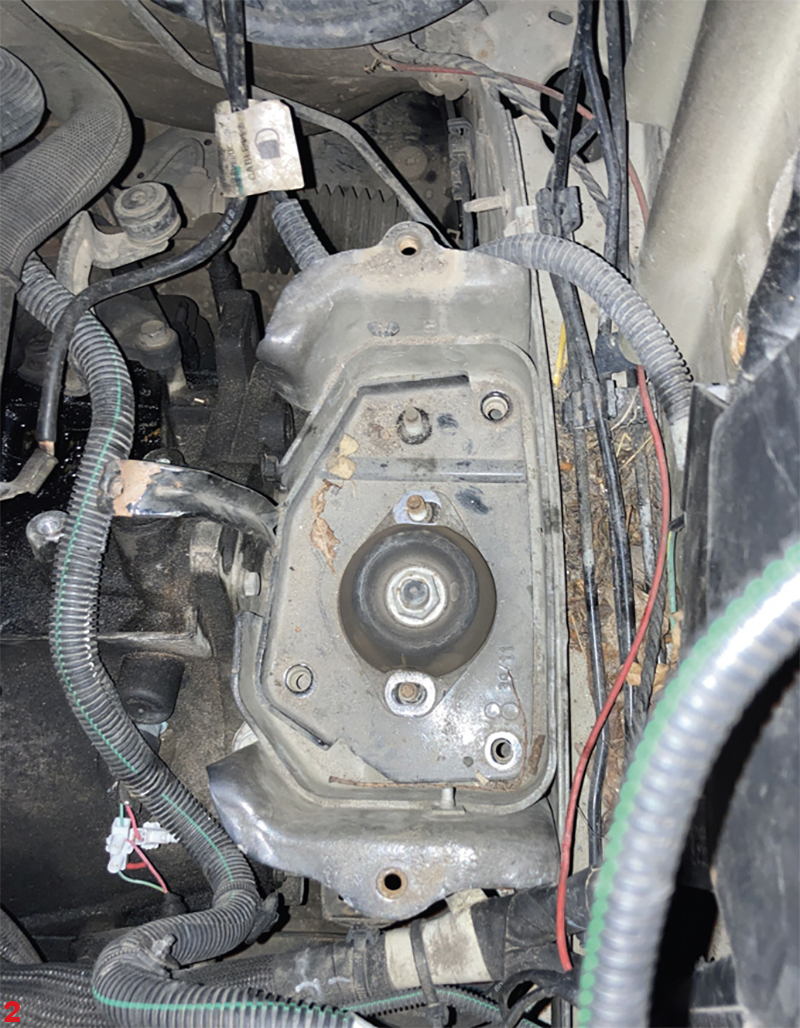
With the top of the gearbox now accessible, disconnect the gear cables and the gearbox wiring loom, by disconnecting its multiplugs, then remove the wiring loom bracket from the top bell-housing bolts and stow the gear cables and the loom out of the way. Whilst in this area, the top bell-housing bolts and top starter motor bolt can be removed, followed by the bolts from the gearbox mounting plate to the inner wing (Fig.2).
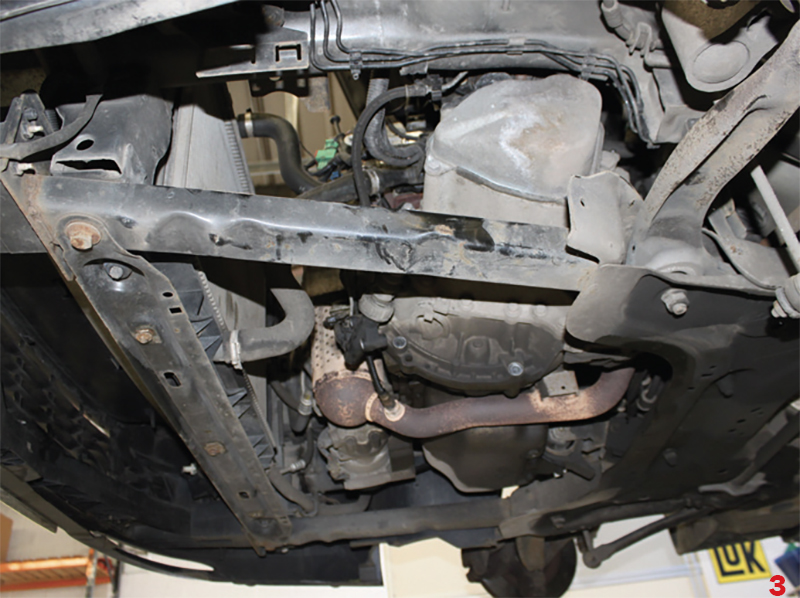
Raise the lift to waist height and remove the N/S/F wheel, then raise it again to gain access to the underside of the vehicle and remove the plastic under-shield and the front subframe side brace (Fig.3).
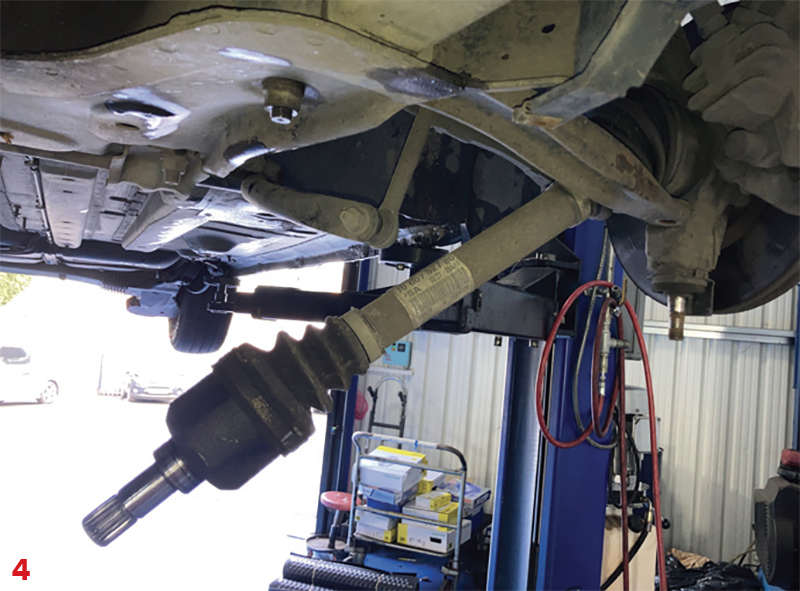
Drain the gearbox oil, remove the N/S bottom ball joint nut and disconnect the ball joint from the bottom arm. Lever the inner CV joint out of the gearbox, then pull out on the strut assembly and the drive shaft will come out of the gearbox and can be positioned away from the gearbox (Fig.4).
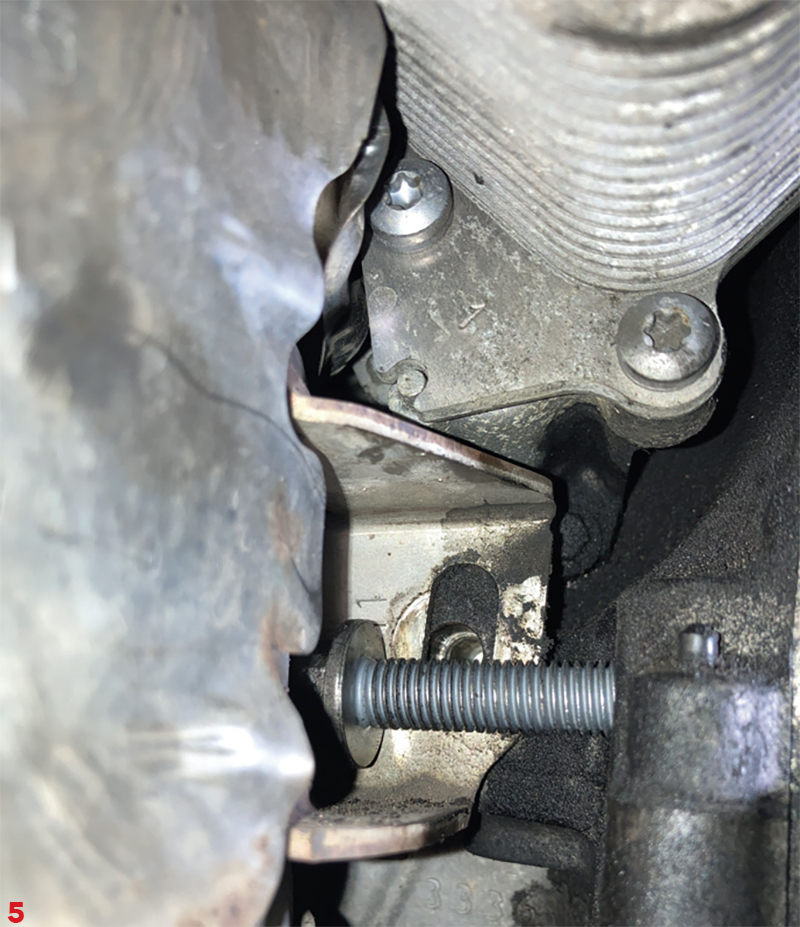
Remove the three bolts from the O/S inner driveshaft seal housing flange, the final starter motor bolts, the lower bell-housing bolts and then, the lower gearbox pendulum mount. Top tip – there is a bolt located by the Diesel Particulate Filter, so remove the nut and stud from the DPF bracket as this will allow the bell-housing bolt to be unscrewed from the gearbox (Fig.5). Remove the two slave cylinder retaining bolts and position the slave cylinder away from the gearbox, without disconnecting the hydraulics.
Support the engine using an engine support and the gearbox with a transmission jack and remove the gearbox mounting. Lower the engine and gearbox assembly slightly to aid its removal, unscrew the final bell-housing bolts, ease the gearbox away from the engine, and when clear, lower and move it away from the vehicle.
Clutch Replacement
Remove the clutch assembly from the flywheel. In this case, we could see the clutch plate was at the end of its service life as the lining had worn close to its retaining rivets. Inspect the back of the engine for any oil or coolant leaks and rectify as required, remove the glaze from the solid flywheel face using emory cloth, and clean with clutch and brake dust cleaner.
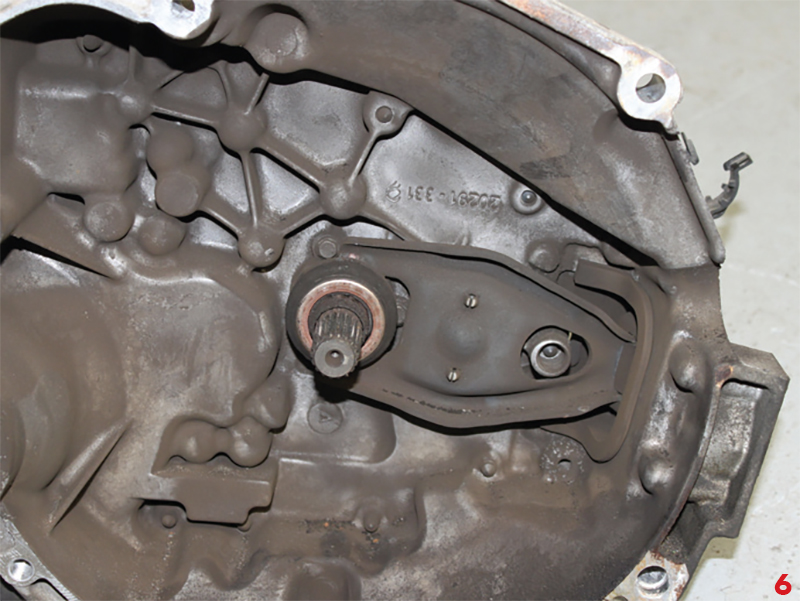
Turning to the gearbox (Fig.6), remove the release bearing and release arm, but always check the pivot points and guide tube for wear, replacing them if required and then wash out the clutch dust from the bell- housing using clutch and brake dust cleaner.
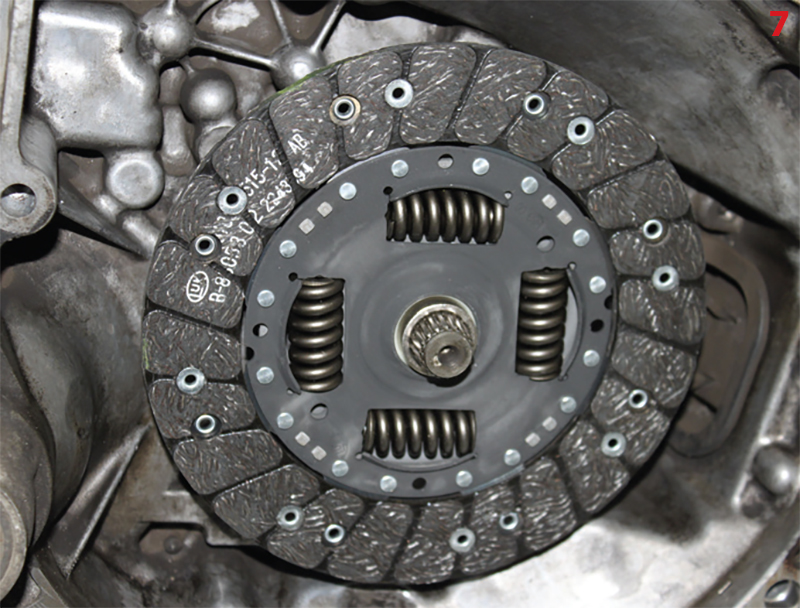
Fit the new release arm and release bearing, apply a light smear of high melting point grease to the gearbox input shaft splines, mount the new clutch plate onto the input shaft (Fig.7), and allow the clutch plate to travel up and down the input shaft as this will ensure the grease is distributed evenly and that the clutch is correct for the vehicle, but remember to remove the clutch plate and wipe off any excess grease before fitting the cover.
Using a universal clutch alignment tool, mount the clutch plate with “gearbox side” facing away from the engine onto the clutch pressure plate and secure in position. Mount the clutch assembly onto the flywheel, insert all clutch bolts, tighten in an even and sequential sequence and finally, torque to the manufacturer’s specification. Then remove the clutch alignment tool.
Gearbox fitment
Before re-fitting the gearbox, so they do not get caught or trapped when refitting the gearbox, ensure all cables etc are clear of the bell-housing area. Place the gearbox on the transmission jack, ease the gearbox onto the clutch and then the alignment dowels and secure in place with an easily accessible bell housing bolt and tighten. Refit all the other components in reverse order of removal and torque all bolts to the manufacturer’s specification.
Refill the gearbox with oil through the gearbox breather. After the battery lead has been connected, reset all electrical consumers, and always carry out a road test to ensure a quality repair has been made.


