
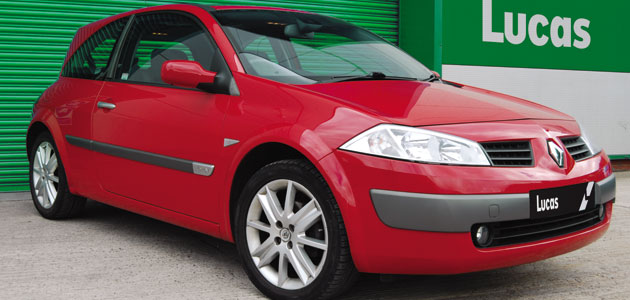
How many hours does it take to change a light bulb? Renault Mégane II drivers will tell you that the answer is no joking matter, as this guide from Lucas Electrical illustrates.
It’s not uncommon for modern vehicles to require a trip to the garage in order to replace a bulb. In many cases manufacturers are cramming more and more technology and safety features into smaller spaces, unsurprisingly leading to very crammed engine bays. Many of these vehicles will incur a minimum charge for a technician to replace the bulb, but for some, the cost can be quite a shock.
The concerns of Renault Mégane II drivers, many of whom have been quoted upwards of £200 for a simple bulb replacement, highlight this. In a recent Observer article, a spokesman for Renault admitted it was difficult for drivers to change the bulbs on the Mégane II, but added:
“We aim to design our vehicles so that most parts can be readily accessible. However, as you can appreciate, safety is our number one priority. Unfortunately, because of the design of the crumple zones in the engine bay of the Mégane II, it can be difficult for drivers to change the headlamp bulbs. As a result, we pay for the labour, provided the car is within its warranty, and the work is carried out within the Renault UK dealer network.” All Mégane II vehicles will, however, now be out of warranty (which lasted for two years) and the cost to simply change a headlight bulb is, in many, cases completely disproportionate to the value of the vehicle.
On further investigation it would seem that the official procedure to replace headlight bulbs on the Mégane II includes the removal of the front bumper and headlight unit. On first impressions, after opening the bonnet of the car, it would appear that the headlight bulbs are completely inaccessible without removing substantial bodywork.
However, there is a much simpler way that can significantly reduce labour times (as highlighted below).
We also took the opportunity to upgrade the standard halogen bulbs to new Lucas LightBooster +120% brighter upgrade bulbs. This has not only increased the amount of light on the road, it has also improved driver safety and brought the aging headlights up-to-date with a brighter, whiter look.

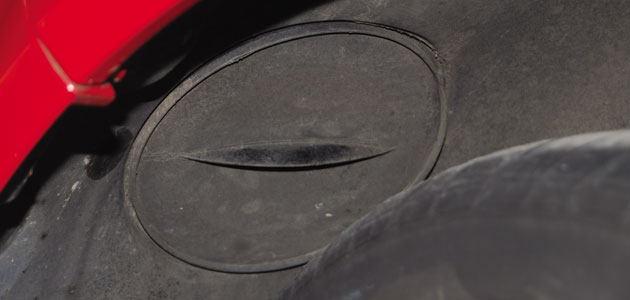
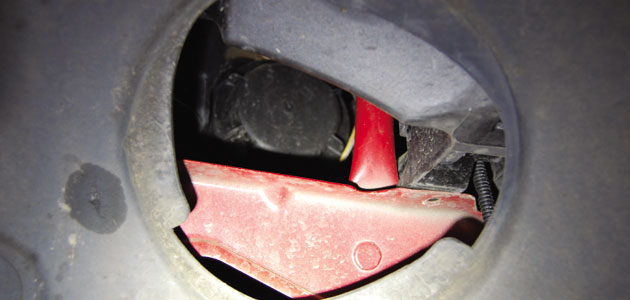
There is no easy way from the usual under bonnet access point and even removing the first level of trim is no use. Happily, there is another access point that can be found inside the wheel arch.
Whilst it is possible to access this point by steering to full-lock, the wheel will still obscure your view of the bulbs and so you would have to change by touch and feel alone.
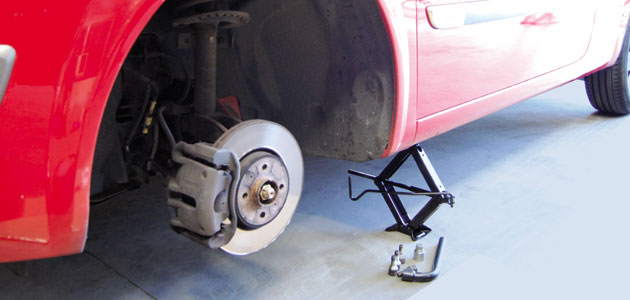
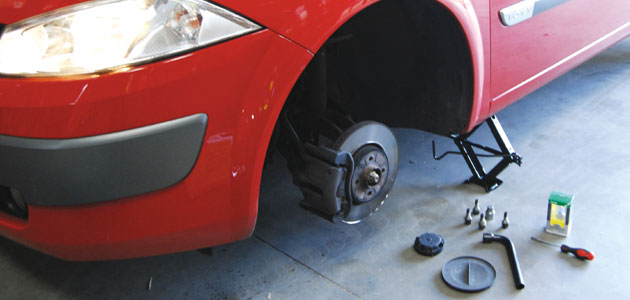
To get a good view of the bulbs, jack up the car and remove the wheel.
The hatch is now clearly visible and easily accessible.
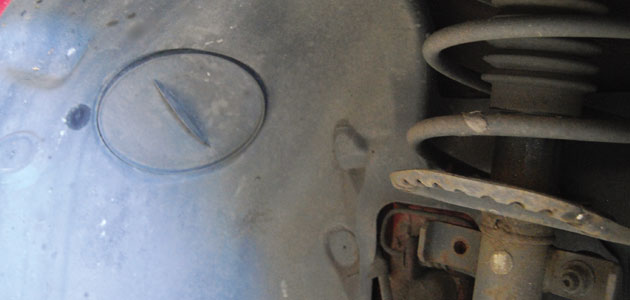
Twist the cover to remove and reveal the rear of the headlight unit.
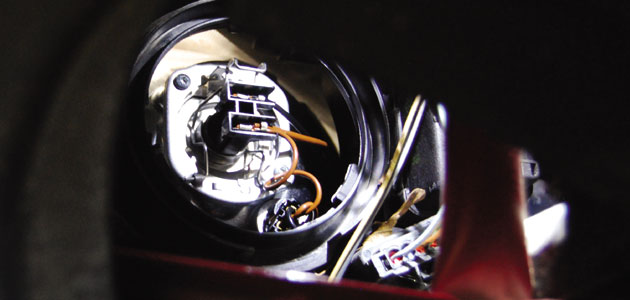
All bulbs in the headlight unit can now be accessed. Simply unscrew the cover behind the required bulb. In this case, unscrew the cover directly in front to access the dipped beam headlight bulb.
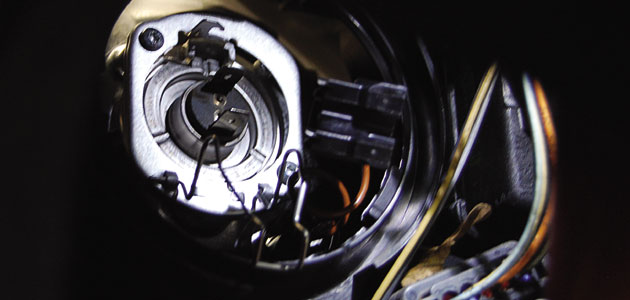
Pull out the power connector and release the hinged wire retaining bracket.
Remove the old bulb and insert the new one (ensuring that the tabs line up correctly). Remember to reconnect the power and lock in place by securing the hinged wire bracket.
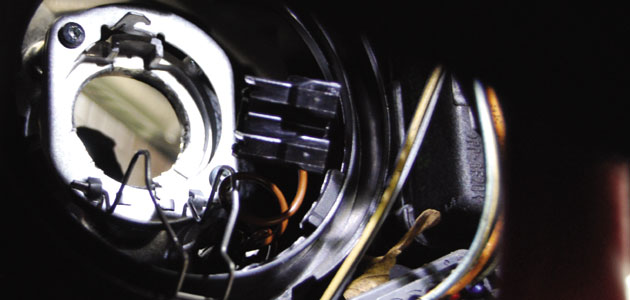
Check that the new bulb is working correctly and reverse the procedure to reassemble.
This is a much simpler and quicker procedure than removing the bumper and headlight unit. The whole task was completed in less than 15 minutes.


