Tim Brotherton from Lucas Electrical explains how to make light work of upgrades on the 2012> F31 Touring Model.
This time last year Lucas Electrical put together a step-by-step guide for PMM readers – featuring the Renault Megane – that highlighted how increasingly difficult it was becoming to replace bulbs on some vehicles. This time around we want to demonstrate some of the simple innovations that manufacturers are incorporating into modern vehicles to make light bulb replacement as easy as it should be.
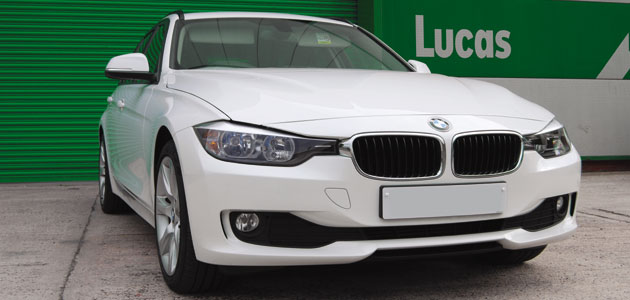
 Our chosen vehicle for this month’s guide is the 2012> BMW 3 Series; in this case the F31 Touring model. Whilst the 2012 car grew in all dimensions compared to its predecessor, the styling – which includes a sweeping bonnet, short front overhang, forward-slanting BMW kidney grille and headlights that extend up to the frame of the kidney grille – makes free space inside the engine compartment in very short supply.
Despite this, BMW has introduced clever design features that make changing bulbs in this tight space relatively easy – provided you know where to look!
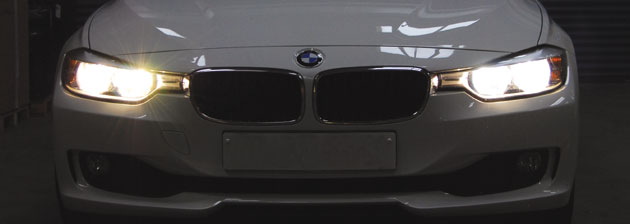
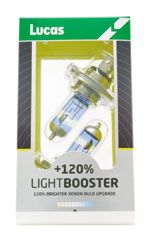
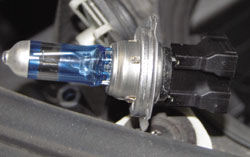
For this demonstration we opted to swap out the standard halogens for our own Lucas LightBooster 120% brighter upgrade bulbs (pictured), which will give the BMW a brighter and whiter light.
“Always replace headlights in pairs, especially when replacing with an upgrade bulb like we have in this article.
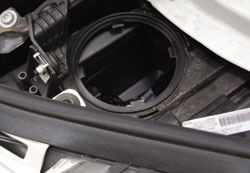
After opening the bonnet it looks like this is going to be a tricky task as the back of the headlight unit is both out of sight and reach. However you’ll quickly notice the circular cover directly above and light that provides easy access.
Twist off the cover to reveal the access hole.
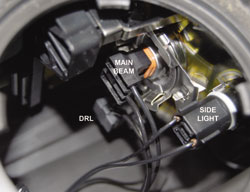
The main beam, side light and daytime running bulbs are all clearly in view. The dipped beam and indicator bulbs, however, are out of reach. Don’t be tempted to try and reach them from here as there is a much easier way that we’ll show you later.
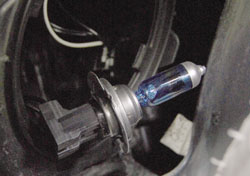
Simply tilt/pull the connector block and bulb upwards and outwards and the bulb pops out. The H4 bulb (477) is held in place by three simple brackets that snap the bulb firmly into position – you’ll need to pull confidently to release it.
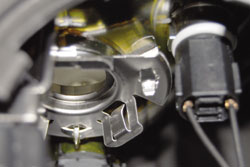
There is enough wiring to then bring the bulb and connecting block out of the access hole.
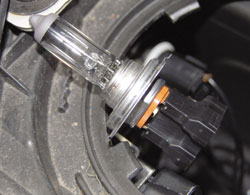
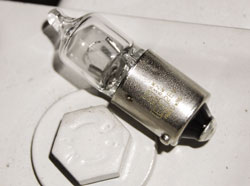
Pull out the old bulb and push in the new LightBooster 120 (p/n LLX477XLS). Simply push the bulb and connector back into the bracket, remembering to tilt the bulb upward slightly until it snaps neatly into place. The flat part of the round H4 base should be facing upwards to ensure correct headlight alignment.
The daytime running lamp also simply pulls out and pushes in whilst the side light bulbs are removed. This can be done by turning the connecting block ¼ circle and then pulling out. The small 12V 6W Halogen sidelight can also be replaced with the Lucas LLB434 if you wish. Replace the cover to protect the bulbs from dirt and water.
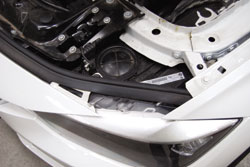
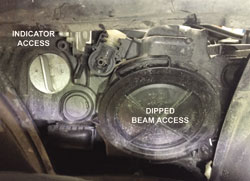
The dipped beam and indicator bulbs are accessed from inside the front wheel arches. With no need to remove the wheel, you just turn the steering wheel to full lock (turning into the arch for which you require access).
Locate the square cover in the plastic of the wheel arch lining.
Pull down on the two top tabs to release the cover. This will reveal a large circular access cover for the dipped beam bulb and an access point for the indicator bulb.
Twist off the large black access cover to reveal the dipped beam headlight bulb.
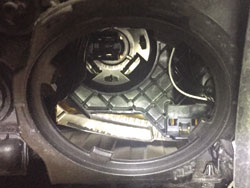
Remove the dipped beam bulb in the same way as the main beam bulb, tilt upwards and pull back. Change the bulb and push back into place.
The indicator releases in the same way as the side light – just ¼ turn the lighter grey block and it releases without trailing wires, making what could have been a difficult stretch into a really easy job.

Replace the cover securely and you’re done. A quick test at this stage and the brighter, whiter light of the LightBooster 120 is clear. Repeat for the other side of the vehicle.