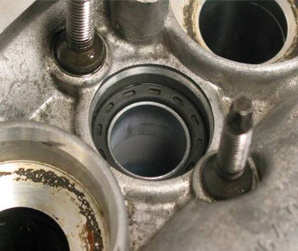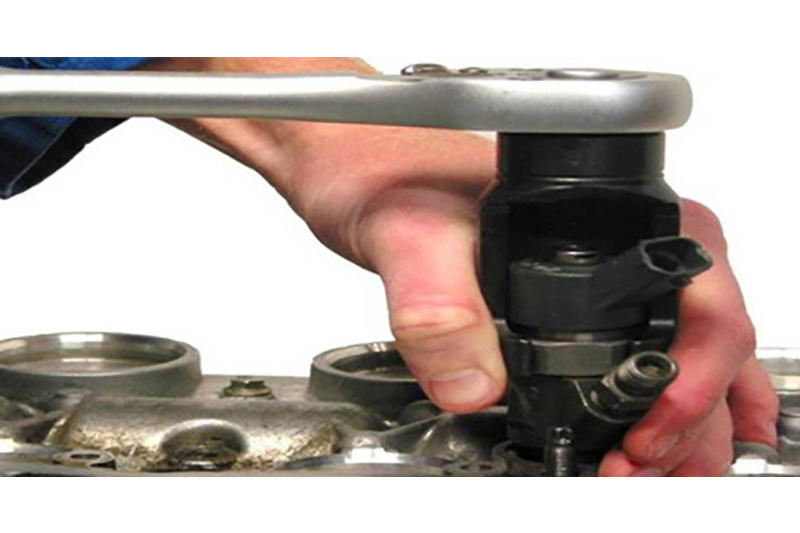
Important user note before commencing work: The tool kit (p/n 60385405) is specifically used for the removal of injectors and pressing in of the injector sleeve and sealing ring. These instructions and recommended tools are meant to serve as aides only and are by no means a guarantee for a removal. In some cases, due to insufficient space, the engine or the cylinder head will need to be removed. Although this tool kit has been tested and used successfully on several occasions, it is of the utmost importance to maintain the correct OEM manufacturer’s sequence.
Removing the injector from the cylinder head (Bosch injector)
1. Unscrewing the solenoid valve
Remove the solenoid valve with a spanner (25) or ratchet with a split socket (25) or water pump pliers and remove the small parts with a magnet.
2. Remove the three leaf, needle and various small parts
Push the ‘three leaf’ down with a screwdriver, remove the locking ring. Using the special hexagon socket, unscrew the nut, remove all detached parts and remove the needle.

3. Screwing in the internal adaptor
Screw the internal adaptor into the injector and tighten it with a combination spanner (22) or socket (22) using a ratchet.
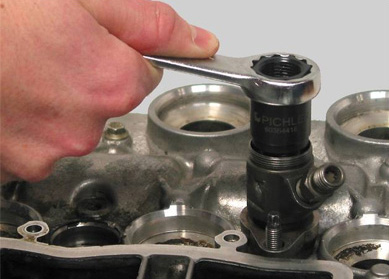
4. Screwing on the external adaptor
Screw the external adaptor completely on the thread for the solenoid valve and tighten it with a combination spanner (32) or socket (32) with ratchet.
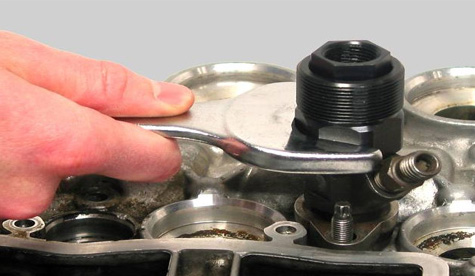
5. Screwing on the box nut adaptor and removing the injector
Screw the box nut adapter onto the external adaptor and tighten it with a combination spanner (32) or with a socket (32) with ratchet. Subsequently remove the injector using the hydraulic injector removal tool or the 8kg slide hammer.
Removing the injector from the cylinder head (Siemens injector)
1. Unscrewing the solenoid valve
Remove the solenoid valve with a spanner (25) or ratchet with a split socket (25) or water pump pliers and remove the small parts with a magnet.
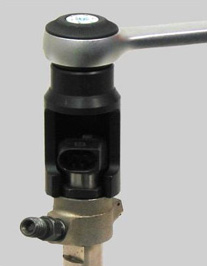
2. Screwing in the extraction adapter
Screw the extraction adapter into the injector and tighten it with a combination spanner (24) or socket (24) with ratchet. Subsequently by using the hydraulic injector removal tool or 8kg slide hammer, extract the injector from the cylinder head.
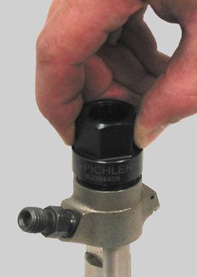
3. Remove the injector and check if the injector sleeve still is in the cylinder head or has come out with the injector
Please note that if the injector could be removed without the injector sleeve being pulled from the cylinder head, only the steps marked with ** have to be carried out. In some cases it may happen that the injector sleeve is pulled from the cylinder head with the injector. If so, all steps have to be carried out in the proper sequence.
Removing the sealing ring and cleaning the sealing surface
1. Removing the sealing ring
** Remove the defective sealing ring with a suitable tool (e.g. a slotted screwdriver).
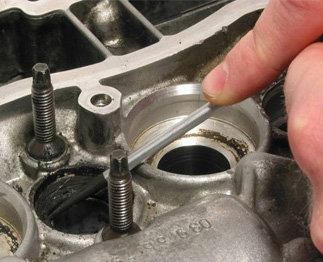
2. Removing oil and carbon deposits
** Place the cleaning cutter and guide in the sealing ring seat and by rotating using the ratchet with socket (19) remove the oil/carbon deposits from the seat.
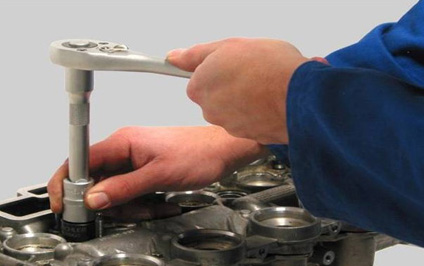
3. Cleaning the sealing surface
Drench a fitting cotton bud swab with degreaser or brake cleaner and clean the sealing ring seat until it shines. If there are still oil and carbon deposits present, repeat the previous steps.
Cleaning the injector shaft
1. Removing oil and dirt
Pre-clean the seat of the injector sleeve with an appropriate cotton bud swab and remove the worst dirt and oil.
2. Positioning the cleaning cutter
Slide the cleaning cutter and guide onto the shaft of the cleaning cutter and place the combination in the injector shaft.
3. Removing adhesive residues, cleaning the seat
While applying a slight downward pressure, turn the cleaning cutter with socket (12) and ratchet until the groove on the axle of the cleaning cutter has completely disappeared in the guide.
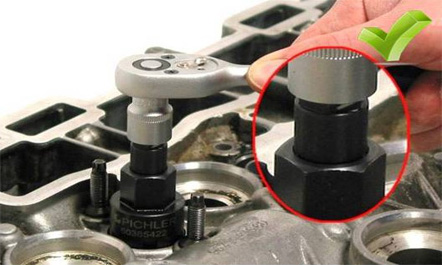
4. Degreasing the sealing surface
Drench a fitting cotton bud swab with degreaser or brake cleaner and clean the seat of the injector sleeve until it is perfectly clean.
Pressing in the injector sleeve
1. Fitting the support legs
Screw the legs on the studs for the injector and tighten them with a combination spanner (10) or ratchet with socket (10).
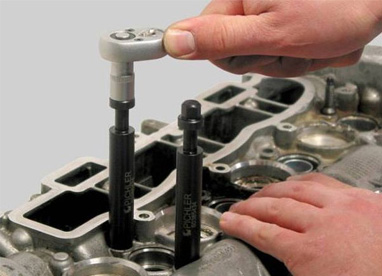
2. Putting the injector sleeve and centring ring together
Slide the injector sleeve on the seal and injector sleeve drift and slide the centring ring over the injector sleeve.
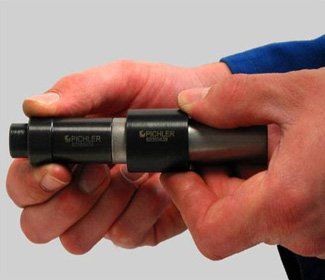
3. Cleaning the injector sleeve and applying adhesive
Clean the injector sleeve with a degreaser or brake cleaner and apply the special glue (approximately 1cm wide) thinly onto the injector sleeve.
4. Placing the pressing tool
Insert the unit in the injector shaft and mount the bridge on the legs.
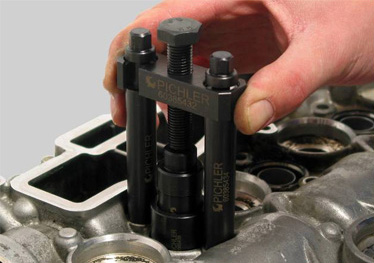
5. Pressing in the injector sleeve
By turning the spindle with a 19mm socket and a ratchet, and at the same time holding the bridge with a spanner (20), press the injector sleeve in the cylinder head.
Pressing in the sealing ring
1. Assembling the pressing tool
** Slide the sealing ring over the smaller diameter end of the seal and injector sleeve drift and from the other side slide the press fit sleeve over the drift.
2. Placing the pressing tool and bridge
** Slide the assembly into the injector sleeve, screw up the spindle of the support bridge and place the bridge on the legs.
3. Pressing in the sealing ring
** By turning the spindle with a socket and a ratchet, press the sealing ring in the cylinder head.
