
Schaeffler FAG REPXPERT Alistair Mason demonstrates how to replace the front and rear wheel bearings on a Vauxhall Corsa D 1.4 SXI.
The Corsa is a popular car amongst younger drivers, often fitted with bigger and wider wheels and lowered to within an inch of its life. These modifications generally don’t help with the life of the wheel bearings and therefore it’s a common repair. However, with a book time of 1.1 hours for the front bearing replacement and 0.7 for the rear, it also presents a quick repair for any independent workshop.
The front wheel bearing is known as a Generation One, with two rows of encased ball bearings, which relies on the hub nut torque to set the bearing pre-load. It also carries the ABS sensor encoder ring that must be located next to the ABS sensor. The rear wheel bearing is known as a Generation Two, is part of the hub assembly and also relies on the hub nut torque to set the bearing pre-load, and has the ABS encoder ring as part of the bearing construction.
Recommended workshop equipment:
- Vehicle lift (two-post is ideal)
- Hydraulic press
- Suitable size press mandrels
Front wheel bearing replacement
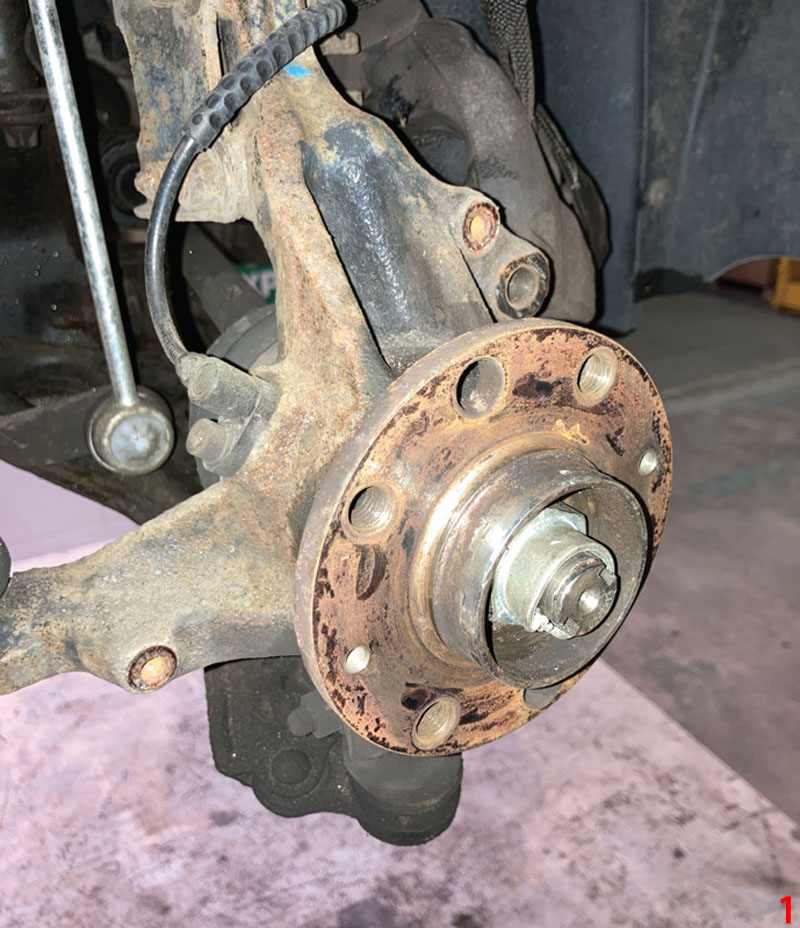
With the vehicle placed on the ramp, remove the hub cap and slacken the hub nut and the wheel bolts, raise the ramp to waist height and remove the wheel. Detach the hub assembly by removing the brake calliper and carrier assembly, brake disc and secure it so not to strain the brake pipe. Remove the back plate, ABS sensor and the hub nut (Fig.1).
Disconnect the track rod end from the hub assembly, remove the bottom ball joint pinch bolt and draw the ball joint out of the hub assembly. The final operation is to remove the two hub-strut pinch bolts, and once removed, the hub assembly can be eased off the driveshaft and taken from the vehicle.
The first operation to replace the bearing is to press out the drive flange. So, support the hub carrier in the press and using a suitable size mandrel, press the drive flange out of the bearing. There is a high chance that the bearing inner race will stick to the drive flange and if this is the case, will have to be removed later. Detach the bearing retaining clip (Fig.2) from the hub carrier and once removed, the complete bearing assembly can be pressed out of the hub carrier.

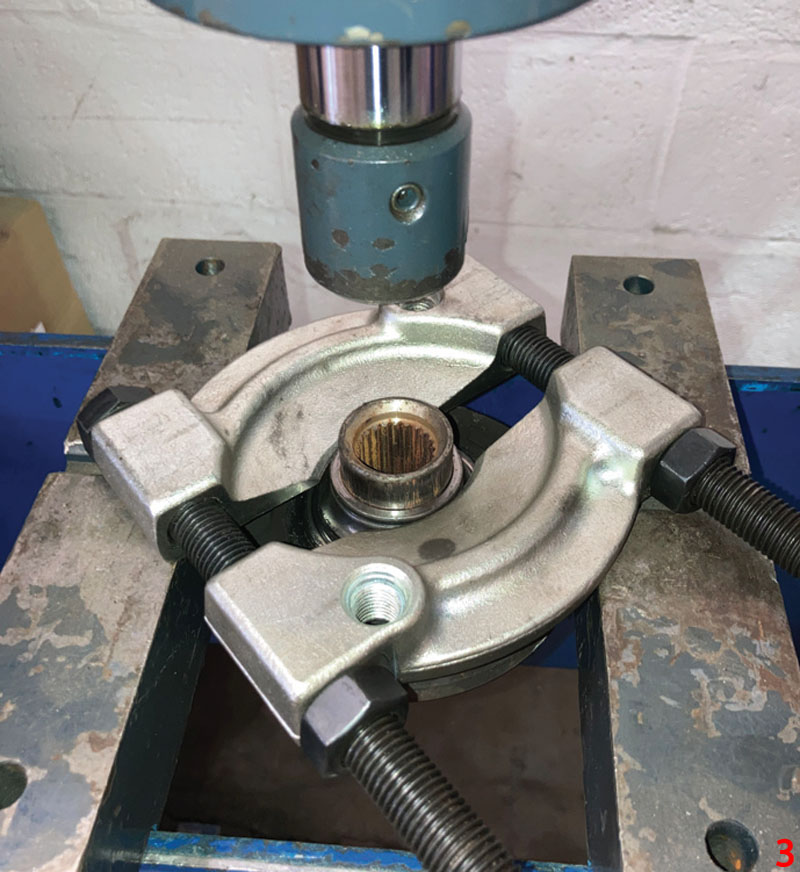
The final operation is to remove the bearing inner race from the drive flange, and in this instance, a bearing clamp was used to grip and support the bearing race and allow the drive flange to be pressed out (Fig.3).
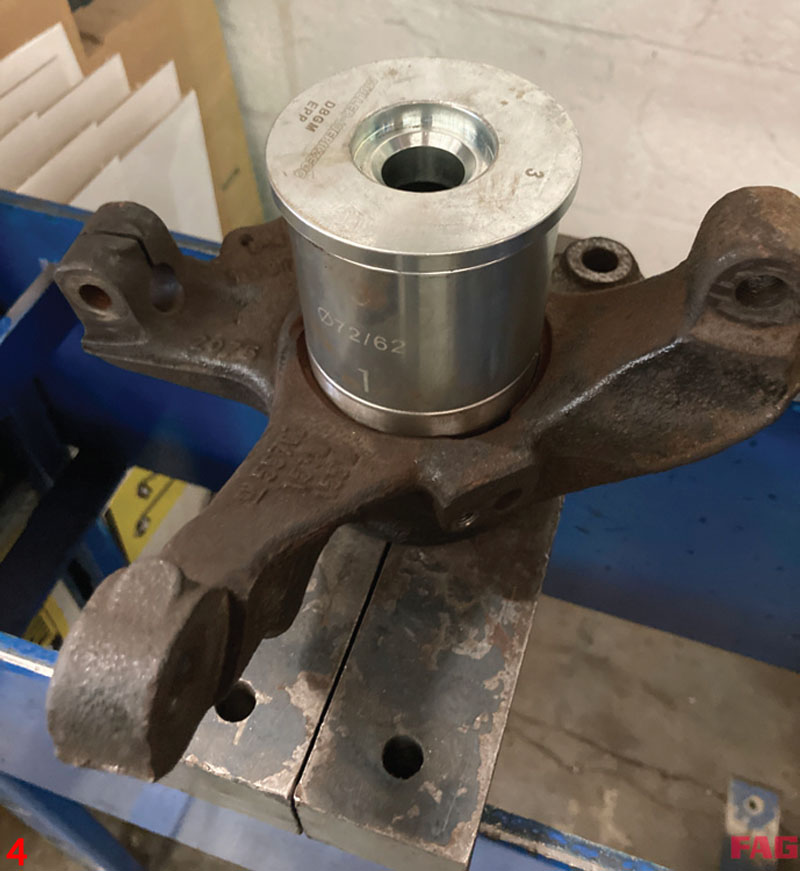
It is always good practice to clean the bearing area with a wire brush or rotary cleaner to aid bearing and clip fitment. Using the hydraulic press, support the front face of the hub carrier, place the new wheel bearing in position, ensuring that the ABS encoder ring will be on the inside surface of the bearing. Select a suitable size mandrel to press the bearing into position on the outer race (Fig.4) until it is in the “home” position and fit the new retaining circlip.
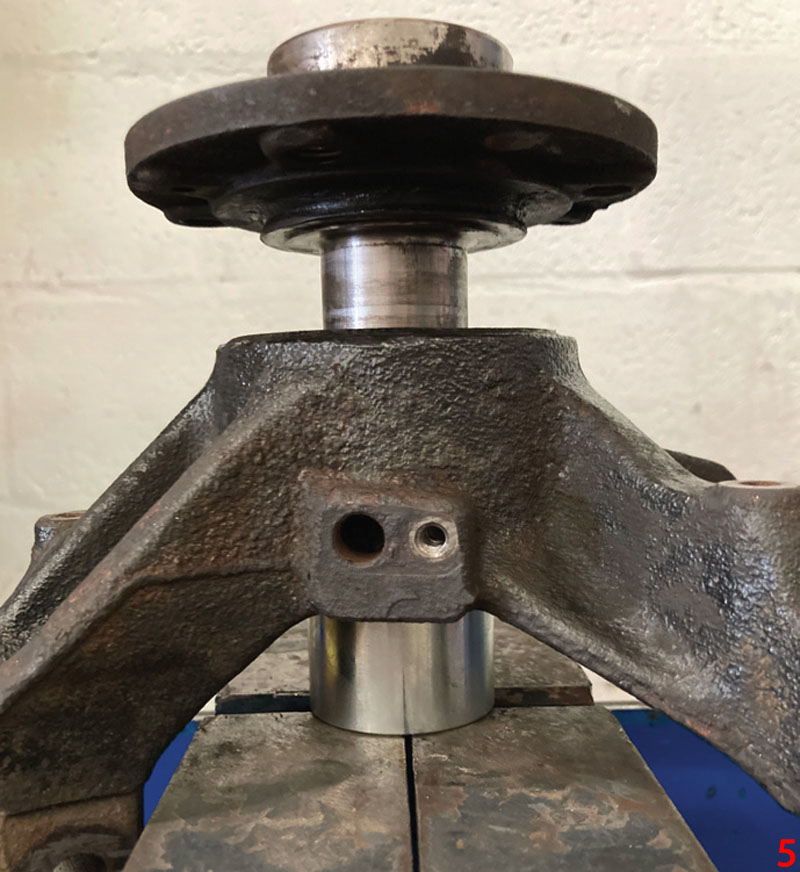
Now press the drive flange into the new bearing by supporting the inner race of the inner bearing, locating the drive flange (Fig.5) and press into position using the hydraulic press.
The hub assembly can now be installed in reverse order of removal. Torque all bolts to the manufacturer’s specification and tighten the hub nut before lowering the vehicle to the floor where the final torque can be applied. However, remember to reset the brake pedal as the brake calliper has been removed and refitted during the installation.
Rear wheel bearing replacement
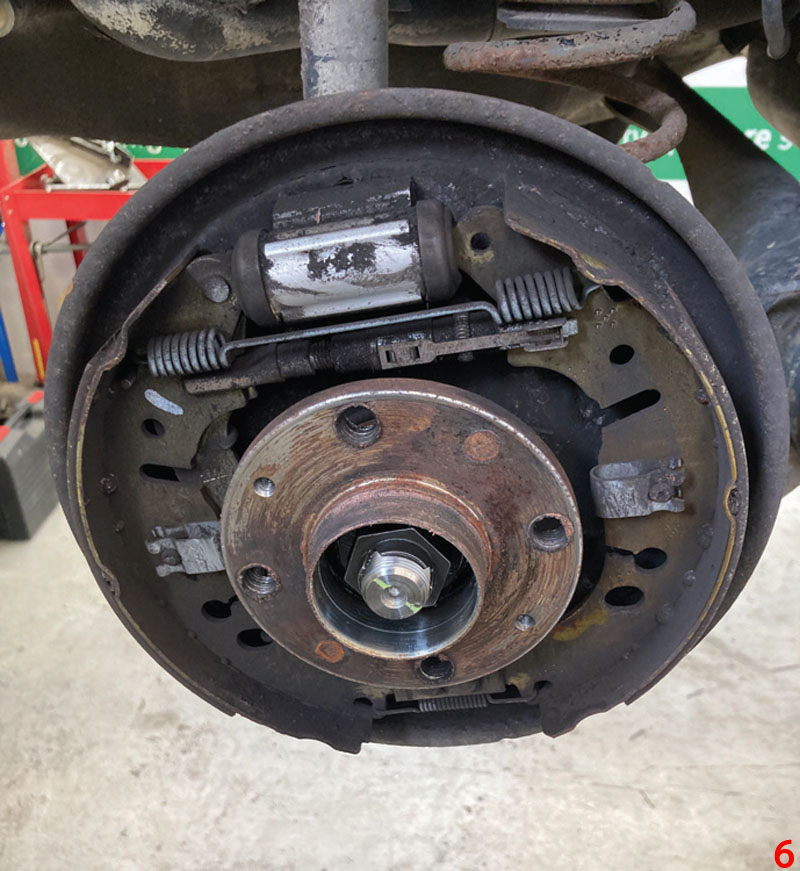
With the vehicle on the lift, slacken the wheel bolts and raise the ramp to waist height to remove the rear wheel. Unscrew the two brake drum retaining screws and take off the drum. Remove the centre hub cap (Fig.6) and then the hub nut, which will allow the flange and bearing assembly to simply slide off the stub axle.
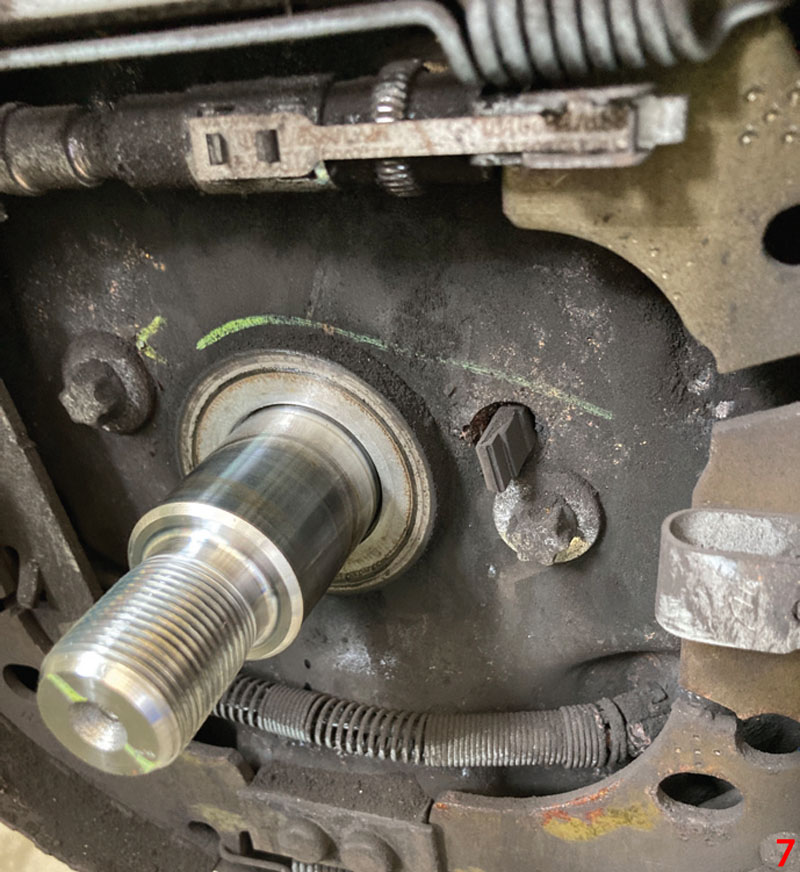
At this point, remove any brake dust using brake and clutch dust cleaner and ensure the ABS sensor is clean (Fig.7).
The new wheel bearing and drive flange assembly can now be installed, so once positioned correctly, fit the new hub nut supplied and torque correctly. Installation is in reverse order of removal, but remember to torque bolts as required and reset the brake pedal.


