In this month’s Belt Focus, REPXPERT Alistair Mason replaces the timing belt, coolant pump and auxiliary drive belt on a 2008 Ford Fiesta, fitted with a 1.25L petrol engine.
The recommended replacement interval on this particular vehicle is 100,000 miles or 120 months, whichever comes first.
The auxiliary drive belts on this engine are ‘stretch’ belts, which are fitted to about 10% of vehicles on the road today.
Generally, they are used on smaller engines with a simple auxiliary drive system. In this instance, power assisted steering is fitted, so a second stretch belt is used. It is always best practice to replace the stretch belts after removal.
The engine on this vehicle has been identified as an ‘interference’ type, so the likelihood of engine damage if the timing belt fails is very high. For this repair, a vehicle lift, engine timing/locking tool set, pulley counter hold tool, engine support and stretch belt installation tool, are required.
Step-by-step guide
Firstly, before carrying out any work, disconnect the battery earth lead. Always turn the engine in the normal direction of rotation, unless advised otherwise by the vehicle manufacturer’s fitting instructions, and it is highly-recommended that the tensioners and idlers are changed when the timing belt is replaced.
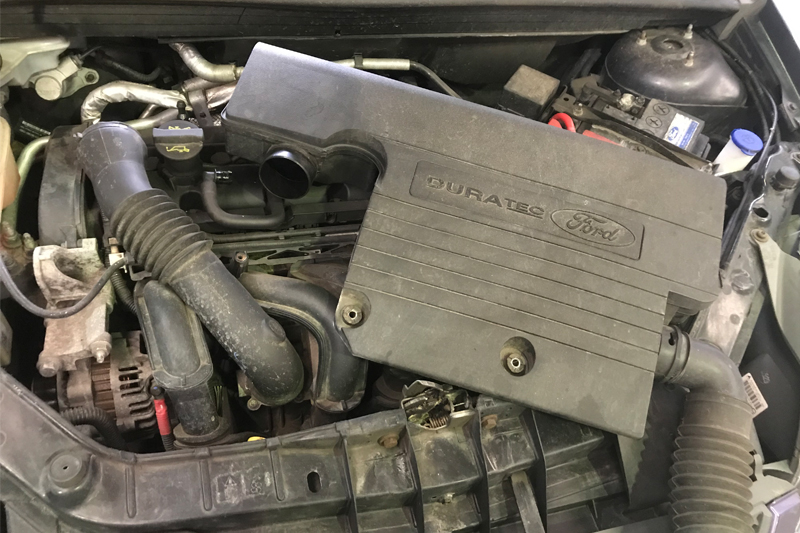
With the fitting instructions obtained from Schaeffler’s REPXPERT workshop information portal and technical bulletins checked, place the vehicle on the vehicle lift. Starting from the top of the engine, remove the complete air filter assembly (see below). Next, disconnect the coolant expansion tank and power steering reservoir and ease towards the alternator.
Raise the vehicle lift to gain access to the underside of the vehicle, then remove the splash-guard that protects the crankshaft pulley area and slacken the four water pump pulley bolts whilst the auxiliary drive belt is still installed – this helps stop the pulley turning. Next, remove the two auxiliary drive ‘stretch’ belts by simply de-railing them off the bottom pulley, and then insert a tool to guide them off the crank pulley. Rotate the pulley until the belt becomes free and can be removed.
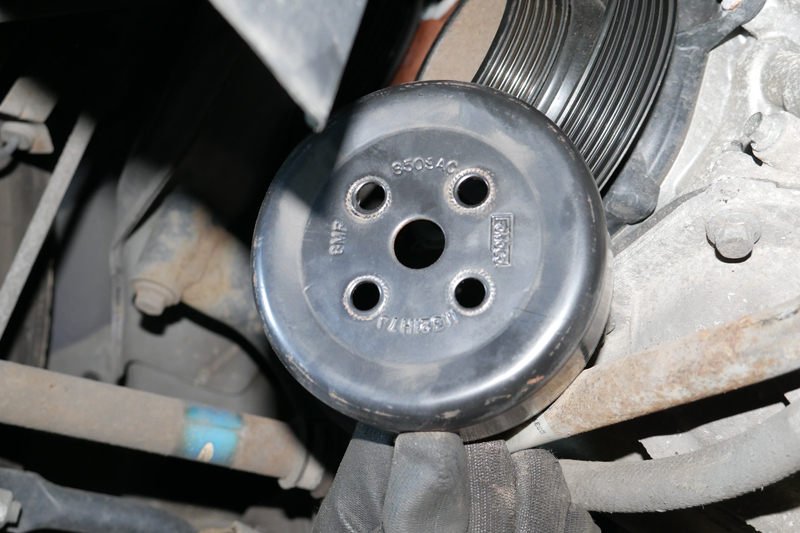
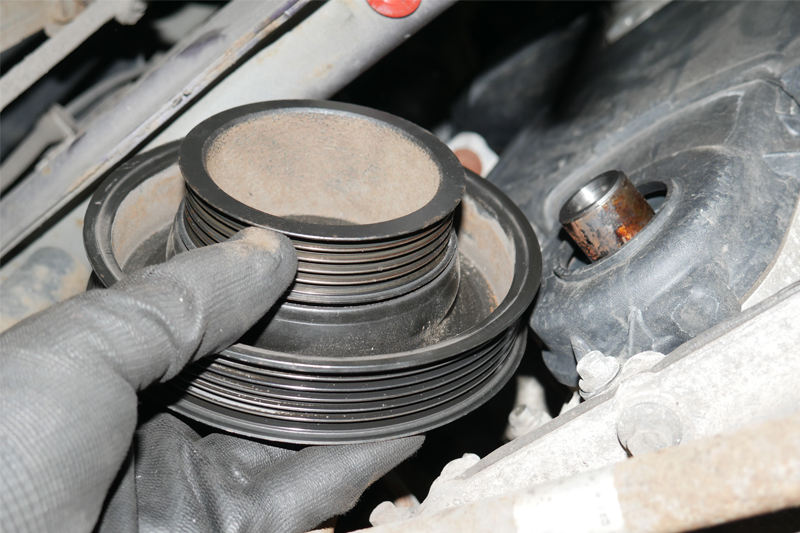
Once the belts have been removed, unscrew the coolant pump pulley bolts and remove the pulley (see below). The engine then needs to be supported, as the engine mounting has to be removed; in this repair, Alistair used a support that attaches to the front sub-frame.
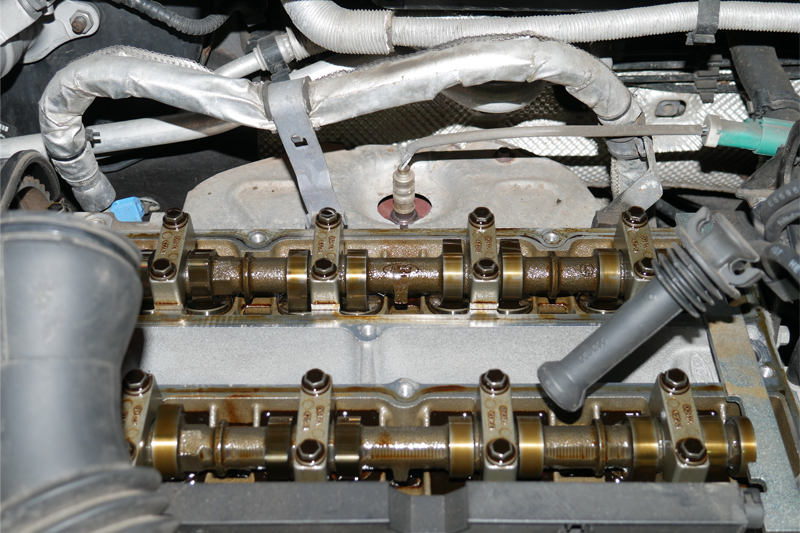
Lower the vehicle lift to ground level, remove the O/S engine mounting and the alternator from the engine block – it is worth noting that the stud can be detached to aid removal (see below). Remove the engine mounting/alternator bracket, the upper timing belt cover bolts, the spark plug leads, and then the camshaft cover assembly.

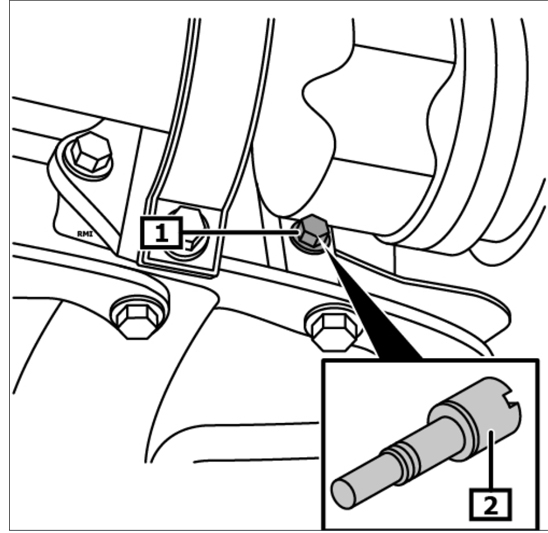
Rotate the engine until the camshaft locking plate can be installed into the camshafts (see below), then remove it, raise the vehicle lift and unbolt the bottom pulley, which in this case was done by putting the vehicle in top gear and a second technician applying the foot brake.
Once slackened, unscrew the crank locking pin blanking bolt and fit the crank locking pin (see below), then, once located, remove the crankshaft pulleys (see below).
Unscrew the final timing belt cover bolts and remove the covers, before ensuring the crankshaft is against the locking pin. Lower the vehicle lift and fit the camshaft locking plate. With the crankshaft and camshafts locked, disconnect the timing belt tensioner bolt, the tensioner and the timing belt. Inspect the timing belt area for any leaks from the engine that could contaminate the new belt and rectify if required.
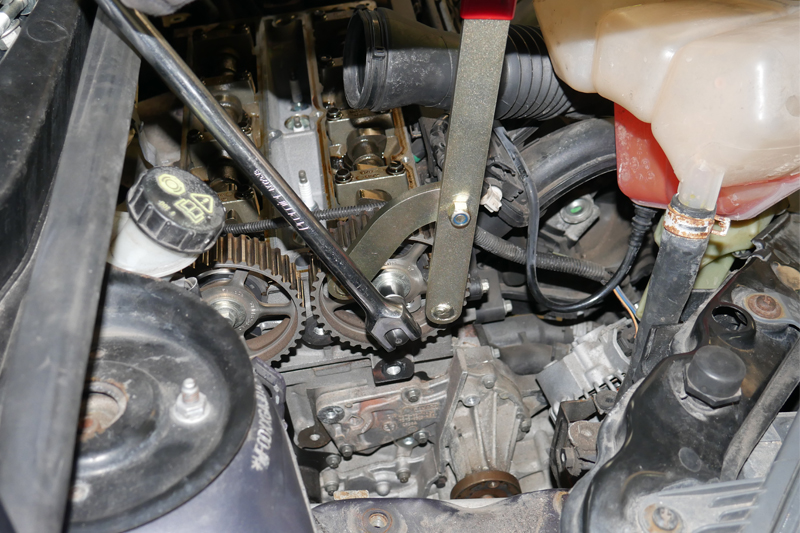
Carefully remove the camshaft locking plate and, using a counter-hold tool (see below), slacken the camshaft pulleys and replace the old bolts with new ones that come in the INA timing belt kit.
Tighten them hard enough so the camshaft pulleys do not tip but the pulleys can still rotate.
Now, replacing the coolant pump, drain the coolant into a suitable collection system. Once drained, remove the coolant pump – it is highly recommended to flush the cooling system at this stage – then clean off any coolant that is in the timing belt area.
The coolant pump is sealed with a gasket; ensure the gasket and coolant pump fit correctly on the dowels (see below).

Next, replace the coolant pump bolts and torque to the manufacturer’s specification.
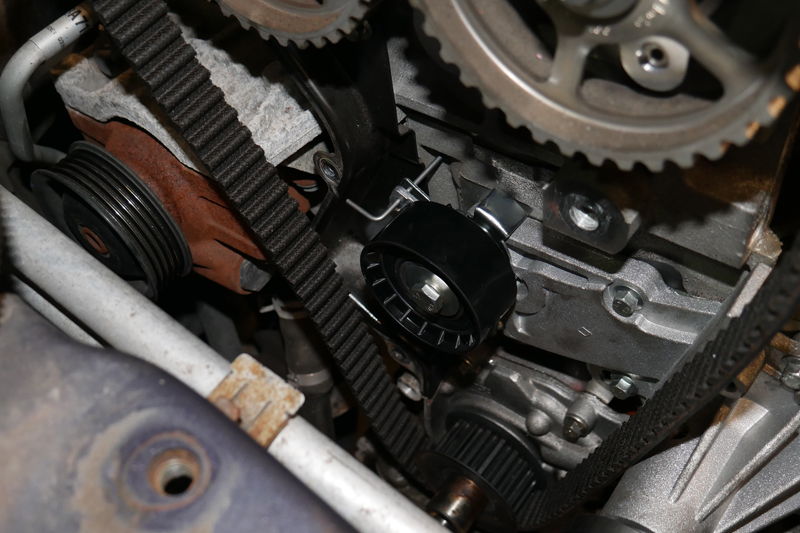
Refit the camshaft locking plate and ensure the crankshaft is against the locking pin, before installing the new timing belt tensioner and torqueing to the manufacturer’s recommended torque. The next task is to actually install the timing belt. Starting at the crankshaft pulley, work in an anti-clockwise direction, finishing at the tensioner (see below). The retaining pin in the timing belt tensioner can now be removed and the belt is tensioned automatically.
Raise the vehicle lift and refit the lower timing belt cover and the crankshaft pulley, and install with the new bolt found in the INA timing belt kit – three bolts are supplied at different lengths, so ensure the correct bolt is replaced.
Tighten the crankshaft bolt to clamp the timing belt crankshaft pulley and check that the crankshaft is still against the locking pin. Lower the vehicle lift, check the camshafts are locked correctly, using the counter hold tool, semi-tighten the camshaft pulley bolts, remove the locking plate and torque the bolts to the manufacturer’s recommended torque, then re-install the locking plate to confirm the timing is correct.
Remove the camshaft locking plate, raise the vehicle lift and remove the crankshaft locking pin, torque the crankshaft pulley bolt to the manufacturer’s recommended torque – a second technician may be required for this – then rotate the engine two complete revolutions and refit the crankshaft locking pin and camshaft locking plate to confirm the timing is still correct. Next, remove the locking pin and plate, and refit the crankshaft pin blanking bolt.
Rebuild in reverse order of removal, remembering that when fitting the new stretch belts, always use the appropriate tool, so not to damage the new belts. Fill the cooling system with the correct specification, strength and quantity of coolant. After the battery has been reconnected, reset all electrical consumers, and, finally, carry out an extended road test to ensure all air has been removed from the cooling system.


