
In this month’s Clutch Clinic, Charles Figgins, Technical Marketing Manager at Blue Print, takes readers step-by-step through a clutch replacement on a 2011 Volvo V50 1.6D.
Vehicle Information
Manufacturer: Volvo
Model: V50 estate
Year: 2011
Engine: 1.6 litre, diesel
Transmission: Six-speed GETRAG manual
The Volvo V50 estate and the S40 saloon models were introduced in 2004 and were manufactured with a number of different engine and transmission options, until 2012. This Volvo model shared its platform with many other Volvo, Ford and Mazda models, making mechanical repairs on this vehicle seem familiar, even if this model is not an everyday visitor to an independent workshop.
The vehicle featured in this article is a 2011 model, fitted with the 1.6 litre diesel PSA group engine and a six-speed GETRAG manual transmission. This car features a stop/start system as it is a DRIVEe model.
The owner of the vehicle had reported some difficulty with the clutch operation, which was suspected to be a hydraulic fault, due to the loss of fluid. However, there were no obvious external fluid leaks from the clutch master cylinder or associated pipes, hoses or connections. Therefore, the fault was suspected to be a leaking clutch concentric slave cylinder (CSC), which required the removal of the transmission for inspection and diagnosis.
The vehicle was brought into the workshop, the bonnet was opened and the engine cover along with the battery cover, battery, battery tray and air cleaner assembly were removed, as well as the DPF pressure sensor, which is attached to the battery tray. This was to provide access to the top of the engine and transmission. All cables associated with the battery were unclipped and secured until reassembly.
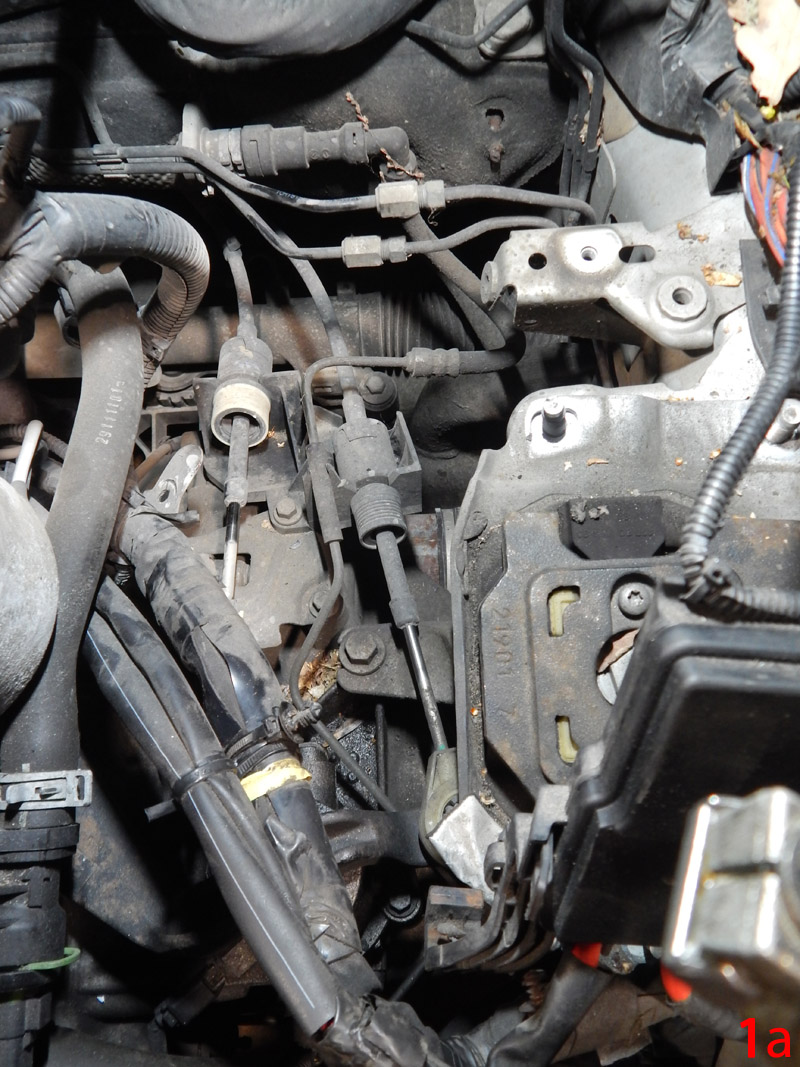
Next, with the top of the transmission visible, we unclip the two gear selector cables from their mounting points and secure them out of the way. Unclip the reverse lamp switch and the neutral switch wiring harness connectors, along with the CSC hydraulic pipe connection. Seal the open end of the connector with a plastic cap to stop any excess fluid from leaking out. (Fig.1 a & b)

The main wiring harness that goes across the top of the transmission can be eased back to reveal the top bell housing bolts, these are to be removed with two of the starter motor bolts accessible from the top of the transmission.
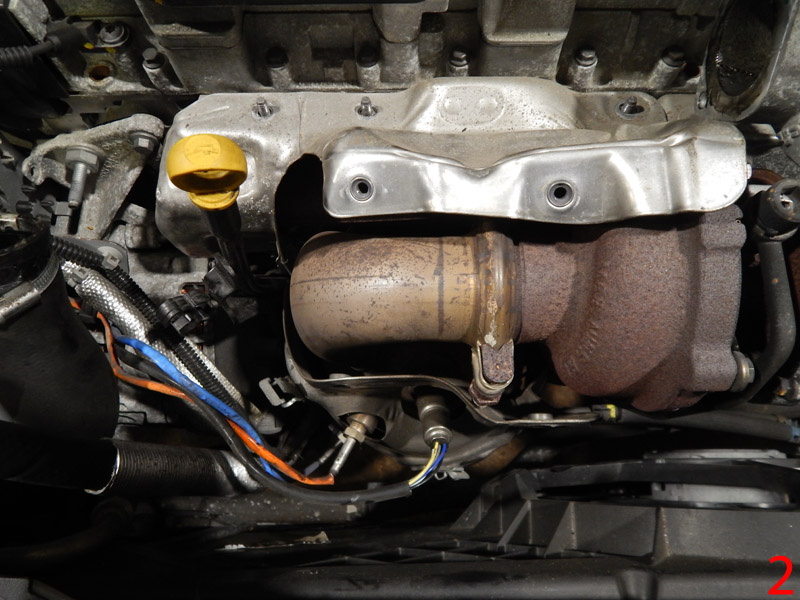
The diesel particulate filter fitted to this engine needs to be lowered in order to gain access to one of the front bell housing bolts. The temperature and lambda sensor wiring harness are disconnected along with the differential pressure sensor pipes. We then remove the air intake pipe, heat shield and retaining clamp so that the DPF can be eased down to give clearance for the removal of the bell-housing bolt. (Fig.2)
The vehicle must be raised to a suitable height and the front wheels removed, this gives access to the hub retaining bolts, which are also removed. Then, remove the left front wheel arch liner to improve clearance ready for the removal of the transmission.
Raise the vehicle again and drain the transmission oil, following this with the removal of both front lower arm ball joints from the hub assembly. This is followed by the removal of the left driveshaft from the transmission. A supporting centre bearing retains the right driveshaft; this needs to be unbolted before the driveshaft can be removed.
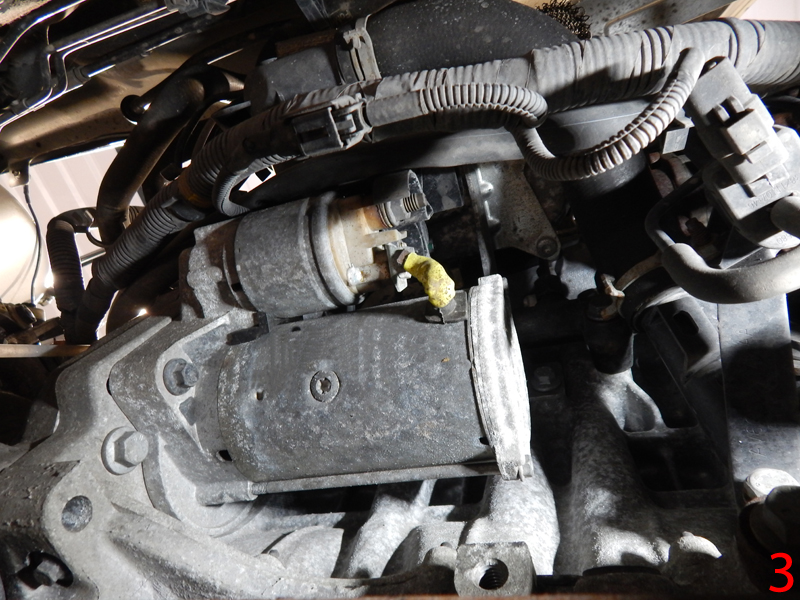
Working from under the vehicle, locate and remove the last starter motor bolt. When we did it, the starter motor was supported and left in place because it does not need to be removed completely for the removal of this transmission. (Fig. 3)
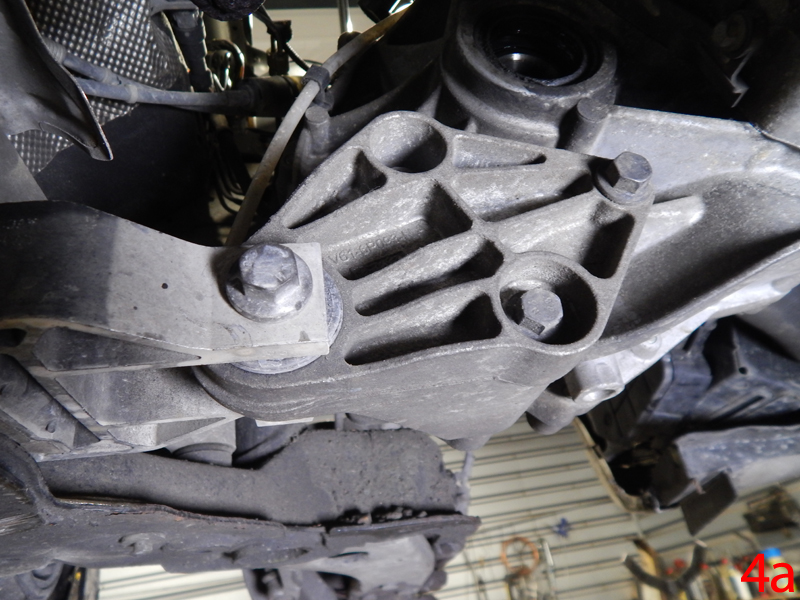
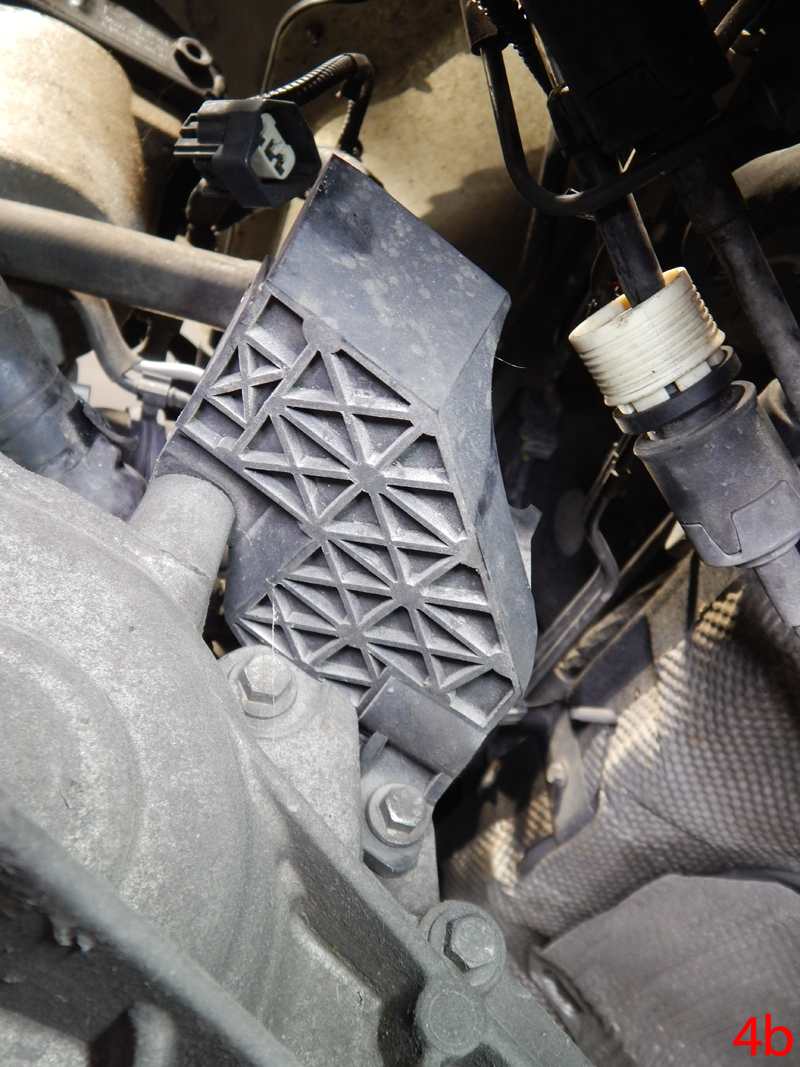
Now for the removal of the gearbox torque mounting, followed by the gear selector cable bracket. This is to give extra clearance to help when removing the transmission. (Fig. 4)
With the engine supported, the top transmission mount released and the last of the bell housing bolts removed, you can now separate the transmission from the engine.
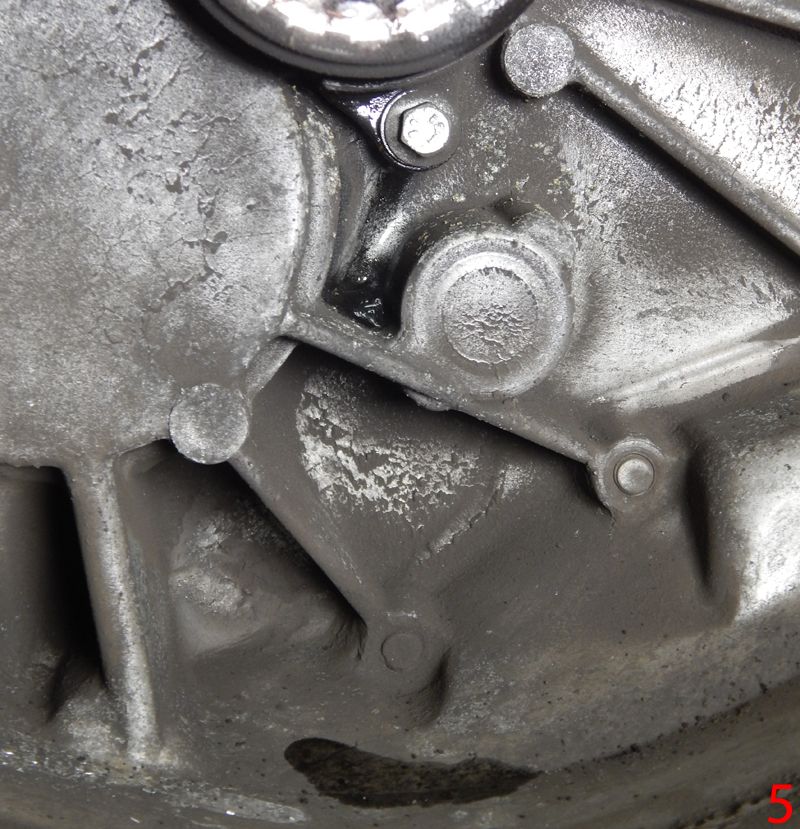
Lower the transmission to the floor for inspection. Upon inspection of the bell housing on our Volvo, it became obvious that the CSC had been leaking, which was the cause of the loss of fluid in the clutch system and the poor pedal performance. (Fig. 5)
We remove the leaking CSC, before thoroughly cleaning the bell housing and the input shaft of all grease, dirt and old friction fibres left by the previous clutch. Inspect the input shaft seal before fitting the new CSC (ADM53635).
The clutch pressure plate and friction disc were removed and inspected, along with the condition of the dual mass flywheel (DMF). The friction disc was very close to being worn out and there was a lot of bluing on the friction surface of both the pressure plate and flywheel. Therefore, on our Volvo, all parts required replacing. Clutch kit (ADF123081) and DMF (ADBP350003) should be selected for this repair, with the original flywheel removed from the engine and the rear main oil seal inspected for any oil leaks before fitting the new flywheel.
The new flywheel is an updated design and is supplied complete with new bolts. It is essential that the new bolts supplied be used, because they are of a different length to the original bolts.
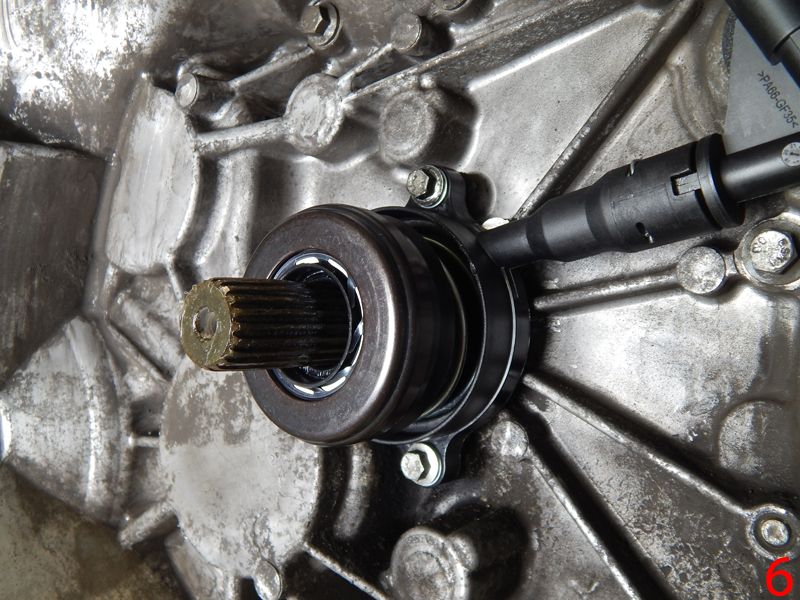
Tighten the new flywheel bolts to the recommended settings and align and fit the clutch kit to the flywheel. Lightly grease the transmission input shaft splines before installation. (Fig.6)
Align the transmission to the engine and secure in place with a few of the bell housing bolts. We then refit all of the parts to the transmission, including all of the other parts that were removed in the process. After tightening all of the bolts and fixings, fill the transmission with fresh oil through the level plug located on the front of the transmission.
Top up the brake/clutch fluid reservoir with fresh fluid and bleed the new CSC of any excess air.
Finally, the battery tray along with all the associated wiring are refitted along with the battery and all other covers. Reset the clock and check the clutch pedal operation, before we finish off with a road test to check that the clutch is back to full operational order.


