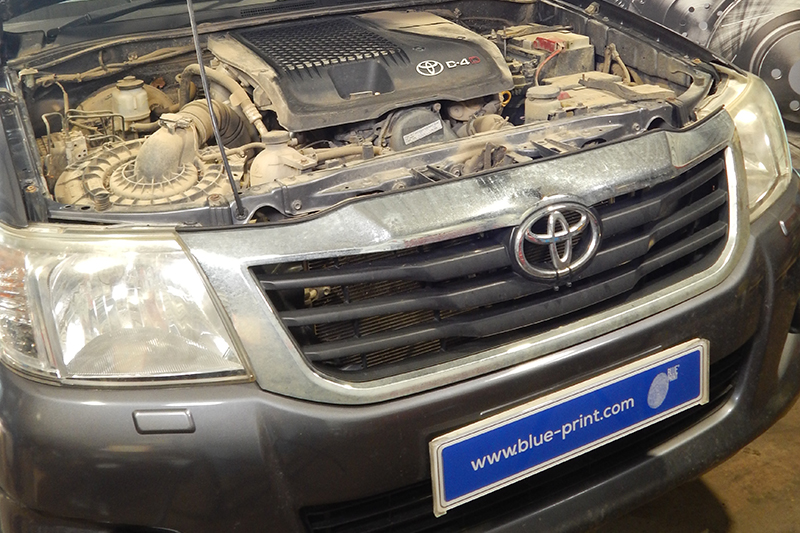
In this month’s Clutch Clinic, Charles Figgins, Technical Marketing Manager at Blue Print, takes readers step-by-step through a clutch replacement on a 2014 Toyota Hilux.
Vehicle Information
Make: Toyota
Model: Hilux
Year: 2014
Drivetrain: 4wd
Mileage: 112,000
The Toyota Hilux pickup is a mainstay of the brand and more than 18 million have been produced since 1968; yet not always under the Hilux name, as the North American market embraced the rather straightforward ‘Toyota Pickup’ title for models sold between 1972 and 1995. Naming differences aside, the Hilux has gone through eight makeovers in its time and the current generation model, introduced in 2015, is known as one of the best pickups available. It is a further continuation of the Hilux’s reputation as being tough and reliable even in the harshest of conditions. Reviews for the latest Hilux praise its safety, strength and reliability as well as the comfortable ride and spacious cabin and load areas.
The vehicle featured in this article is a seventh-generation example from 2014 which has had a life of continuous use on a farm – being used mainly for towing and off-road duties, exactly what a Hilux was designed to do. Although proven to be a very reliable ‘workhorse’ around the farm, the clutch was showing signs of slipping after 112,000 miles of driving. Therefore, it required a replacement clutch kit.
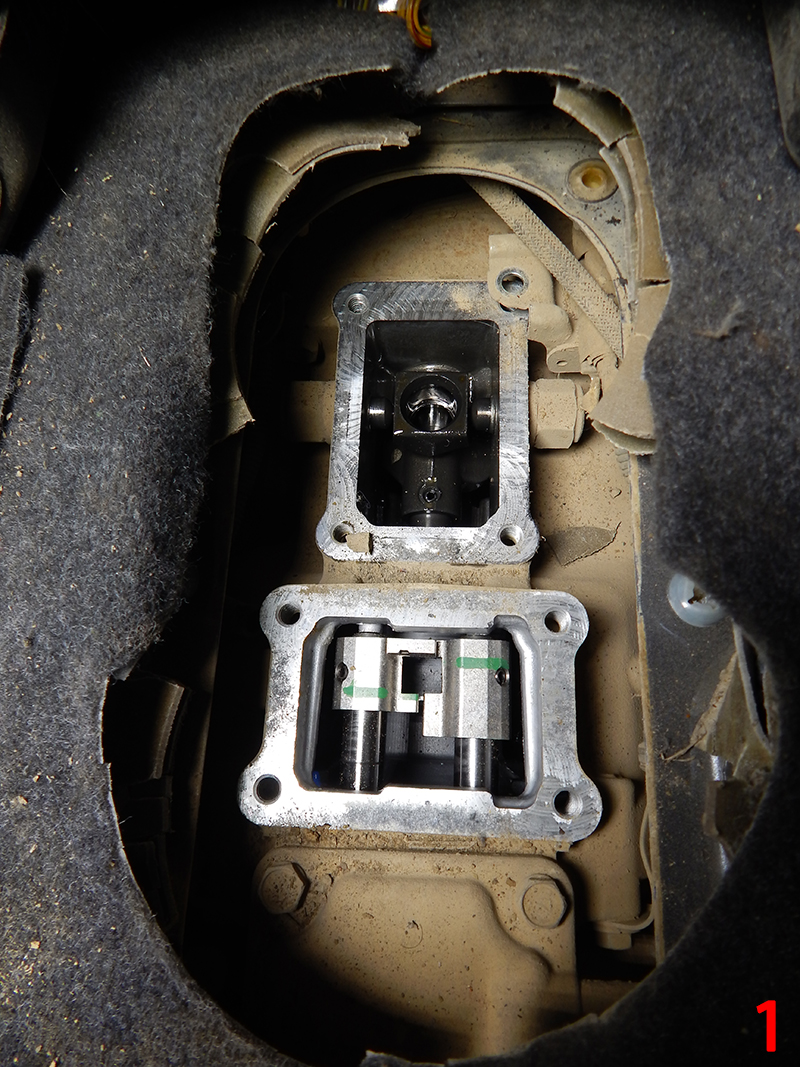
The vehicle was brought into the workshop and the bonnet was raised to start the procedure. To begin, disconnect the two batteries. Being a four-wheel drive vehicle of traditional design, with the powertrain mounted longitudinally in a ladder-frame chassis, the two gear sticks in the cab need to be taken out in order to remove the transmission. Firstly, remove the gear sticks and the centre-console surround, before carefully folding back the carpet surrounding the gear sticks; this is to reveal the gear stick gaiter-retaining bezel. Remove its four screws and two clips, along with the two gear stick gaiters, to enable access to the gear sticks mounted on top of the gearbox (Fig.1).
With these parts removed, both gear sticks can then be unbolted from the transmission, ready for work to continue underneath the vehicle. With the vehicle raised, mark the alignment position of the front and rear propshafts and undo all of the bolts that retain them to the drive flanges. Remove the propshafts from the vehicle, checking all four universal joints for any excessive ‘free-play’ or ‘stiffness’ and put them to one side.
Next, remove the two bolts and the one bell-housing bolt retaining the clutch slave cylinder. Put all of them out of the way, ready for when the transmission is to be removed.
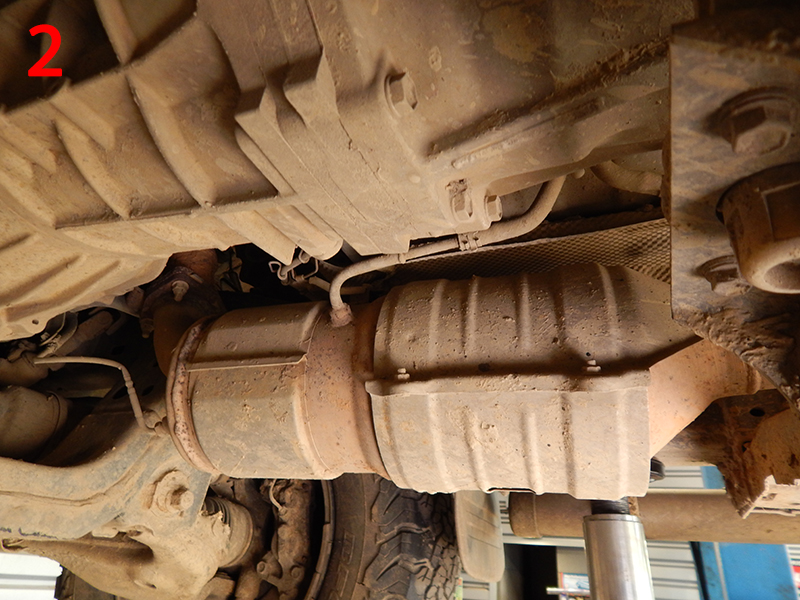
Disconnect the three exhaust-gas temperature sensors and the oxygen sensor from the wiring harness, in preparation to remove the diesel particulate filter (DPF) and the differential-pressure sensor hoses (Fig.2).
Support the transmission with a transmission jack, unbolt the crossmember from the chassis and the transmission mounting and remove. This now gives enough room to remove the DPF. Undo the two exhaust bolts at the rear that secure it to the exhaust, then the three bolts retaining it to the exhaust down-pipe. Once released, carefully lower the DPF to the floor.
Disconnect all other remaining switches, sensors, breather hoses and cables from the transmission and secure them to one side.
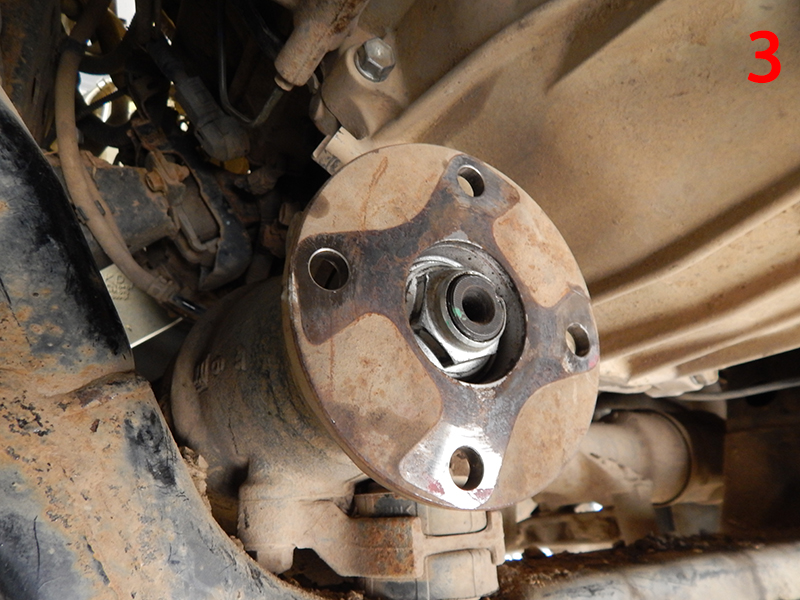
Unbolt and remove the drive flange from the front axle in order to give extra clearance. This is because the transmission has very limited clearance between the transmission tunnel, the exhaust down-pipe and the front axle drive flange (Fig.3).
With the transmission and transfer box assembly securely supported, unbolt all of the bell housing nuts and bolts. Note which bolts are from which location, because they differ in length. The starter motor can be left in place because it does not need to be removed completely for the removal of the transmission.
Then, carefully separate the transmission assembly from the engine and lower it to a working height.
Remove the clutch-pressure plate and friction disc from the flywheel, and inspect them for any ‘unusual’ wear issues. In the case of this Hilux example, the flywheel was in good condition and only needed a clean before fitting the new clutch. However, the friction disc material was very close to being worn out. Therefore, it was concluded that this clutch assembly required replacement, using Blue Print clutch kit ADT330285.
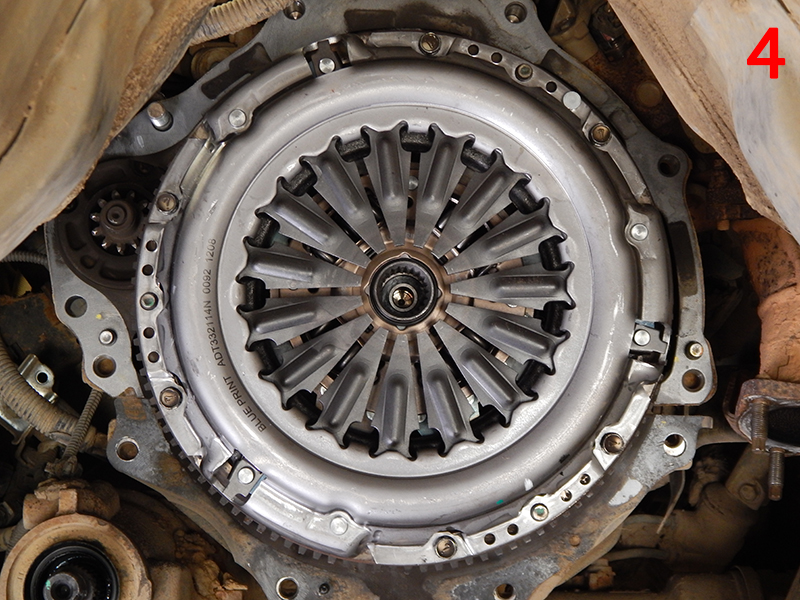
Align and attach the new pressure plate and friction disc to the flywheel, and tighten all six bolts in a ‘star’ pattern to the required torque. This is to give an even spread of pressure during the tightening process – preventing twisting and vibration of the cover and the lifting of the pressure plate (Fig.4).
Turning our attention to the release mechanism, it is important to clean the bell housing thoroughly to free it from all grease, dirt and old friction fibres from the previous clutch. Remove the release bearing from the clutch fork and inspect the guide sleeve for wear. Remove the clutch fork and release lever and inspect them for any fractures or other damage. Apply grease to the pivot points before refitting.
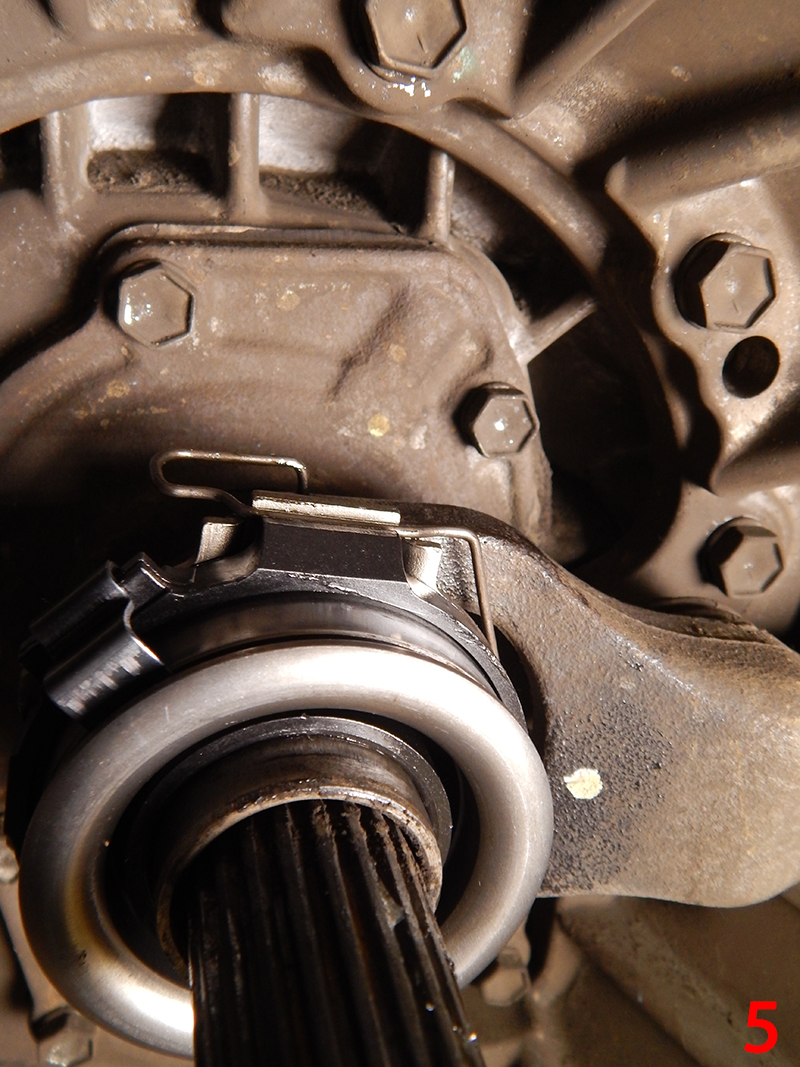
Next, fit the new release bearing whilst securely locating the retaining clips on the fork and noting the correct orientation of the release bearing. Failure to do this can create operational issues with the clutch mechanism (Fig.5). Apply a small amount of grease to the input shaft splines before reinstalling the transmission.
With the new clutch kit fitted, the transmission assembly can be reunited with the engine. Install and tighten all bell housing nuts and bolts.
Locate and align the wiring harness for the transmission and the DPF – this is to allow for the reconnection of all the sensors and switches for the transmission. You can then refit the DPF to the exhaust system and reconnect the hoses and sensors.
Next, return the chassis crossmember to the chassis, which supports the transmission. As a result, the transmission jack can now be safely removed.
With the transmission securely in place, refit the clutch-slave cylinder, front-axle drive flange and the front and rear propshafts and lower the vehicle.
Now working inside the vehicle, refit the gear sticks to the transmission, followed by the rubber gaiters. Secure them to the body with the bezel surround (FR denotes the direction of fitment). The carpet can now be put back in place, followed by the centre console surround.
Reconnect the batteries and close the bonnet. Reset the clock and carry out a full road test to check the operation of the new clutch. For the Hilux used in this article, the vehicle was then sent back to work on the farm.


