
Widely regarded as Suzuki’s first global success, the compact off-road Jimny has been on our roads since 1970. The vehicle that we’re working on in this article is a third generation Jimny, manufactured from 1998 onwards, which features a transfer box that gives you the option of 2WD, 4WD-Low and 4WD-High.
A clutch replacement can be a little tricky on this particular model so, with some guidance from LuK, this handy technical guide should prove its worth for any UK independent aftermarket garage looking to undertake this repair.
Recommended labour time: 3 hours. LuK part number installed: 619302860.
No special tools were required for this repair and we used a four-post ramp to carry out the clutch replacement, however a two-post ramp is ideal. A transmission jack will also prove to be very useful.
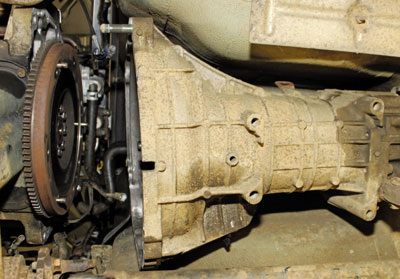
When replacing the clutch on this vehicle it is not possible to fully remove the gearbox; the gearbox eases back about 150mm which is enough room to replace the clutch components.
The bonnet pull is located at the top of the glove box, so open the bonnet and disconnect the negative battery lead.
Gearstick removal
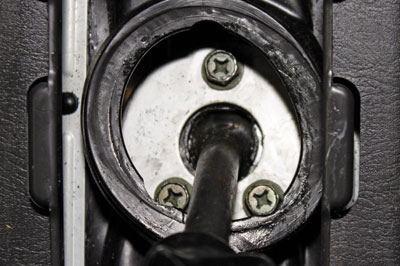
We now need to remove the gearstick. To do this you should remove the rubber boot that is attached to the centre console. There is then another rubber boot underneath which needs to be raised to expose the three retaining plate bolts. Remove the three bolts and then remove the gearstick.
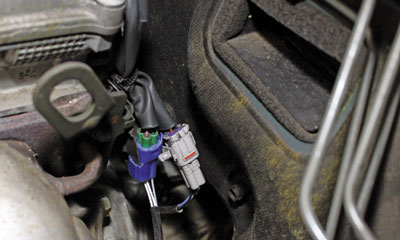
Be careful as there is a small bush located at the bottom of the assembly. At this point we can disconnect the multi-plug for the oxygen sensor which is located on the back of the cylinder head.
Now raise the ramp and remove the front section of the exhaust, held by four bolts and two exhaust mounting rubbers. Now remove the prop shaft that goes from the output shaft of the gearbox to the transfer box, support the gearbox with a transmission jack and then remove the complete rear gearbox mounting assembly.
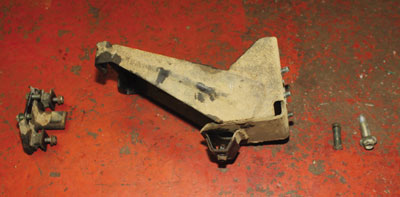
Something to look out for is that we found the rubber mounting for the rear gearbox mount had become un-bonded and required replacement.
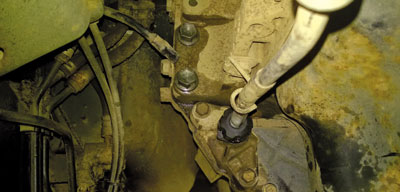
At this point remove the bolt from the gear linkage and the bolt from the stabiliser before removing the gearstick linkage. Now disconnect the multi-plug for the reverse light switch which is located on the top of the gearbox and remove the flywheel protection plate from the bottom of the bell housing retained with two bolts. Disconnect the clutch cable located at the front of the bell housing.
In this instance the nylon adjuster nut had seized onto the body of the cable, which seems to be a common problem. We removed the plastic cover on the bell housing to allow access to the release arm and clutch cable, by depressing the clutch pedal, and then preventing the clutch arm returning.
You can then disconnect the cable and work the cable free from the nylon adjuster nut.
Remove all of the bell housing bolts (these can be very tight!) and once all the bell housing bolts have been removed, the gearbox can be separated from the engine. We encountered a small issue in that the bell housing had seized onto the dowels and stud, but with some light easing we managed to free the gearbox and move backwards as far as possible, making sure it was well supported with the transmission jack. This gives a gap of about 150mm to work in to change the clutch and release bearing.
Remove the old clutch assembly from the flywheel and then check the flywheel for signs of heat stress or excessive wear. If the surface of the flywheel is to be skimmed, make sure that the same amount is taken from the clutch bolting surface – failure to check and rectify these areas may cause the clutch to operate incorrectly. Clean the bell housing and remove any debris. If any oil leaks are visible then these must be repaired before refitting the gearbox. Replace the release bearing by releasing the clip on the release arm, then remove the release arm and slide the bearing out of the clip.
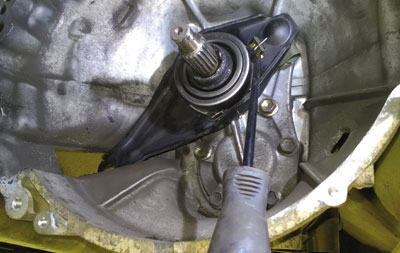
Clean the arm and replace the bearing by sliding it into the retaining clip and then refitting the release arm.
Before fitting the new clutch disc make sure the input shaft is clean and free from any wear. Put a small dab of high melting point grease (not a copper-based product) on the first motion shaft splines and make sure the new driven plate slides freely back and forth. This not only spreads the grease evenly but also makes sure you have the correct kit. Wipe away any excess grease off the shaft and driven plate hub.
Using a universal alignment tool and checking the driven plate is the correct way round the clutch can be bolted to the flywheel evenly and sequentially.
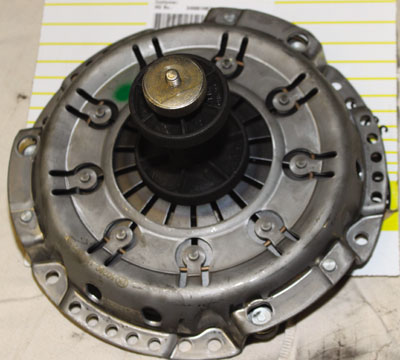
Make sure any dowels have not become dislodged or damaged and replace any that have. Install the gearbox and make sure the bolts are secured and all mountings are refitted before removing the supporting transmission jacks. Refitting the remaining components is the reverse of removal.


