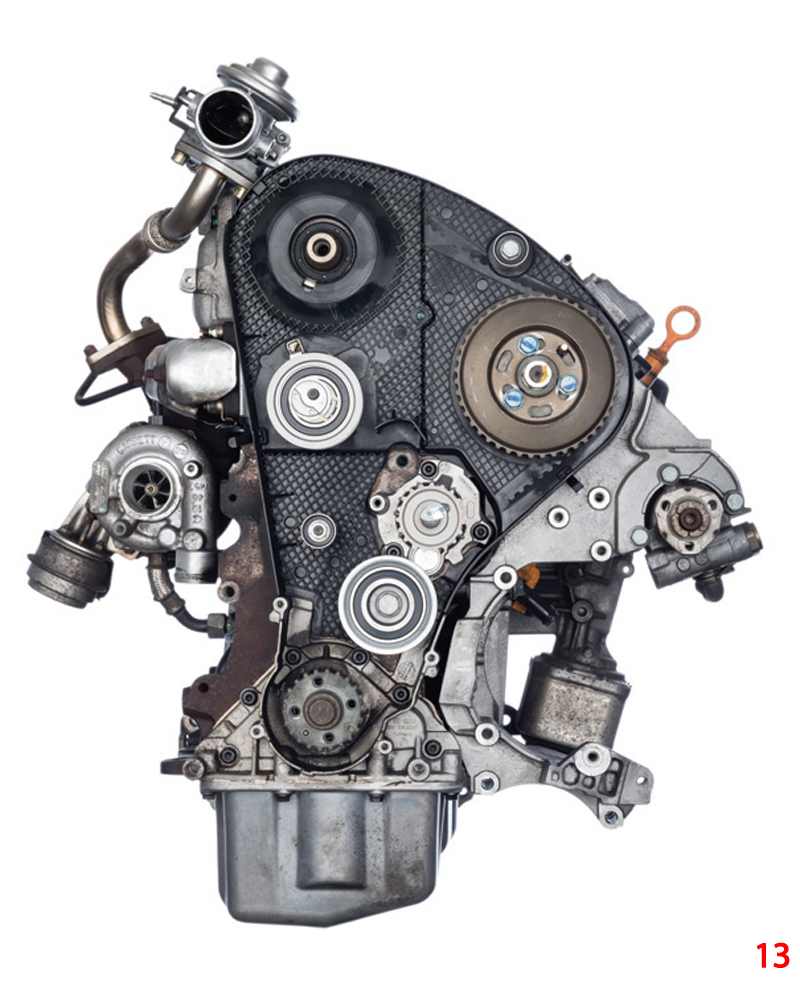
The expert technical team at Continental provides detailed instructions on how to install the company’s timing belt kit CT1044WP1 in a Skoda Octavia 1.9L TDI, MY 2003 with engine code ASV.
Installation top tip
When changing the timing belt, the tensioning pulley and the idlers for the timing belt and the multi V-belts must also always be changed at the same time. To avoid later failures with unnecessary costs, it is recommended that you do not re-install the multi V-belt once it has been removed.
For this month’s Belt Focus, Continental provides fitters with a detailed installation guide that offers a step-by-step explanation of the correct replacement procedure to ensure smooth belt change operations.
As is always advised, consult the manufacturer guidelines for the vehicle in question. In this instance, the manufacturer recommends changing the timing belt in varying intervals every 90,000km up to 2001/04, every 120,000km from 2001/05, and every 150,000km from 2002/05. For this procedure, the suggested labour time is 2.9 hours.
The manufacturer also recommends changing the timing belt idler at bottom right from 2001/05 to 2002/04 (spare part no. 038 109 244 H) every 120,000km, and this is likely to take 0.1 hours to carry out.
Technicians need the tools specified below for this procedure, which can be found in the Continental Tool Box V01:
- Injection pump drift OE (3359), Tool Box V01/6
- Camshaft alignment tool OE (3418/T 10098), Tool Box V01/22
- Tensioning wrench for tensioning pulley OE (V159), Tool Box V01/27
- Puller for camshaft sprocket
- Counterhold OE (3036)
Preparatory work
First, identify the vehicle using the engine code, then disconnect the vehicle battery. Make sure you do not turn the crankshaft and camshaft once the timing belt has been removed. Next, turn the engine in the normal direction of rotation (clockwise), unless it is otherwise specified.
Turn the engine only at the crankshaft sprocket and not at any other sprockets, and vitally, ensure that you only carry out checks and adjustments when the engine is cold. It is also essential to avoid contact between the belt and harmful substances, such as engine oil or coolant.
For all the tightening torques required in the procedure, refer to those specified by the vehicle manufacturer.
Ahead of removal, loosen the ancillary unit belt, upper engine cover, right headlamp, air pipe, and coolant expansion reservoir and place to one side. Then, place the pipe for the crankcase ventilation system, the power steering expansion reservoir, and the screen wash bottle to one side. Next, remove the vacuum pump for the brake booster, the upper and lower timing belt guards, the cylinder head cover, the right engine mount, and the engine mount bracket.
Removal – camshaft belt
- Set the valve timings to the TDC mark of cylinder 1
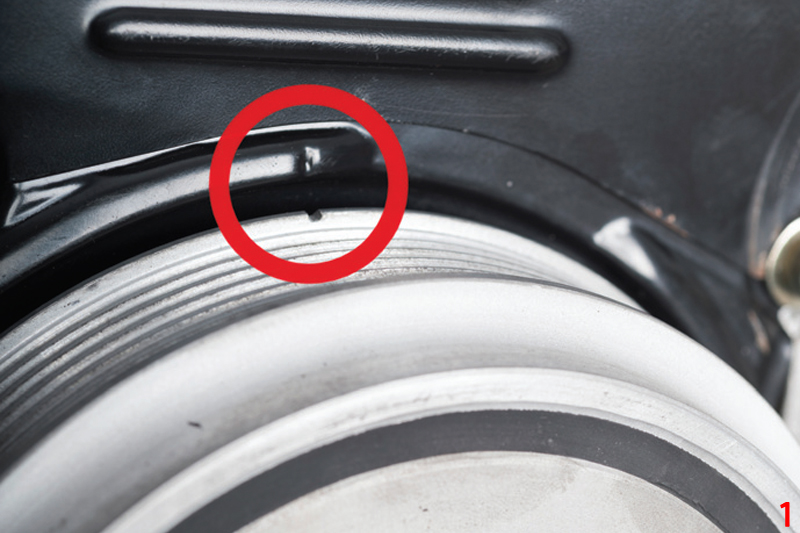
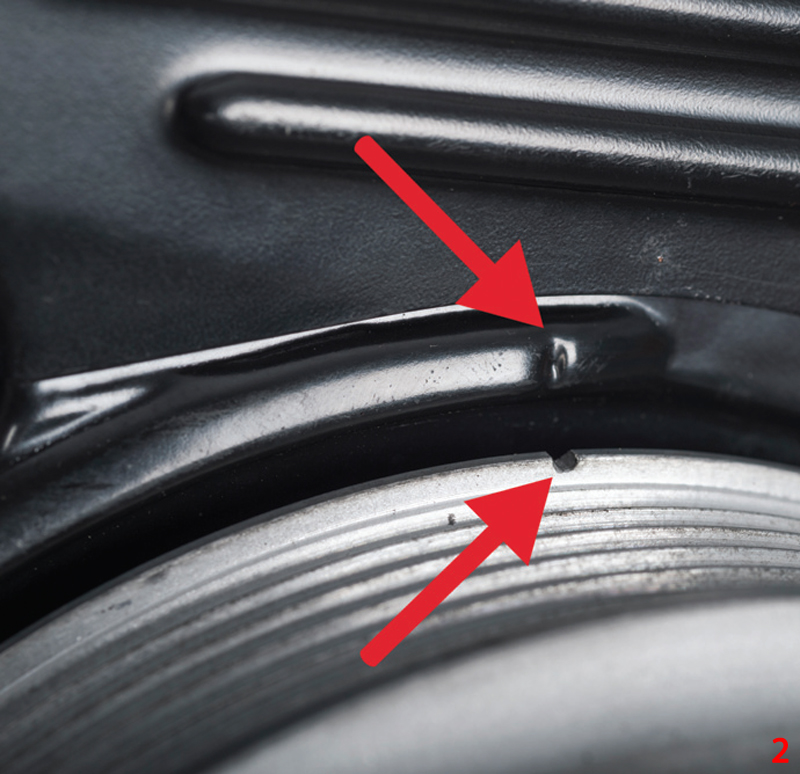
- Align the mark (notch) on the crankshaft sprocket with the mark (notch) on the rear timing belt guard (Figs 1/main image & 2)
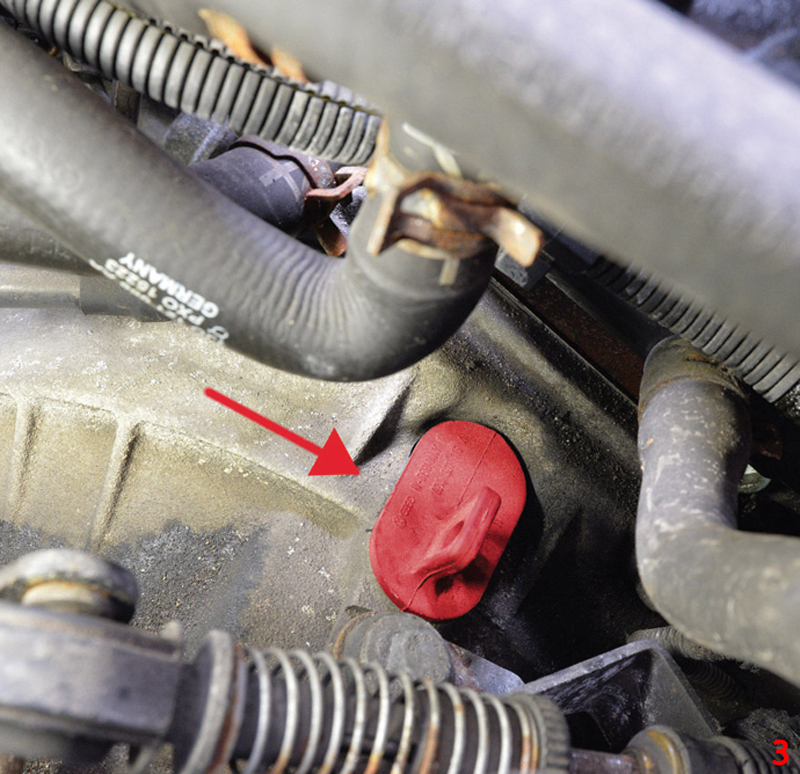
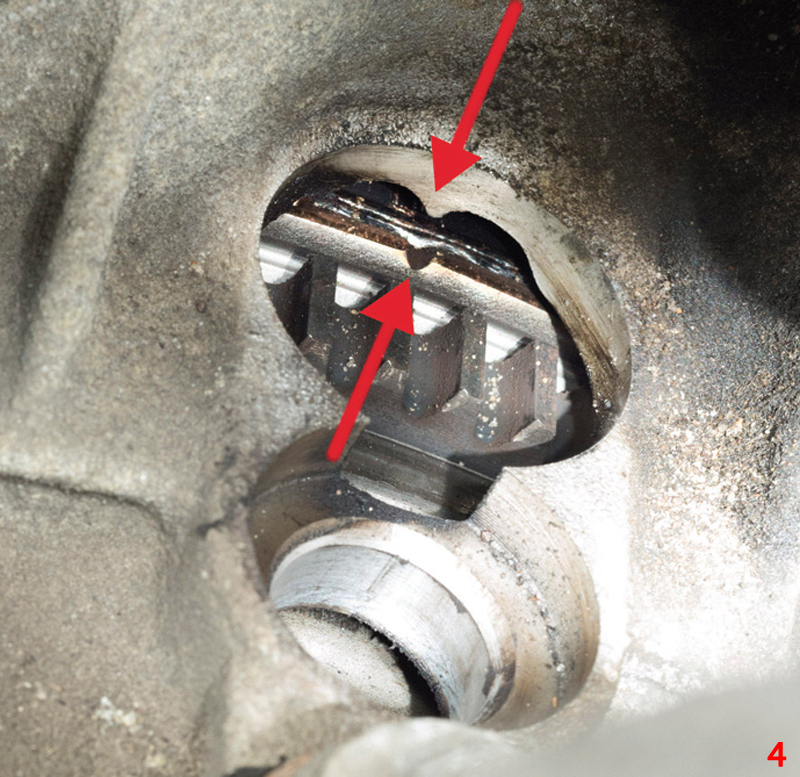
- Check the crankshaft mark. To do so, remove the rubber plug from the torque converter housing (Fig 3). Then, align the mark (notch) on flywheel must align with mark (projection) of opening (Fig 4)
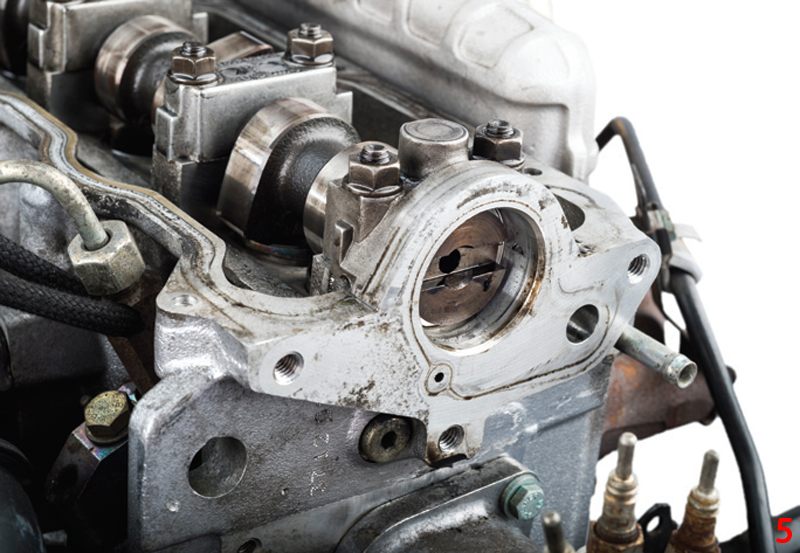
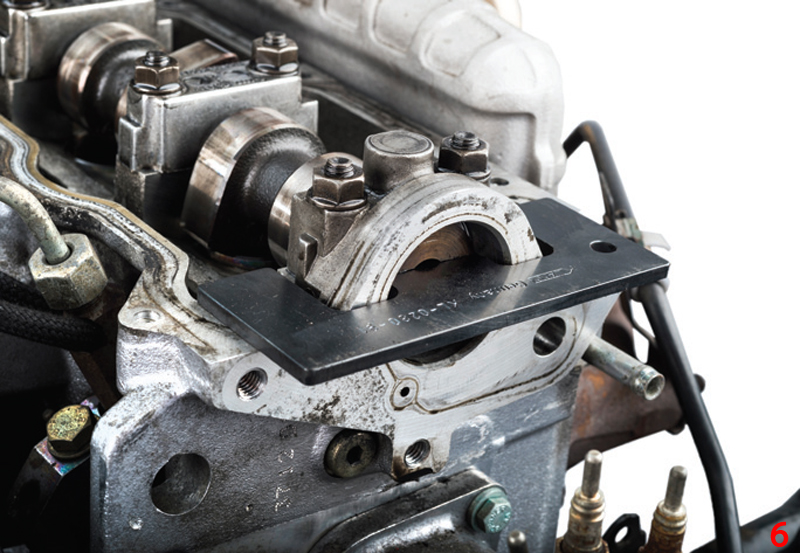
- Insert the camshaft alignment tool, OE (3418/T10098), into the rear of camshaft (Figs 5 & 6). When you do so, ensure that the valves of cylinder 1 are closed and the valves of cylinder 4 are overlapping
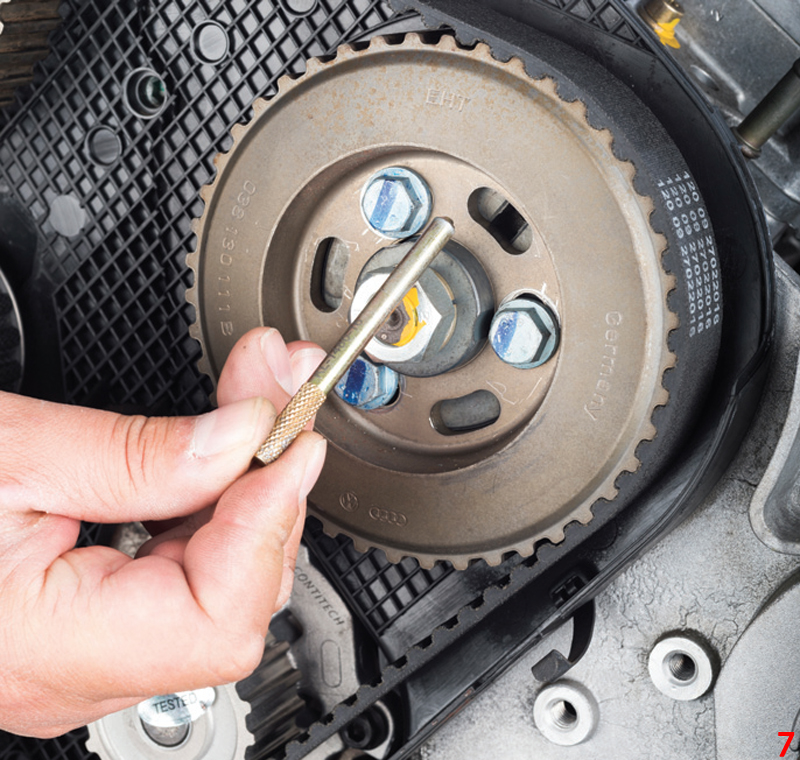
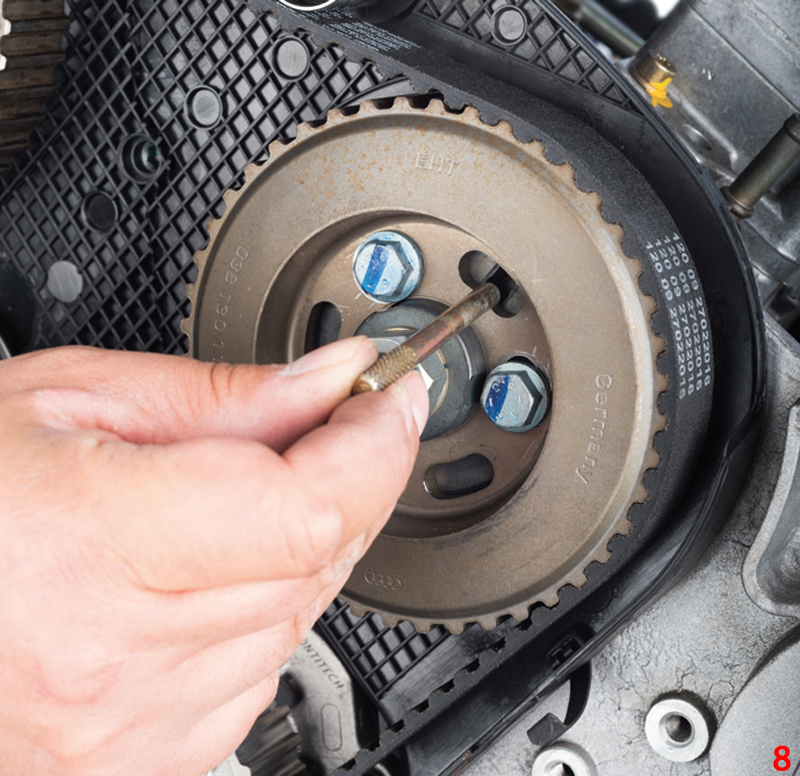
- Insert injection pump drift OE (3359) into the injection pump sprocket at approximately the one o’clock position (Figs 7 & 8)
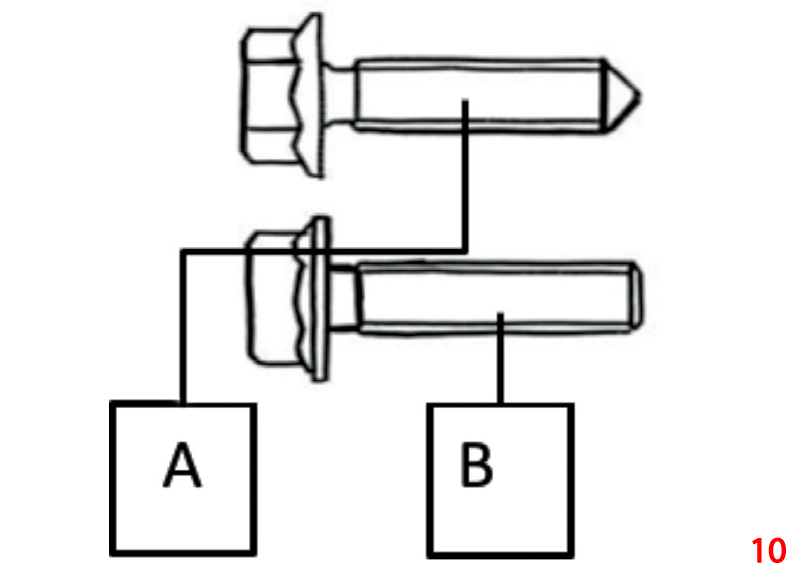
- Loosen the three bolts of the injection pump sprocket using the counterhold (Fig 9). There are two different types of bolt. Type A must be changed; type B can be re-used (Fig 10)

- Remove the crankshaft belt pulley and the lower timing belt guard
- Loosen the tensioning pulley nut and release the tension on the timing belt
- The timing belt can now be removed
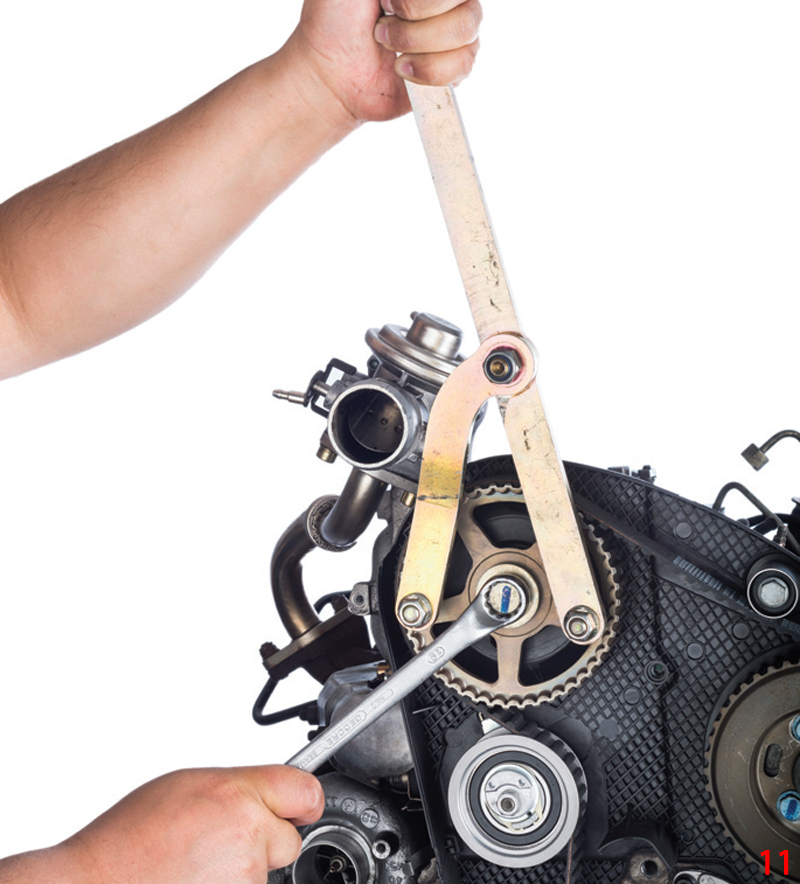
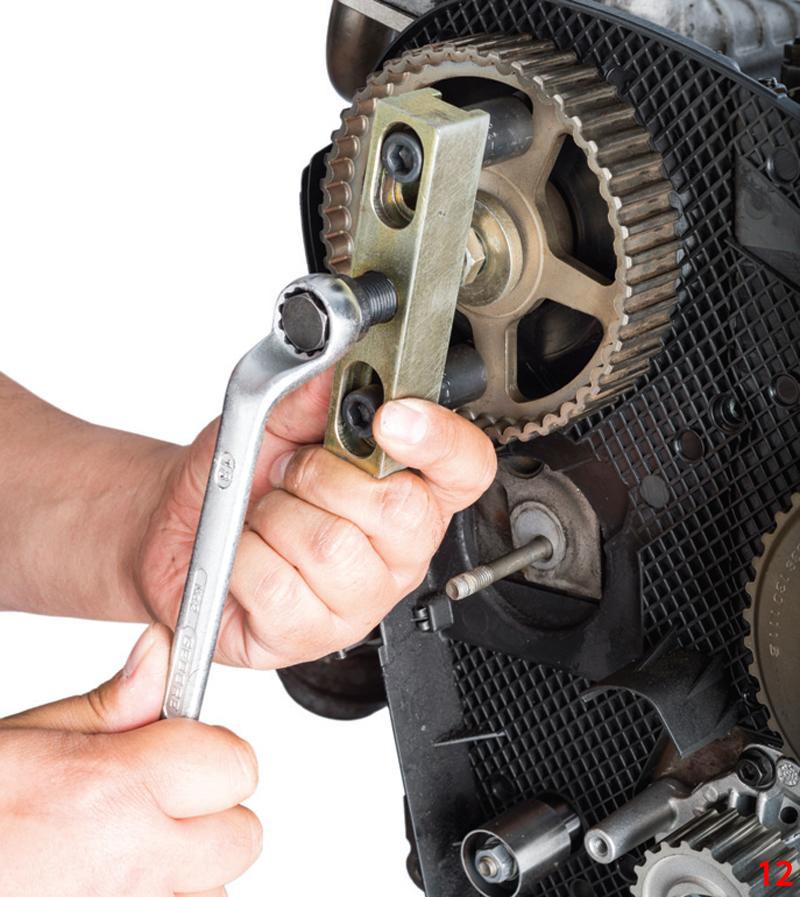
- Loosen the camshaft sprocket bolt using the counterhold and detach it from the shaft using the puller (Figs 11 & 12). Before that, remove the camshaft alignment tool, OE (3418/T10098), from the camshaft. Never use the camshaft alignment tool as the counterhold. Finally, remove camshaft sprocket (Fig 13)
Installation – camshaft belt
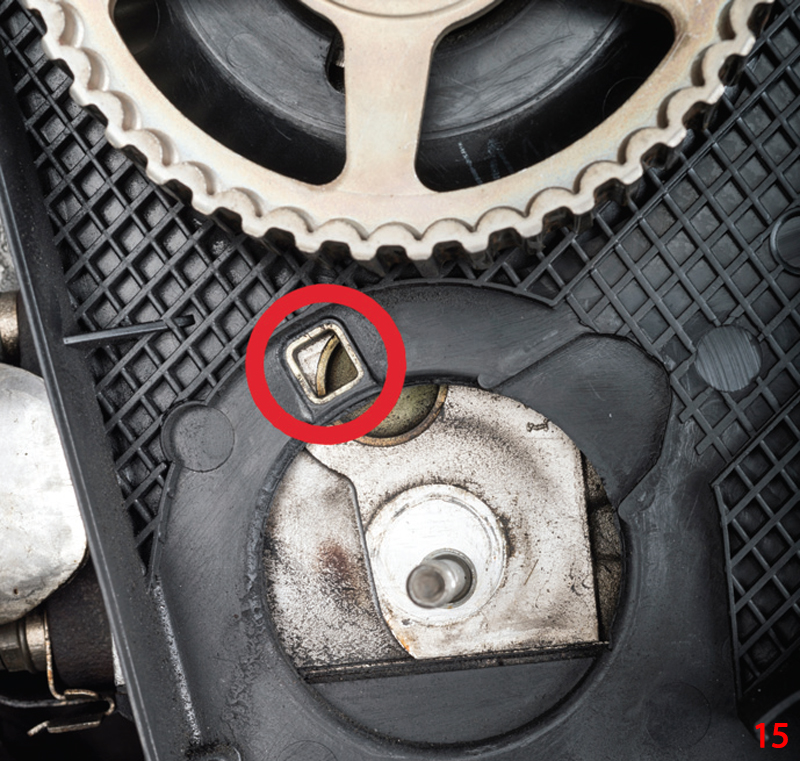
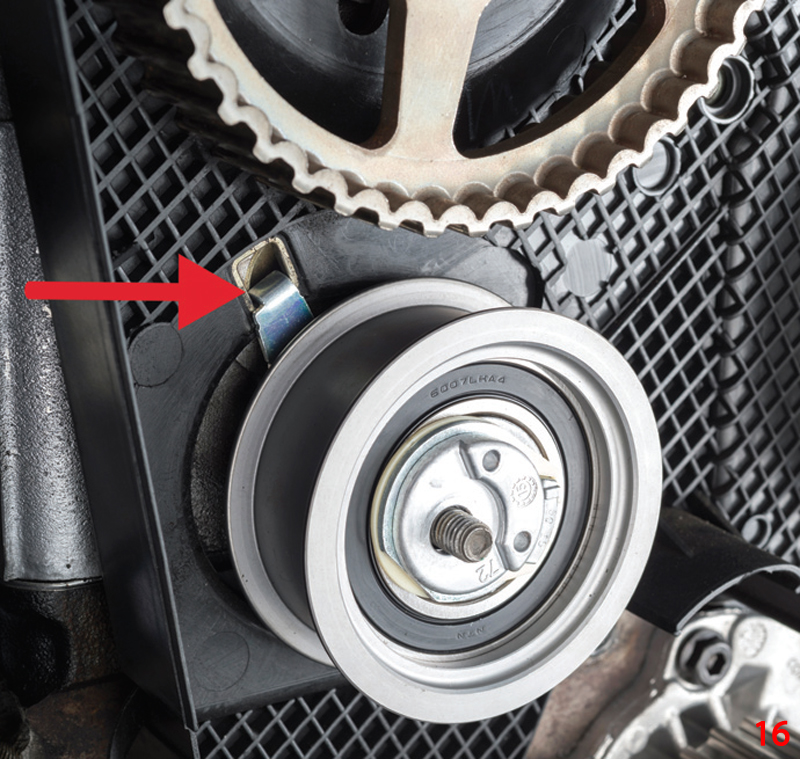
- Fit the new components from the timing belt kit. Check the remaining components, such as the camshaft sprocket and the crankshaft sprocket, for damage. Check that the positioning is correct when fitting the tensioning pulley. The lug must engage the recess in the rear plastic cladding (Figs 14, 15 & 16)

- Position the fuel injection pump pulley in the center of the slots
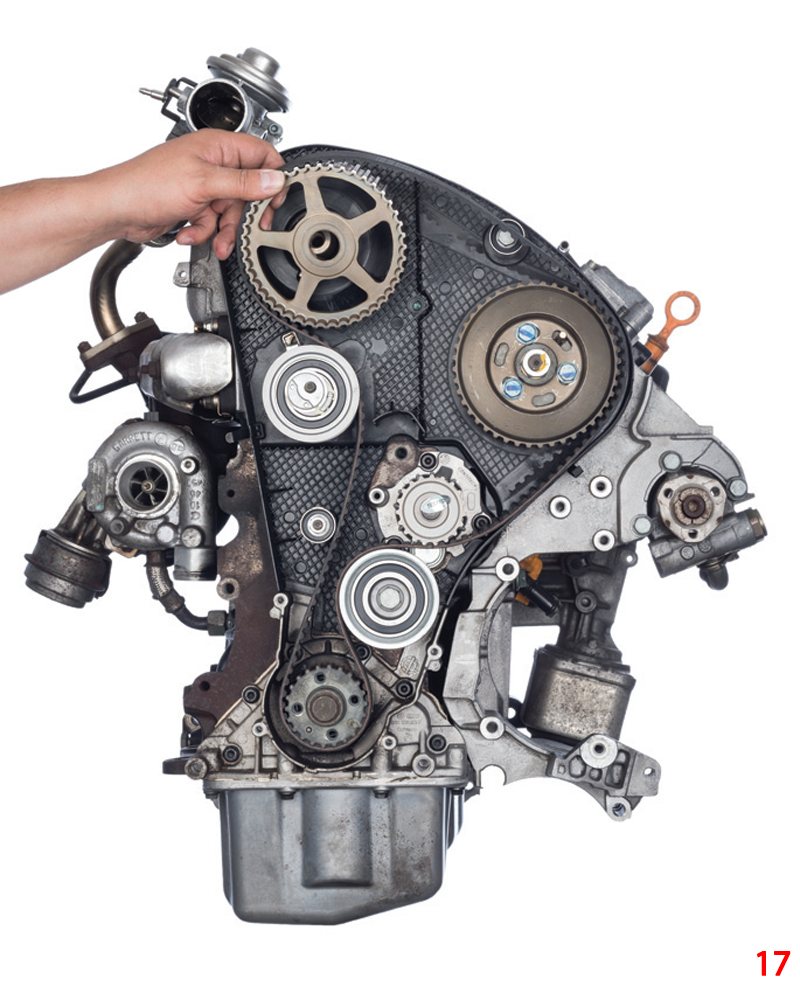
- Place the timing belt first on the crankshaft sprocket and after that counterclockwise on the idler, water pump, and then on the tensioning pulley. Finally, place it on the camshaft with the loose camshaft sprocket (Fig 17) and screw in the bolt to secure the camshaft sprocket. Important: Take care to ensure that the timing belt is not kinked during the fitting! The timing belt must be tight between the sprockets on the tight side
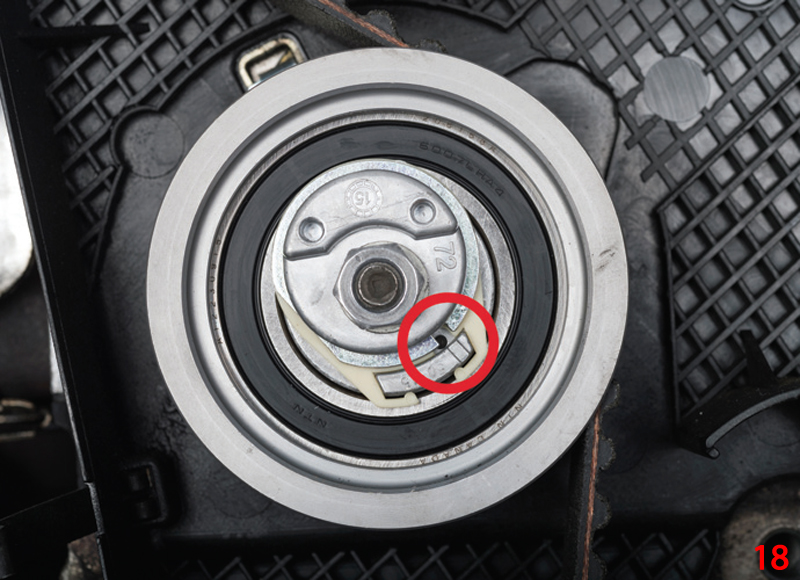
- Tension the timing belt via the tensioning pulley. To do so, insert the tensioning wrench for the tensioning pulley, OE (V159), into the tensioning pulley and then turn the tensioning pulley clockwise and tension it until the notch is aligned with the mark (Fig 18). Next, tighten the tensioning pulley nut to 20Nm
- Remove the locking tools from the injection pump sprocket and camshaft
- Tighten the camshaft sprocket bolt to 45Nm using the counterhold
- Tighten the three bolts of the injection pump sprocket using the counterhold as follows: type A to a torque of 20Nm (+90° after final assembly), type B to 25Nm
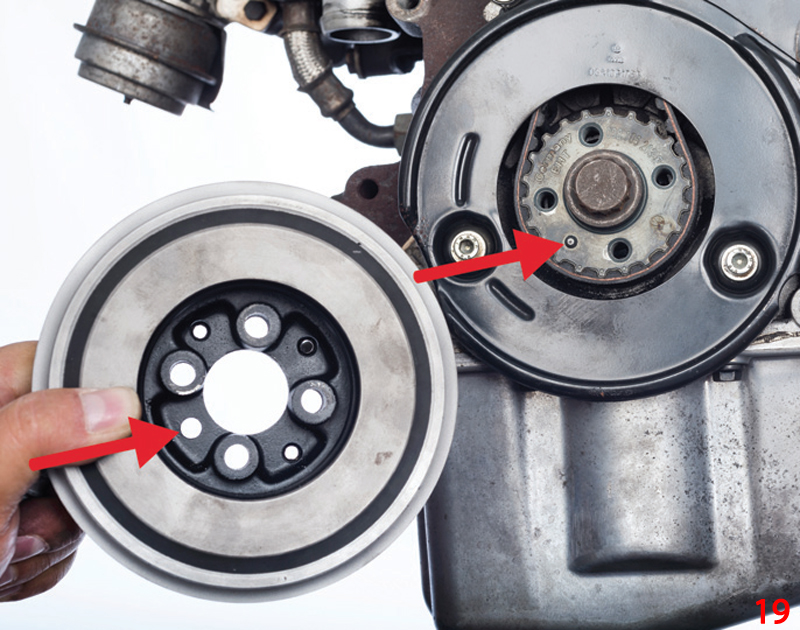
- Re-fit the lower timing belt guard and crankshaft belt pulley. Ensure the crankshaft belt pulley is correctly positioned. There is a small cam on the crankshaft that only fits into the belt pulley in one position (Fig 19). The belt pulley contains three small and one large bore(s); the large bore matches the cam. Tighten the four bolts to 10Nm + 90°
- Turn the engine through two revolutions in the direction of engine rotation
- Set the valve timings to the TDC mark of cylinder 1 (same setting as stated in the ‘Removal’ section)
- Check the timing belt tension reading again
- Assemble and finalise in the reverse order to removal
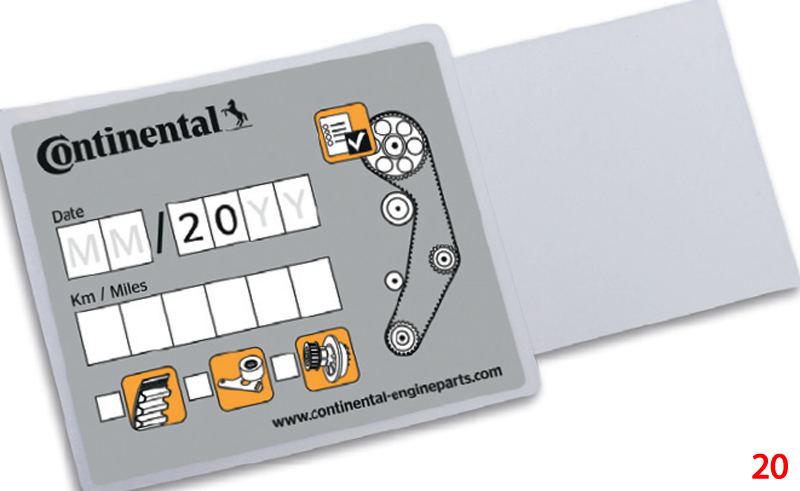
- Finally, record the changing of the original Continental timing belt on the sticker supplied and stick this in the engine compartment (Fig 20)
As always, carry out a test run or test drive to ensure correct operation.


