Digital Radio UK, the organisation working with stakeholders and government to co-ordinate the migration to DAB, has stated that the government is preparing to announce a switchover – from analogue to digital radio signals – later this year.
Although a precise date has yet to be confirmed, the switchover will likely occur once the share of listening reaches 50% and population coverage is 97%. Both have been rising quickly: over 35% of all radio listening is digital and population coverage tops 94%.
Offering digital radio upgrades
To ensure their customers are not left in silence once the initiative gathers pace, Celsus UK is urging garages to take advantage of this potentially lucrative ‘upsell’ by offering upgrades to existing car audio systems.
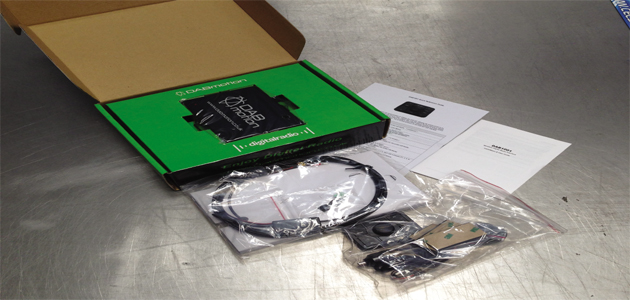
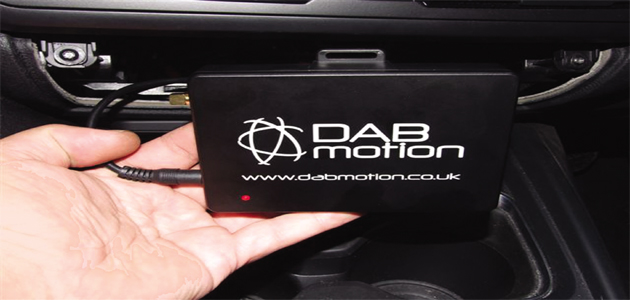
The DABmotion DAB1001 is the ideal product to help them do this. This wireless digital radio upgrade kit includes a hide away interface, a sleek user control and a high-performance antenna. Additionally, it is quick to set up and operate.
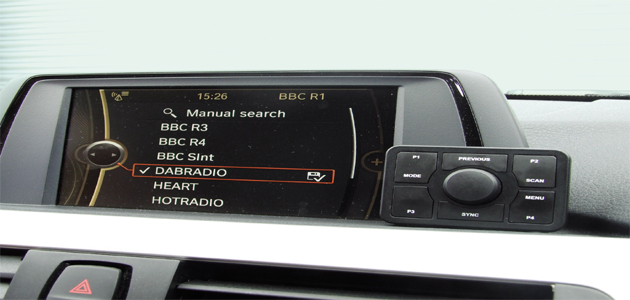
Looking at functionality, the kit is designed to upgrade existing FMRDS radio to deliver high-quality digital reception through the existing audio system. Drivers can then have access to all the choice and benefits of digital listening on the move!
Speaking about some of the product’s features, Mark Baker, Celsus Marketing Director, says: “DABmotion offers programmable presets and displays station, track and artist text on the existing head unit.
“It’s easy to fit, as there’s no requirement to connect to the vehicle’s CAN Bus system, and we’d recommend that the high performance internal glass mount antenna and 4m extension are located in the front or rear of the vehicle to further boost performance.”
Getting the best performance
DAB1001 also scores on versatility; the “hide away” black box interface is just 112mm x 86mm x 23mm, so it will fit easily in the glovebox or behind the dash. In terms of the antenna, there may be a small numbers of cases where a high-performance antenna is required to boost the DAB signal, due to screen filaments or coatings that might filter it.
Celsus is happy to provide advice on this where needed. DABmotion is a universal fit item and can be installed as a ‘plug and play’ device (power can be achieved via an accessory socket/plugin 12V power supply), meaning some motorists may be tempted to ‘have a crack’ themselves.
Garages should, though, inform the car driver that the recommend option for better performance is for the device to be fully hidden behind the dash, utilising the hardwire power option. This is a procedure that requires a professional installation, and, thus, presents technicians with the opportunity to offer this service.
Looking into the future, Mark believes that digital radio upgrades will drive a valuable new revenue stream for garages, stating: “We expect to see a prime market opportunity for garages looking to offer digital radio upgrades to existing customers during service and MOT visits. For a small amount of labour, drivers can get a system that’s powered without plugging in, whilst ensuring antenna and interface placement is optimised.”
DABmotion is fully supported with technical back-up from Celsus and installation guidelines are included. A full training programme is also available, while the company’s website shows customers stock availability and detailed product information at the click of a button.
Fitting the DABmotion 1001
DABmotion can be powered via a 12V accessory socket, but there’s no doubt a professional install with hardwire power supply and hidden interface is recommended. In this case, the vehicle also needed a high-performance antenna. This is not usually the case, so you should bank on a typical installation taking around 30 minutes.
1. Open the product box to reveal all the parts of DABmotion DAB1001.
2. Locate a suitable installation position for the interface box of DAB1001 – behind the head unit and in/behind the glovebox if preferred.
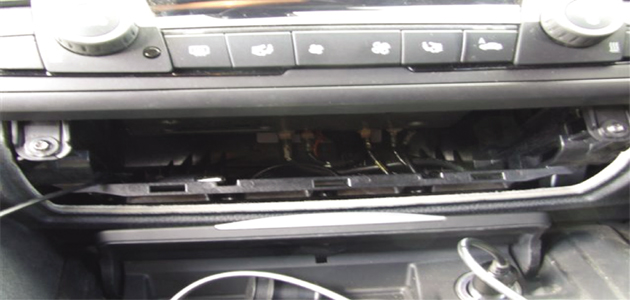
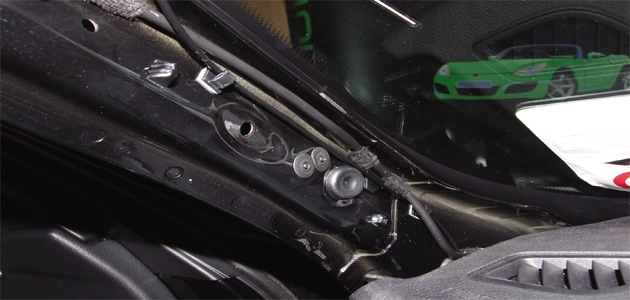
3. For professional installation, hardwiring of the 12V power and ground is advised – soldering the connection of these feed wires is recommended.
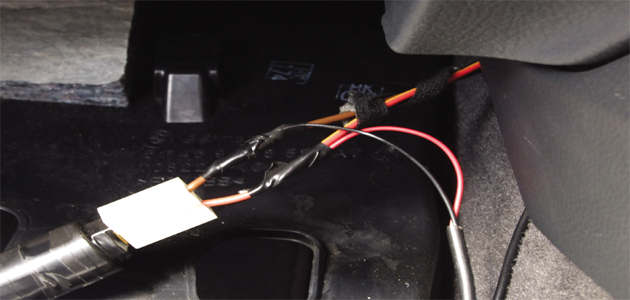
4. Connect the power plug to the DAB1001 interface.
5. Follow the step-by-step process in the installation guide provided to locate a suitable person to correct fitment of the digital radio antenna.
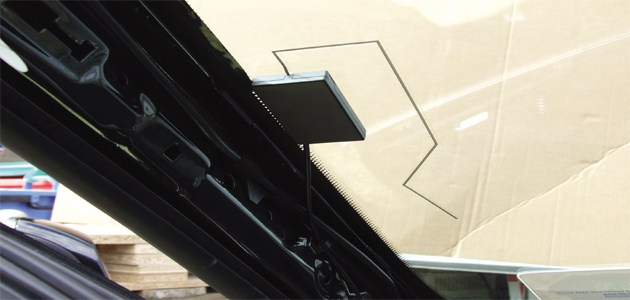
6. Ensure that the coaxial cable from the high performance digital radio antenna is fitted securely with the clips provided and is kept away from airbag locations.
7. Plug in the SMB digital radio antenna connection to the DAB1001 interface box.
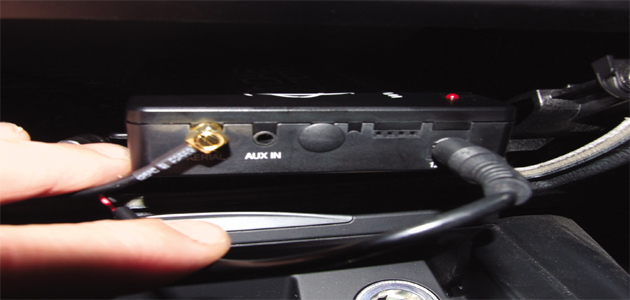
8. Test the unit before rebuilding the car interior. Your customer can then start to enjoy the benefits of digital radio on the move!