Schaeffer Automotive Aftermarket (UK) provides a full replacement guide for the C180 1.8 Petrol, 2003 model using LuK parts.
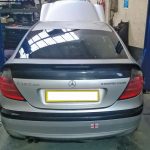
The Mercedes C Class has been on our roads since 1993. In 2003, Mercedes introduced the C180Sports Coupe range and this has become a popular and desirable vehicle.
The car we’re featuring in this clinic is a 1.8 Supercharged 2003 model, which had covered over 140,000 miles and the customer had noticed a little clutch slip.
Recommended fitting time: 4 hours LuK parts fitted: 624324019; 415018710; 510003510; 411014810
When carrying out a visual inspection it was apparent that this is a straightforward job that most independent workshops can carry out.
For this repair, the workshop equipment we advise is a two-post ramp and a transmission jack. With the vehicle placed on the ramp, it is recommended that you disconnect the negative battery lead for safety. There is no work to be carried out from the top side of the vehicle, so raise the ramp and remove the engine and gearbox under shields. Disconnect the PAS pipe from the gearbox bell housing by removing the two TRX bolts.

Exhaust centre removal
Disconnect the gearbox speed sensor multiplug located on the underside of the gearbox before disconnecting the reverse light switch multiplug at the rear of the gearbox. You should then remove the gearbox earth strap and now disconnect and completely remove the exhaust oxygen sensor.
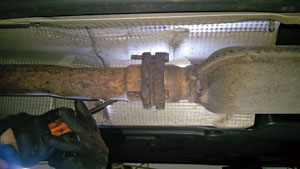
Disconnect the exhaust centre joint by removing the three bolts (these may be corroded) and then remove the exhaust front pipe support bracket. Now remove the rear gearbox mounting, before disconnecting the prop-shaft from the gearbox.
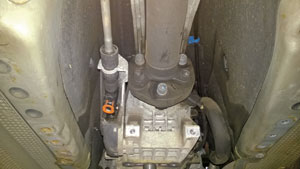
Remove the rubber cushion drive unit, noting the position and colour of the bolts and washers as they have different locations. Now disconnect the hydraulic clutch pipe; the easiest point for this is where the hydraulic pipe comes through the transmission tunnel on the O/S. Once disconnected, the pipe connection needs to be blanked to prevent the fluid leaking out.
Remove both parts of the gear linkage: part one is achieved by removing the plastic cover from the linkage housing and then removing the cable by releasing the ball joint. Part two of the process is completed by removing the retaining pin from the selector rod above the output flange and disconnecting.
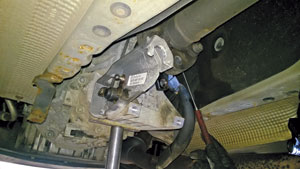
At this point you should block/support the prop-shaft and linkages using the cross member to give clearance around the rear of the gearbox. Support the gearbox with a transmission jack and remove the ten bell housing TRX bolts; all bell housing bolts can be accessed from the underside, with the use of a long extension bar. Ease the gearbox back until it is clear of the clutch and then lower and remove. The gearbox may be tight on the dowels so you should ensure the dowels remain in the engine and not the bell housing.
End limit
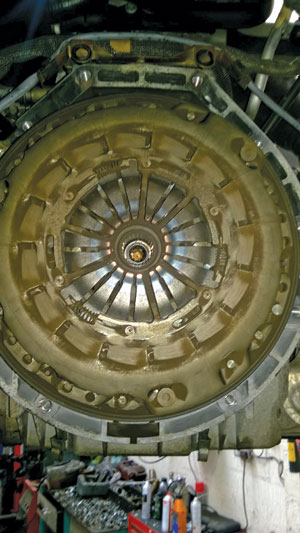
With the gearbox removed, an initial inspection showed the clutch was at its end limit as the three little adjustor ring springs were fully extended. Remove the clutch assembly and test the dual mass flywheel (DMF) for play and rock – this information is available through Schaeffler’s Repxpert website, on-line catalogue and/or DMF Checkpoint App.
Remove the Concentric Slave Cylinder (CSC) from the bell housing, clean the bell housing and fit the new CSC. Clean the flywheel face to remove the “glaze”; for this we used an Emory cloth. It is now good practice to try the new clutch plate on the gearbox input shaft to ensure the splines are correct and to lubricate the clutch splines with a small amount of high melting point grease so we have an even smear and any excess is wiped off. Fit the new clutch assembly using the correct Clutch Alignment Tool and checking the clutch plate is the correct way round showing ‘Getriebe Seite’ (Gearbox Side) on the outer face – we advise installing the clutch assembly with a Self Adjusting Clutch (SAC) fitting tool.
Ensure the gearbox bell housing dowels and the separator plate are still located properly. Refit all parts in reverse order and torque to the manufacturer’s specification. When bleeding the clutch hydraulic system, connect a bleed bottle to the bleed nipple with a hose and open the bleed nipple. This system is gravity bled so you must ensure the clutch master cylinder does not run dry. Reconnect the battery lead and ensure all electrical systems work correctly, such as the radio, central locking etc. Once the car has been road tested and checked, the job is complete.


