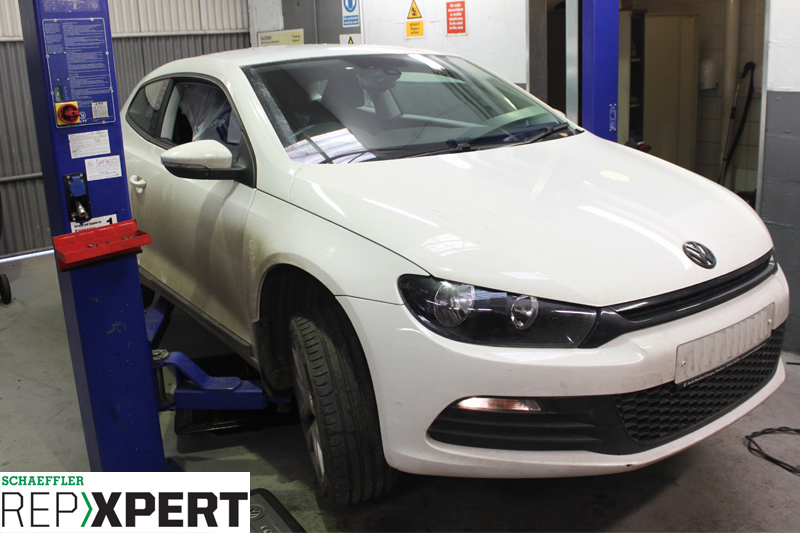
REPXPERT’s Alistair Mason, replaced the timing belt and water pump on a 2011 Volkswagen Scirocco, which was fitted with a 2L TDI common rail engine (engine code CFHC). The vehicle had covered slightly more than 70,000 miles and was replaced due to its age and mileage.
KIT NEEDEDFitters need the following tools for the procedure:
1. Two-post ramp
2. Engine support
3. Crank, cam and pump locking tools
4. Pulley counter hold tool
5. Cooling system vacuum bleeding set
On this occasion, the engine was identified as an ‘interference’ type engine. Therefore, in the event of timing belt failure, the likelihood of engine damage is extremely high.
All timing belt replacements should be carried out with the engine at ambient room temperature, and always rotate the engine in the normal direction of rotation unless otherwise advised. It is also recommended that all the tensioners, idlers and fixings are replaced and torqued as per the manufacturer’s instructions.
Step-by-step procedure
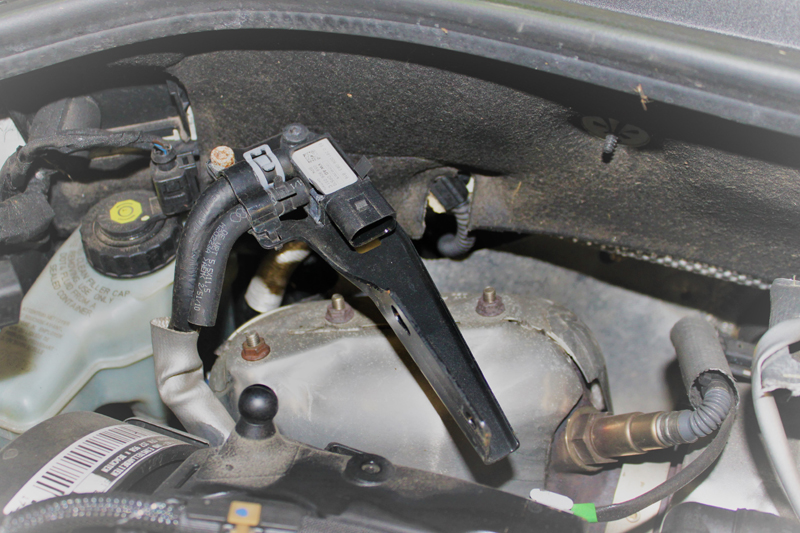
With the car positioned on the ramp, open the bonnet and remove the plastic engine cover. Unscrew the bolt that secures the screenwash bottle filler neck, and carefully undo the coolant expansion tank cap to release any pressure and then refit. Next, undo the retaining screws for the cooling system expansion tank, disconnect the diesel particulate filter pressure sensor and stow towards the bulkhead area (See below).
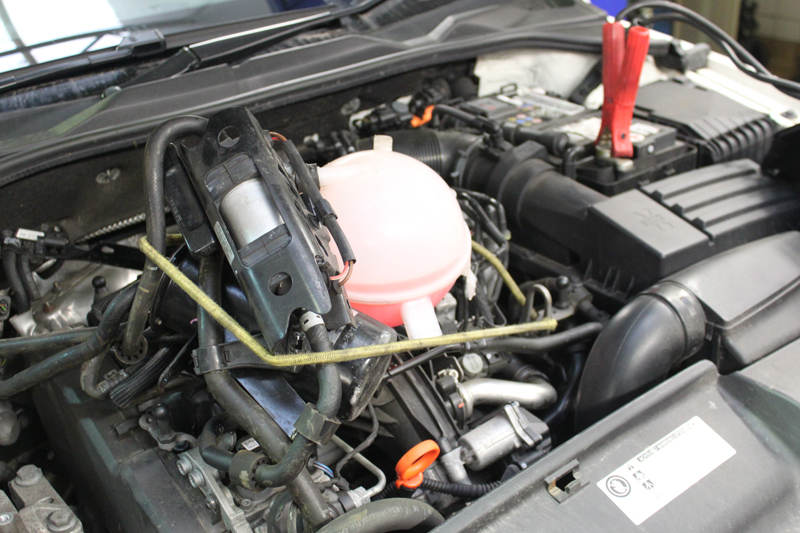
The next job is to remove the complete fuel filter assembly, then unbolt and remove the bracket that contains the auxiliary fuel pump – then the whole assembly can be stowed and secured on top of the engine (See below).
This now provides clear access for removal of the upper timing belt cover. Release the retaining clips and remove the cover (See below) – at this point, raise the ramp to gain access to the underside.
Remove the engine shield and the O/S wheel arch liner, giving access to the auxiliary drive belt (See below).
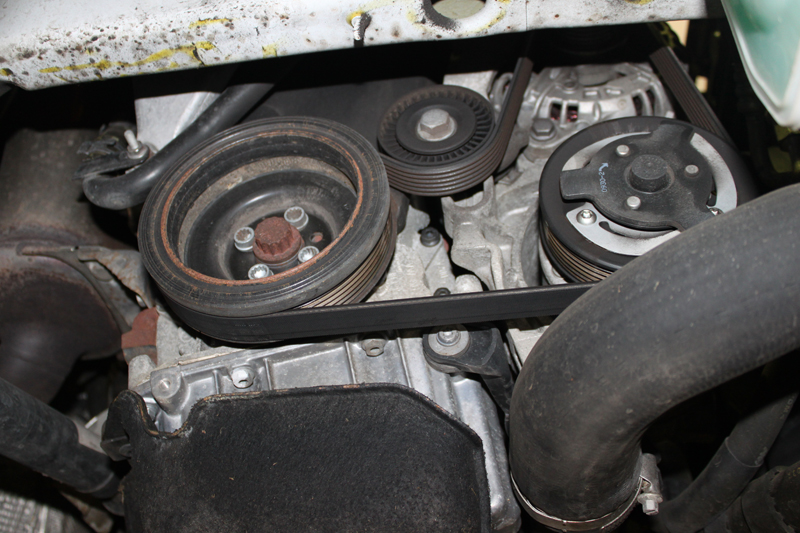
It is good practice to slacken the four bottom pulley retaining bolts with the auxiliary drive belt still attached. Once the bolts have been slackened, release the tension from the auxiliary drive belt and remove it.
Once uninstalled, inspect the auxiliary drive belt for wear and cracking – replacement of this belt is always advised. Now remove the bottom pulley and unscrew the retaining bolts for the metal coolant pipe, which runs along the timing belt cover. Undo the lower cover retaining bolts and then remove the lower timing belt cover.
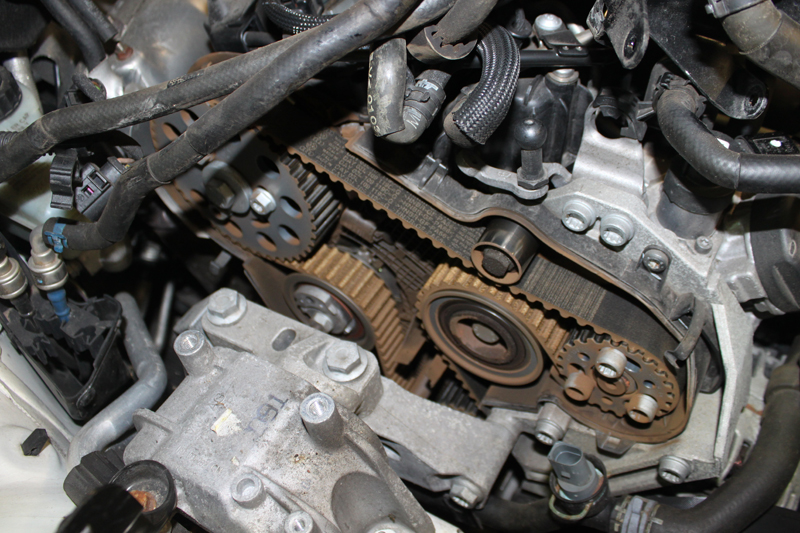
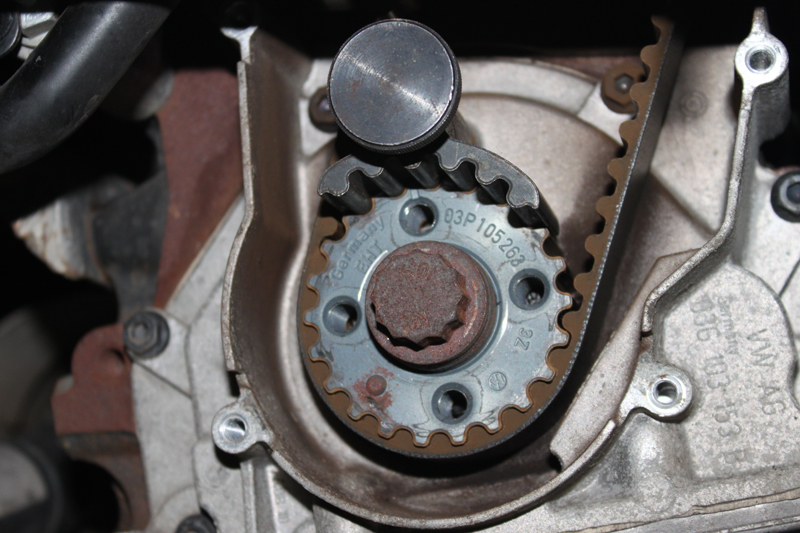
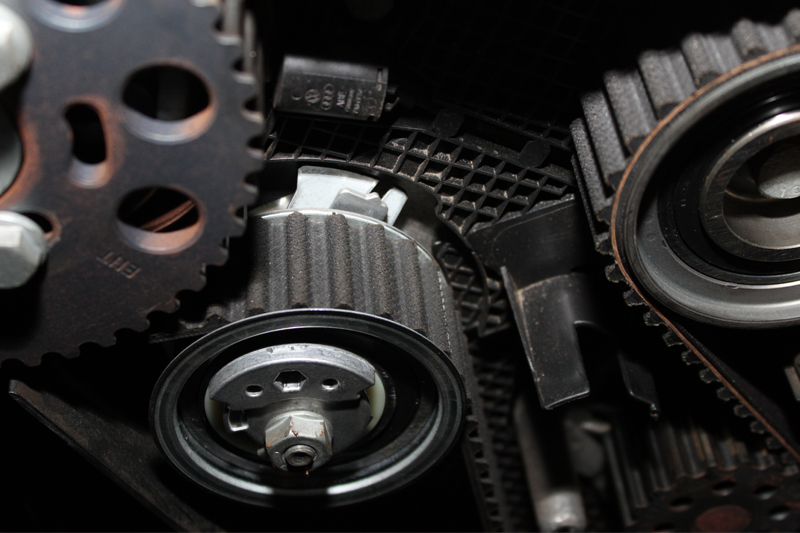
Using a 19mm 12-point socket, rotate the crankshaft until the timing mark for the crankshaft aligns, then locate the camshaft locking pin, before locking the crankshaft, camshaft and high-pressure fuel pump with the locking tools (See below).
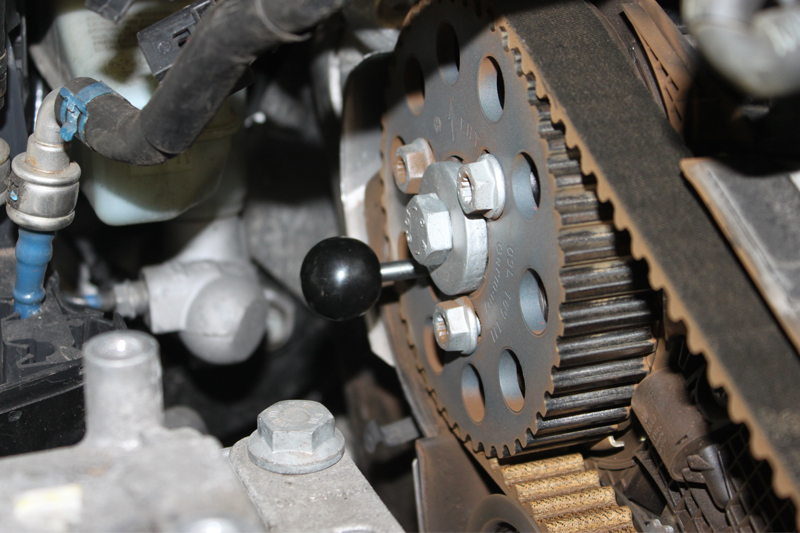
Slacken the three bolts on the camshaft sprocket and the three bolts on the high- pressure fuel pump sprocket by holding the pulleys with the counter hold tool.
Support the engine using an engine brace or sub-frame mounted support, and remove the complete engine mounting, located in the timing belt area. Loosen the timing belt tensioner nut and remove the timing belt to gain more access to the timing belt area. The camshaft sprocket can then be removed, as can the tensioner.
On this application, there is no instruction to replace the tensioner stud, but it is best practice to do so.
The next task is to replace the three idler pulleys and torque to the manufacturer’s specification, before raising the vehicle to gain access to the underside and draining coolant from the radiator. Using a coolant drainer, release the drain screw located at the bottom of the radiator on the N/S.
Once the coolant has been drained, undo the three bolts from the water pump and remove the water pump. Before fitting a new water pump, clean the area where it is going to be positioned. Install the new component and torque the bolts to the manufacturer’s specification, as well as ensuring that all coolant is removed from the timing belt area.
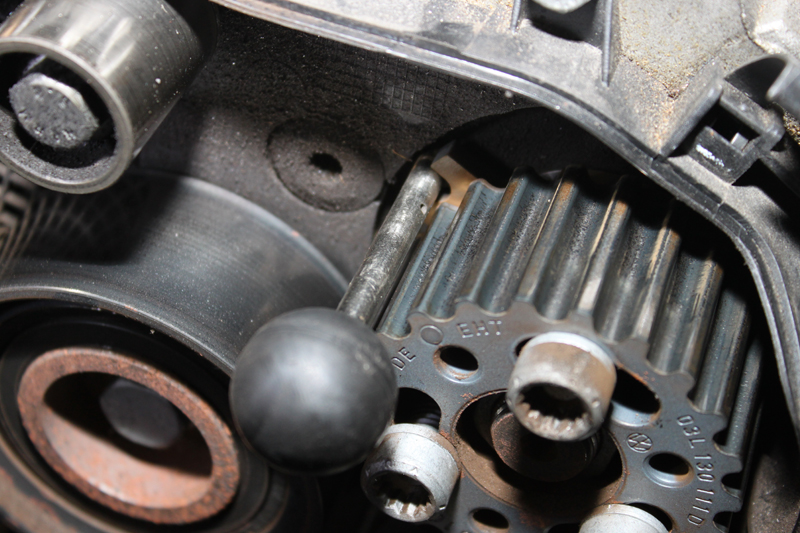
Fit the camshaft sprocket, and ensure the locking pin is correctly installed. Turn both the camshaft sprocket and high-pressure fuel sprocket in the clockwise direction on the elongated holes, leaving the bolts free enough for the pulleys to rotate but not tip, before fitting a new tensioner.
Timing belt installation
Fit the new timing belt, starting from the crankshaft, tensioner, camshaft, high-pressure pump, coolant pump, and finally slide it onto the idler. When positioned correctly on the sprockets and idlers, tension the belt by turning the tensioner with an Allen key in a clockwise direction until the pointer aligns with the gap on the indicator back plate (See below).
Hold the tensioning roller in position, tighten and torque the tensioner nut to the manufacturer’s specification. The camshaft and high-pressure pump sprockets will now be aligned in a central position – at this point, hold the sprockets with a counter hold tool and tighten the sprockets, again to the manufacturer’s specification.
Next, remove the locking tools and rotate the engine at least two complete revolutions in the direction of rotation, refit the locking tools to ensure the timing is correct and also check that the belt tension has not altered at the tensioner pointer. Once the correct timing and belt tension has been confirmed, ensure all bolts have been torqued correctly, then refit all components in reverse order of removal.
It is worth noting that the engine mounting on this vehicle, located on the cylinder block, uses a stretch bolt, which will also need replacing.
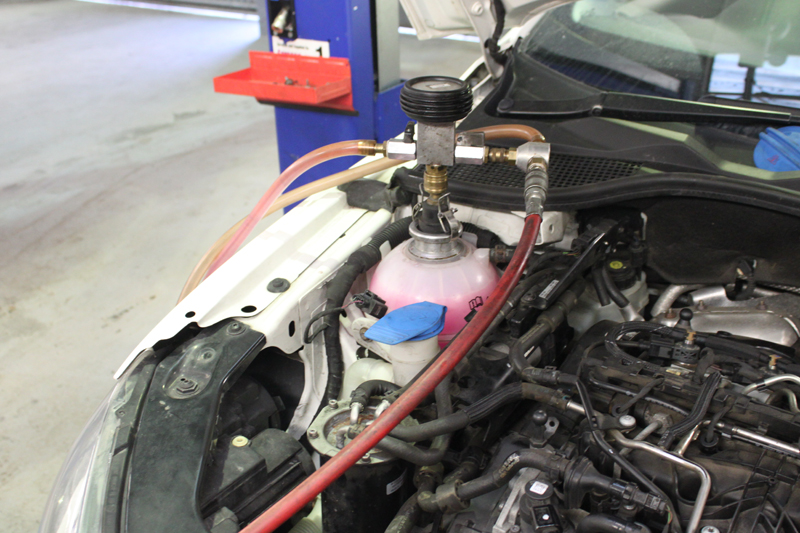
Remember to refill the cooling system with the correct specification. However, it must be bled beforehand via a new and preferred method of ‘vacuum bleeding’ – it’s quick, easy and removes all air from the cooling system (See below).
When the repair is complete, run the engine to confirm a successful repair. Always check for engine fault codes and carry out a road test.


