
A full clutch replacement guide for a Ford Focus, 1.8L TDCI 2007 from the experts at Schaeffler Automotive Aftermarket.
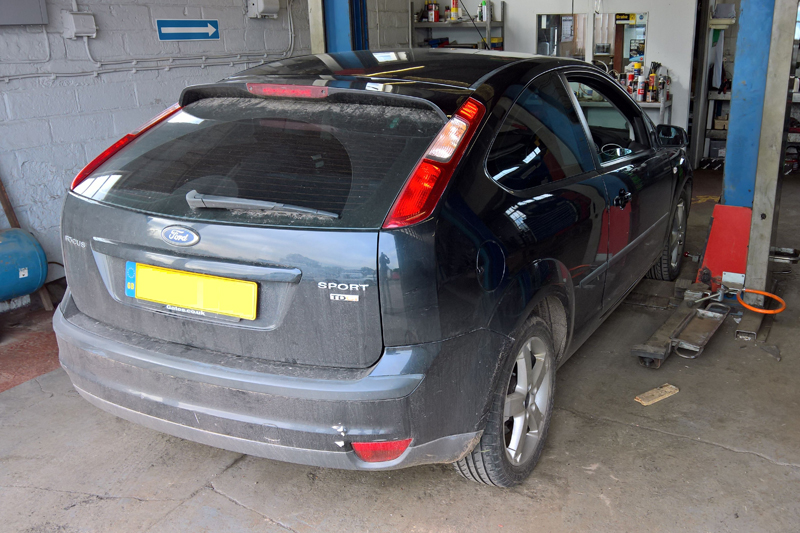
This month, Schaeffler’s Alistair Mason replaced the clutch on a 2007 Ford Focus 1.8 TDCI after a customer noticed slight clutch slip and a heavy clutch pedal. A short road test of the vehicle, which had clocked more than 117,000 miles, confirmed the fault and a clutch replacement was advised.
The Ford Focus is one of the most popular cars in the UK, so clutch replacement is a frequent undertaking. Therefore, to ensure a quality repair inside the scheduled time of four and three-quarter hours, requires strict adherence to the correct procedure.
Below is a thorough step-by-step guide on how to complete the job effectively and efficiently. Before starting the repair, however, if the vehicle is equipped with locking wheel bolts, be prepared by obtaining a key.
Procedure step-by-step
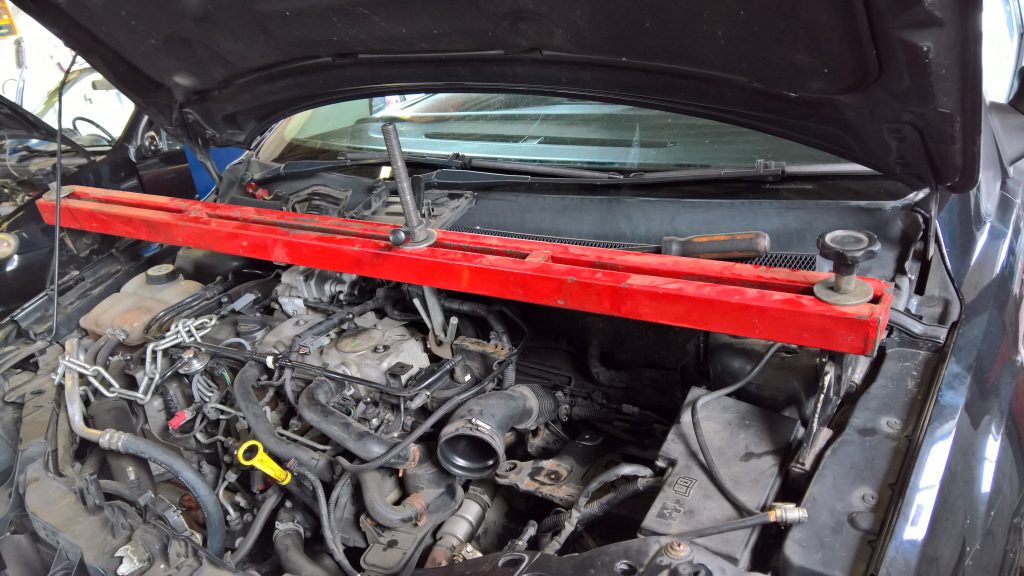
With the vehicle placed securely on the ramp, raise the bonnet; remove the engine cover, air box assembly and battery cover. Then disconnect and remove the battery and battery carrier to gain access to the gearbox (See below).
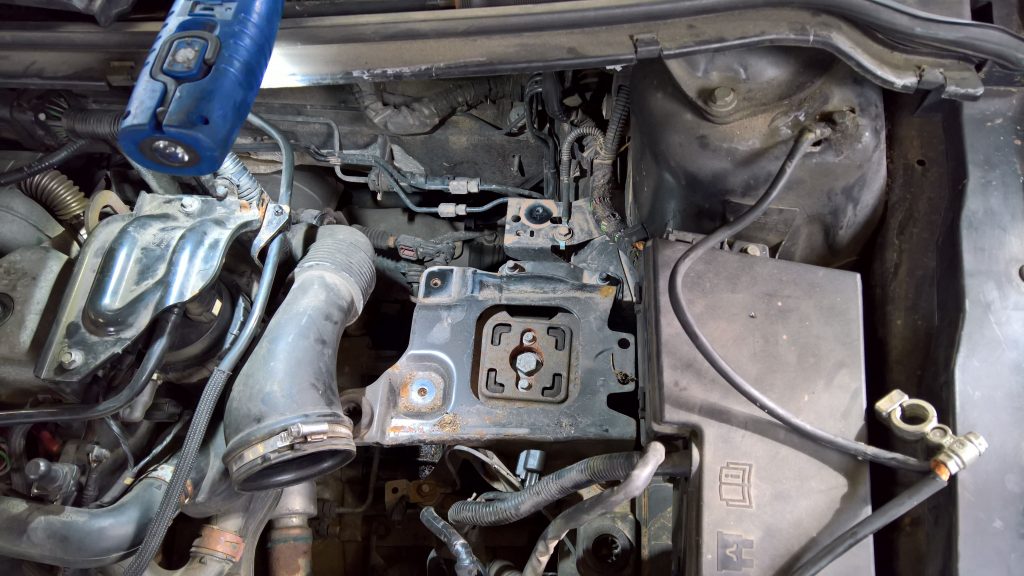
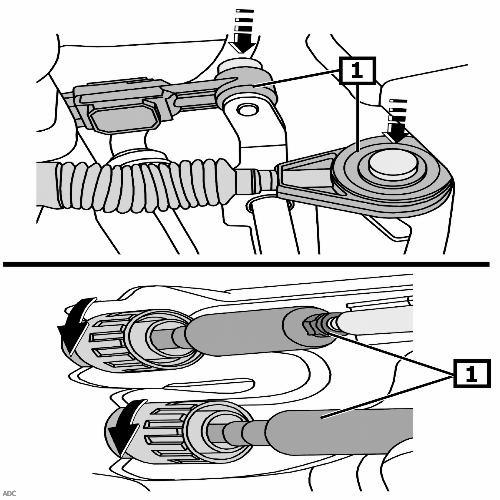
Once completed, the gearbox earth cable and reverse light switch multi-plug can be disconnected, and the gear change cables can be removed by pressing firmly on the centre of the ball joint retainer and lifting the plastic surround. Next, release the outer cable by turning the retaining nut anti-clockwise and, by freeing the outer cable from the mounting bracket, these can now be stowed in the bulkhead area (See below).
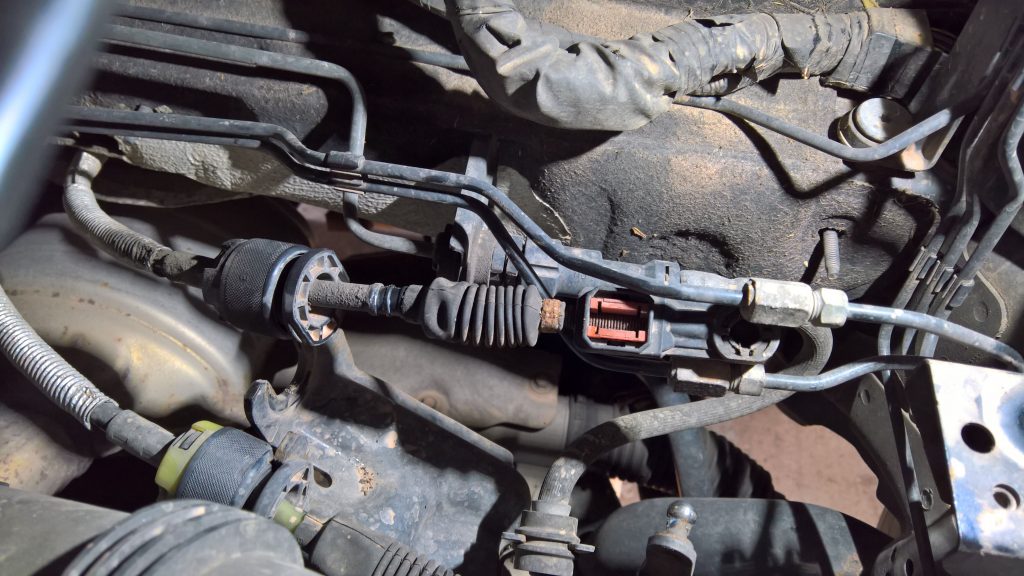
The ensuing task is to clamp the flexible section of the hydraulic clutch pipe and disconnect the clutch pipe from the concentric slave cylinder by releasing the spring clip. Remove the hard, plastic intercooler pipe from the bell housing area by releasing the hose clamp and retaining the nuts. Also, disconnect the coolant pipe bracket from the bell housing stud.
Whilst the vehicle is still on the ground, slacken the front wheel nuts, before raising the vehicle to access the underside of it. Once underneath the vehicle, remove the engine tray and drain the gearbox oil (See below).
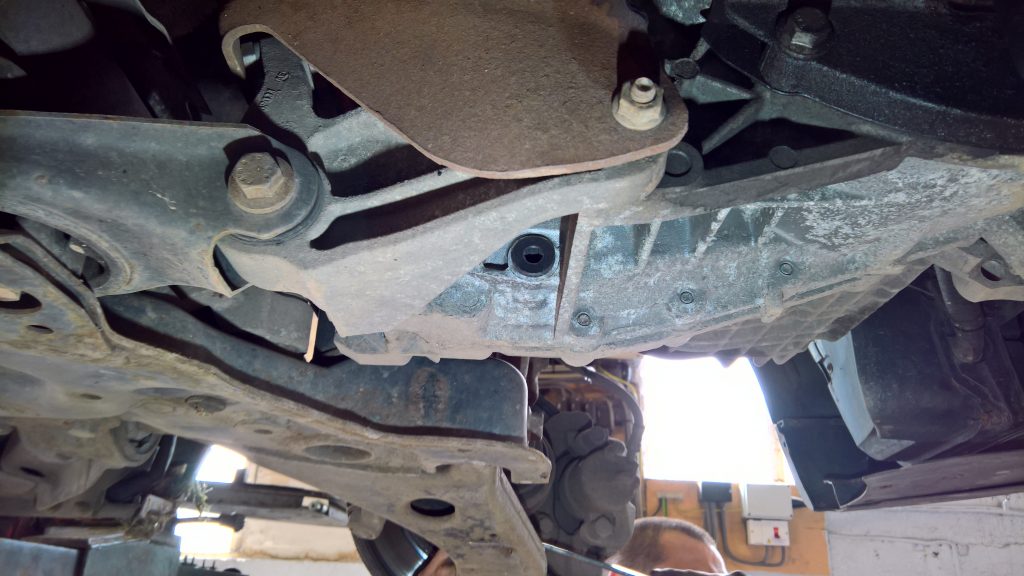
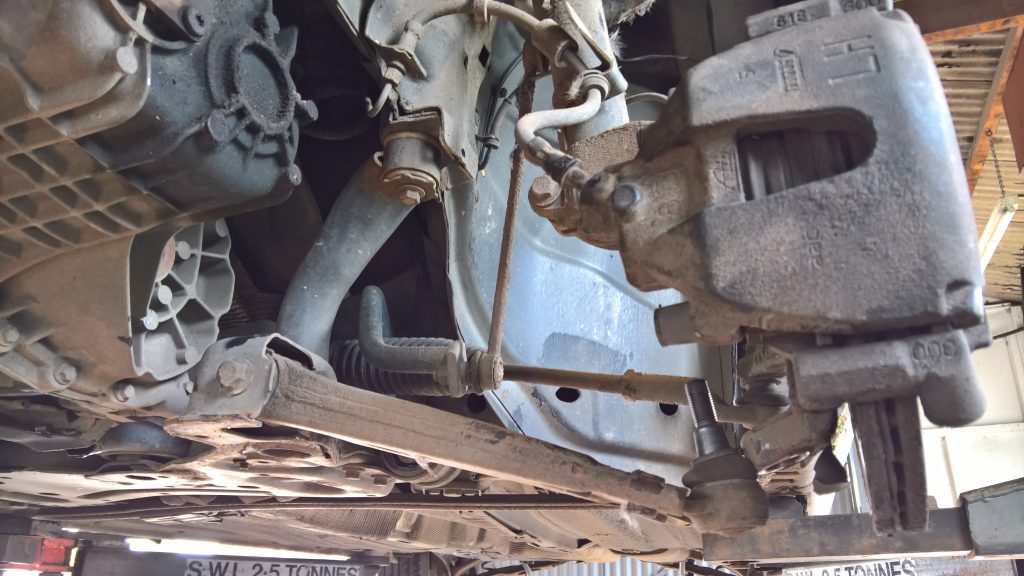
Once completed, lower the ramp to waist height, remove both front wheels, both outer driveshaft retaining bolts, the N/S/F wheel arch liner and disconnect both bottom ball joints (See below). Remove the N/S driveshaft, followed by the O/S driveshaft centre support bearing bracket nuts and, subsequently, the O/S driveshaft.
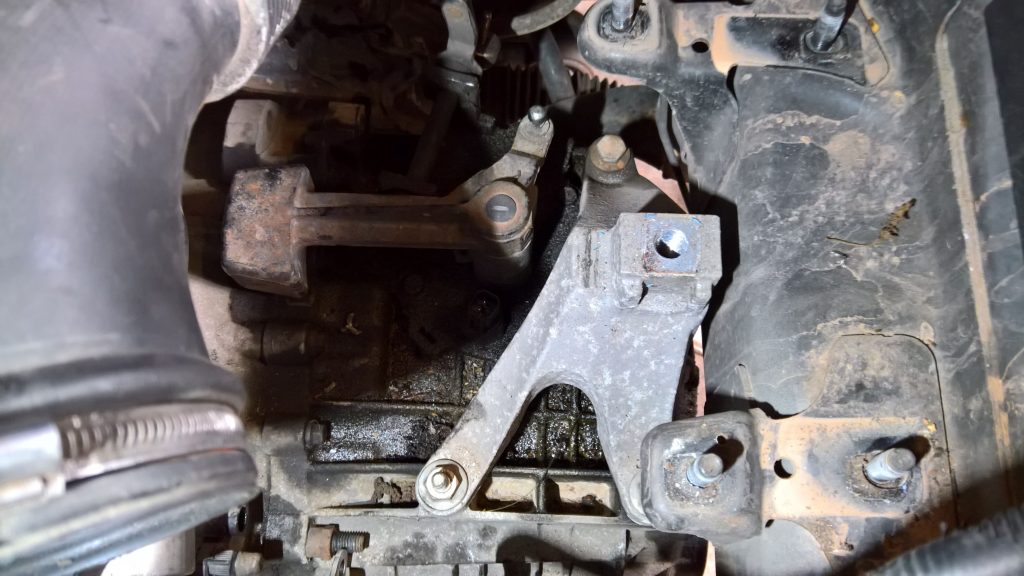
In addition, disconnect the exhaust support bracket from the catalytic converter and gearbox mounting, as well as the lower gearbox torque arm mount. As a result, the starter motor can be detached and left in position. At this point, lower the ramp to ground level and then mount an engine support (See below).
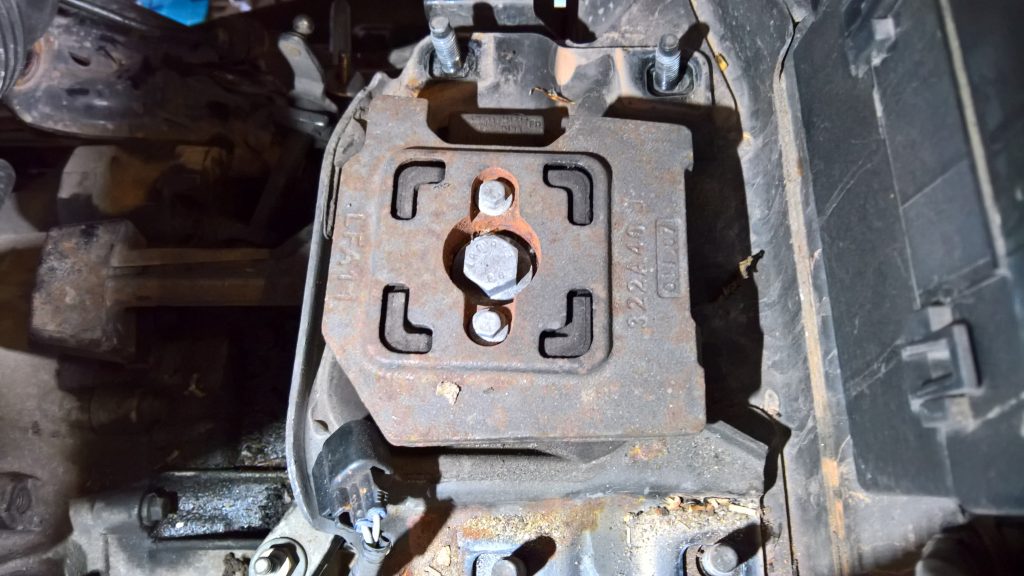
Support the weight of the engine and gearbox before removing the upper gearbox mount (See below).
Carefully, place the engine and gearbox on the engine support until, crucially, the gearbox is below the level of the chassis leg.
Raise the ramp and support the gearbox with a transmission jack. Afterwards, using an extension bar system, remove all bell housing bolts from the N/S/F wheel arch area. Once all bolts have been detached, ease the gearbox back and lower the transmission jack to remove the gearbox.
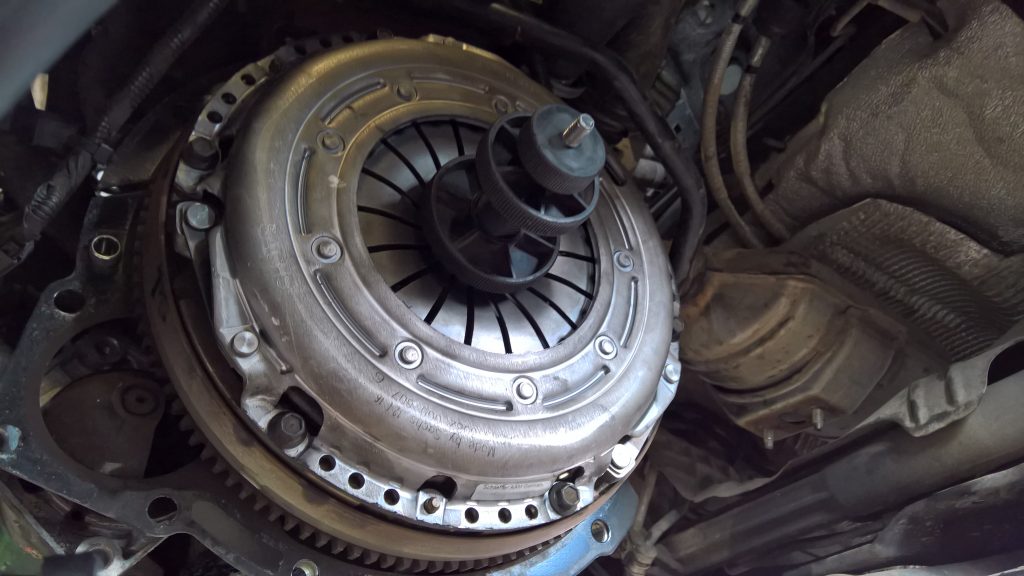
Finally, the clutch can be removed and inspected. The examination confirmed the component had reached the end of its service life and required a replacement. However, when testing the flywheel for rotational ‘free- play and rock’, it showed it was in good condition, so the surface glaze was removed with emery cloth.
To ensure the new LuK dual mass flywheel clutch is correct, compare it against the worn unit and mounting on the gearbox input shaft splines.
This is a good time to clean the gearbox bell housing and lubricate the input shaft splines with high-melting point grease. When mounting the clutch plate onto the splines to confirm it fits, the grease will be evenly distributed – any excess grease can be wiped away. Plus, remember to inspect the spigot bearing in the crankshaft for smooth operation, lubrication and condition.
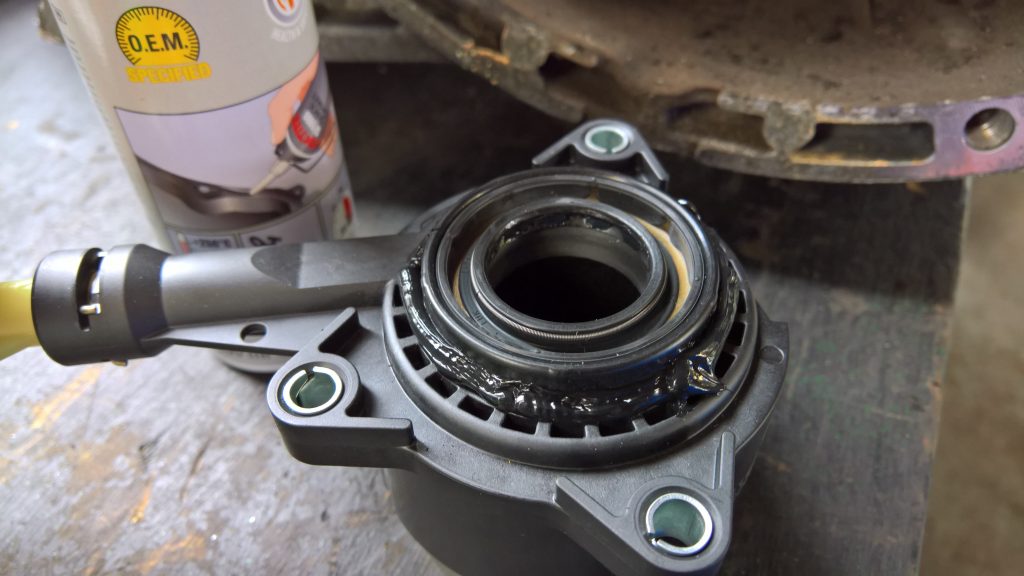
Now mount the clutch using a clutch alignment tool (See below). Ensure the clutch plate is located correctly, with ‘Gearbox Side’ – or ‘Getriebe Seite’ – facing the gearbox, and then tighten and torque the bolts in an even and sequential process. When undertaking this clutch repair procedure now or in the future, always replace the concentric slave cylinder inside the bell housing.
For this particular application, two non- verbal bulletins are supplied with the unit; one instructing to replace the concentric slave cylinder retaining bolts, as shorter bolts are required; the second bulletin advising to seal the concentric slave cylinder to the gearbox – superseding the previous ‘O-ring’ seal design (See below).


Before fitting the gearbox, it is best practice to flush the old clutch fluid out of the system to prevent contamination of the new concentric slave cylinder and seals.
Now re-fit the gearbox to the vehicle and install in the reverse order of removal. The clutch can be bled by two methods: gravity bleeding or pedal bleeding. Avoid pressure bleeding, however, as this technique can cause internal damage to the hydraulic system.
Torque all bolts to the manufacturer’s specification, refill the gearbox with the correct quantity and quality of oil, reset all electrical consumers when the battery has been reconnected and, as always when completing a clutch replacement, conduct a thorough road-test to ensure the repair is complete.


