A full clutch replacement guide for a 2014 Toyota Yaris, which was fitted with a 1.3L petrol engine. It had covered just over 80,000 miles and reportedly suffered from clutch ‘slipping’.
A short road test later confirmed that the clutch needed to be replaced. The clutch replacement on this vehicle should take no more than five hours.
Step-by-step procedure
Place the car on the vehicle lift, using a two- post ramp. Open the bonnet and remove the lower windscreen trims to gain access to the battery and the brake fluid reservoir (see below).
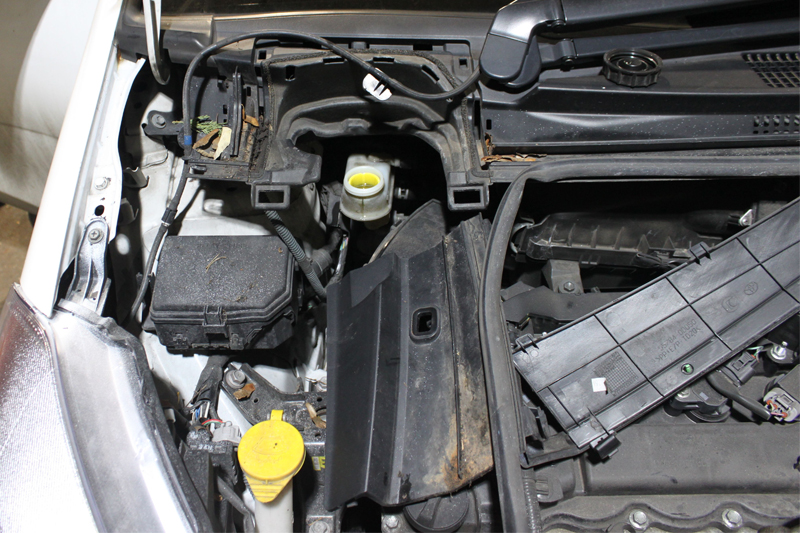
Next, remove the battery clamp, the battery and the battery carrier (see below) – these steps will mean there is good access to the top of the gearbox. Now detach the gear change cables by removing the small ‘R’ clips, before disconnecting the brackets for the coolant hose and wiring loom.

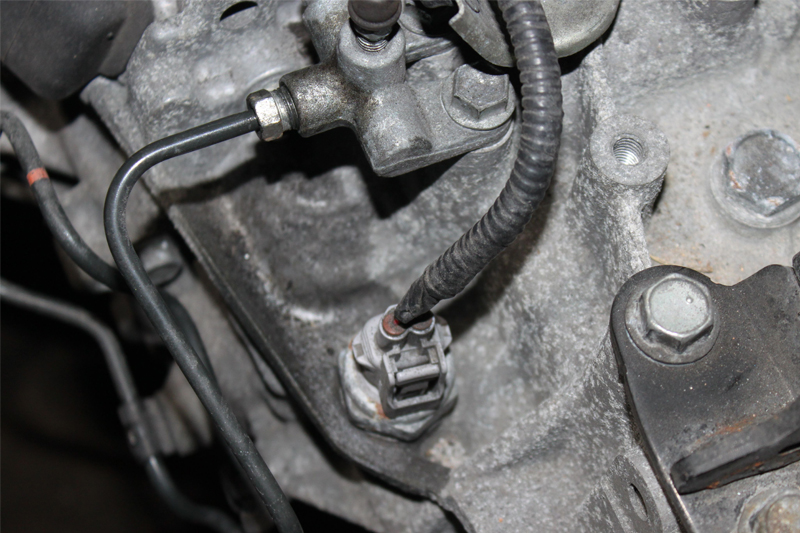
Afterwards, remove the upper bell housing bolts. At this point, the reverse light switch multiplug can be also be taken away (see below). Clamp the flexible clutch pipe and disconnect the clutch hydraulic pipe from the gearbox.
The next task is to raise the ramp to gain access to the underside of the vehicle. Once raised, remove the engine undertray and drain the gearbox oil. Whilst the oil is draining, though, the ramp can be lowered to waist height and both front wheels can be removed.
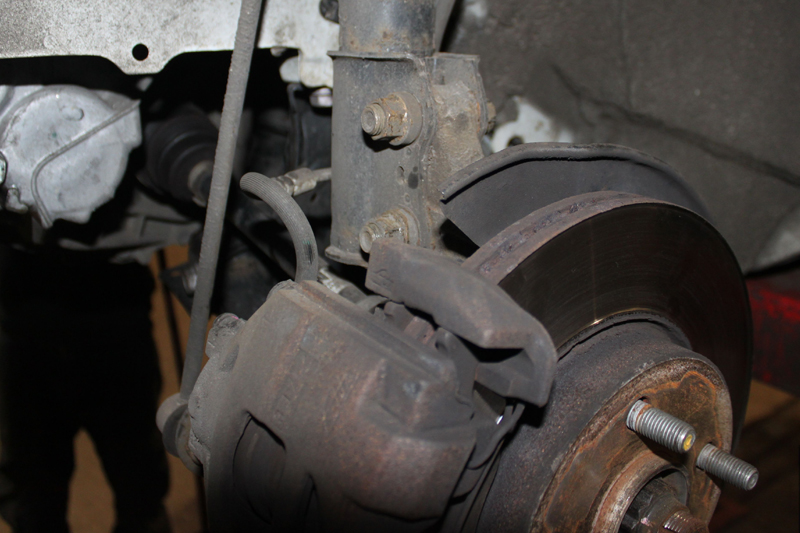
Once safely stored away, the front anti-roll bar links can be disconnected, and the two bolts that connect the strut to the hub assembly can be unscrewed (see below).
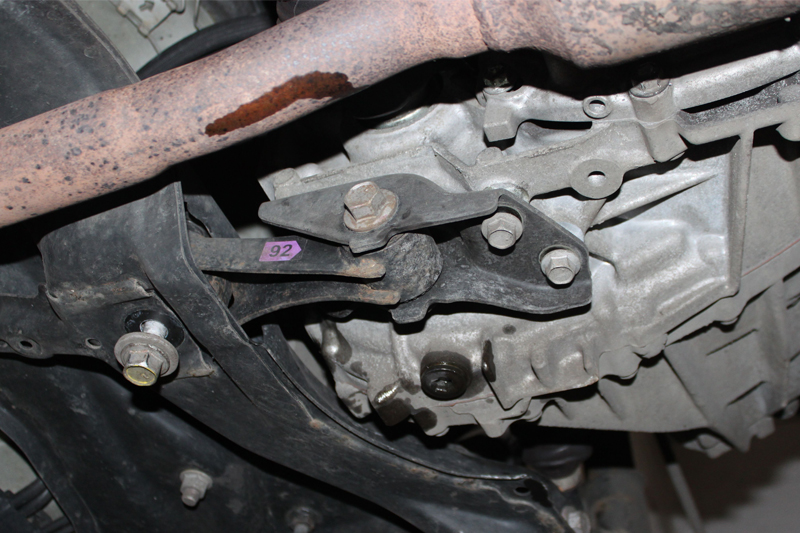
The driveshafts can then be eased out of the gearbox and cleared from the work area. Raise the ramp once again to access the underside, before refitting the gearbox drain plug and torqueing to the correct specification, removing the gearbox pendulum mount at the same time (see below).
The lower bell housing bolts can now be removed, remembering to leave one easily accessible bolt in place to retain the gearbox, until ready for complete removal. Now support the engine, either using an engine brace, sub frame-mounted support, high- reach stand or second transmission jack.
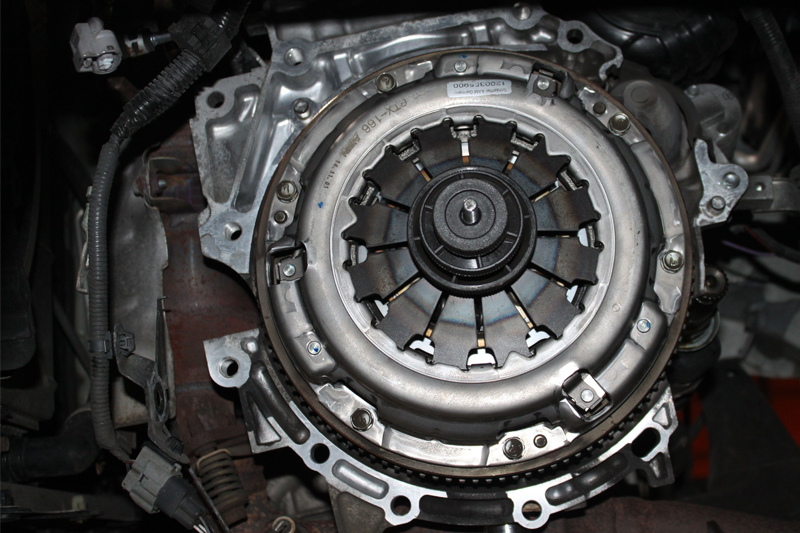
Once secure, the upper gearbox mounting can be removed and the engine can be lowered slightly to aid gearbox removal. Using a transmission jack, support the weight of the gearbox and unscrew the final bell housing bolt. Ease the gearbox away from the engine, and once the gearbox input shaft is clear from the clutch, the gearbox can be lifted away from the vehicle and placed in a safe area. With the gearbox out of the way, the next task is to remove the clutch from the engine’s flywheel by unscrewing the six clutch cover bolts.
On this occasion, it was clear that the clutch had reached the end of its service life, as the clutch plate lining had worn level with the retaining rivets, and the rivets had also made contact with the clutch pressure plate.
The flywheel was then inspected for any damage and heat cracks, but it was given the thumbs up. The glaze was then wiped from the surface with an Emory cloth, and the general flywheel area was cleaned with brake and clutch dust cleaner.
Next, replace the concentric slave cylinder (CSC), which is mounted in the gearbox bell housing. Disconnect and remove the clutch pipe, rubber grommet and bracket, before unscrewing the three retaining bolts.
Once completed, remove the CSC and clean the bell housing using brake and clutch dust cleaner, so that the old dust will not contaminate the new clutch.
Mounting the new CSC
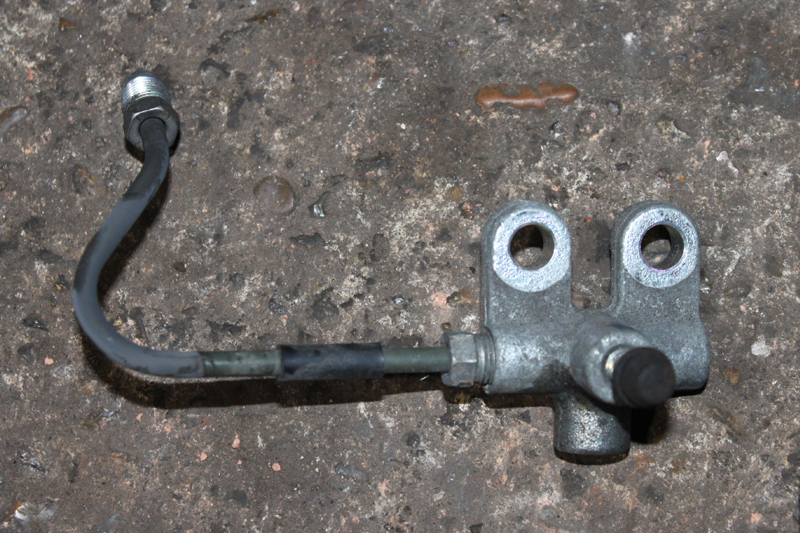
Mount the new CSC, and torque the bolts to the manufacturer’s specification. Install the clutch pipe to the CSC (see below), and mount the bracket on the gearbox, locating the grommet and tightening the pipe in a central and relaxed position. Now apply a light smear of high-melting point grease to the input shaft splines and place the new clutch plate onto the splines – this will ensure the clutch plate has been correctly fitted. Evenly distribute the grease, and with the clutch plate removed, wipe off any excess grease.
Ensure that the clutch plate is facing the correct way, indicated by ‘Gearbox side’ or ‘Getriebe site’ labelling, and that the clutch plate and pressure plate are clean before installing the new clutch onto the flywheel.
Using a clutch alignment tool, centralise the clutch plate and fit the clutch cover, tighten the bolts evenly and sequentially, and torque to the manufacturer’s specification (see below).
Installing the gearbox
First, check that the alignment dowels are in position and that the back plate is located correctly. Then, using the transmission jack, ease the gearbox into position and locate on the dowels. Once the gearbox has been located, secure it in position with an accessible bell housing bolt and tighten.
Next, raise the gearbox using the engine support, and fit the top gearbox mounting – at this point, the transmission jack and engine support can be removed – and then install the components in reverse order of removal.
Remember to refill the gearbox with the correct quality and quantity of oil, then reconnect the battery, reset-all electrical consumers and erase any fault codes. In this instance, the clutch bled easily by ‘gravity bleeding’, simply by opening the bleed nipple and allowing the fluid to run through until all air had been removed. If gravity bleeding is unsuccessful, manual bleeding or vacuum bleeding is advised.
Once the repair is complete, carry out a full road test to confirm a successful repair.
- Never ‘dry squeeze’ the new CSC, as this can cause damage.
- Ensure the mounting area for the new CSC is clean and that the CSC mounts squarely.
- Check that the CSC bolts are the correct length, and tighten correctly.
- It is best practice to flush/change the clutch hydraulic fluid, which is achieved simply by placing a drain tray under the clutch pipe, removing the clamp and allowing the old fluid to run out, topping up the reservoir as required until clean/new fluid runs through. Finally, clamp the pipe.
- Check for any leaks on the engine or gearbox, which could contaminate the new clutch, and rectify any issues before gearbox installation.


