PMM readers will know that removing exhaust bolts is often a lengthy, difficult and frustrating task for motor mechanics. The nuts securing the bolts rust easily and, as they are usually placed in inaccessible areas, it makes it very hard to remove them. However, help is at hand…
The Mini-Ductor® II + (MD800P) handheld induction heating tool, uses Invisible Heat® that heats ferrous metal (containing iron), and some non-ferrous metal, parts in seconds. This allows all types of adhesives bonded to metal, bonded with thread lock compound and seized hardware to be removed and released much quicker than traditional naked flame heating metods. Made in the US by Induction International Inc., the product is the updated version of the popular and PMM award-winning Mini- Ductor® II unit.
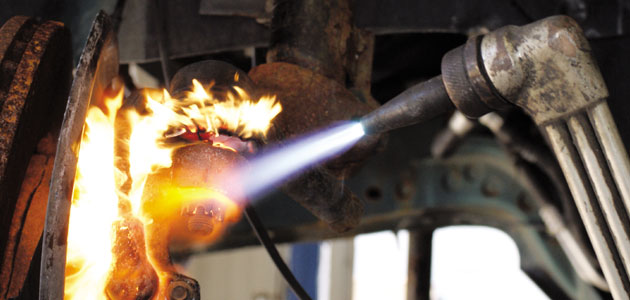
Using a naked flame/torch in a confined space, such as around an exhaust, vastly increases the consequential fire risk. Fuel fumes and stray oil can catch fire – as can plastics, wire and trim. Not only is this dangerous for the operator, but can lead to costly repairs having to be made.
Why use Invisible Heat® to remove an exhaust bolt?
The tool has multiple benefits that keep mechanics safer and help remove problem parts quickly and easily. These include:
Safety
There’s no longer the need to use a naked flame, which risks a potential explosion by igniting fumes from the exhaust or fuel tank. As only the part is heated, not the tool and the surrounding area, damage to wiring beneath the vehicle is eliminated using the innovative Invisible Heat® generated by induction heating.
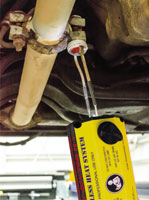
Works fast The Mini-Ductor®’s bendable coils produce high frequency magnetic fields and are ideal for accessing hard to reach areas, such as where exhaust bolts sit. They ensure heat is localised on the problem part only, not the surrounding area. Using the coil, a ¾” nut is heated red hot in 15 seconds. The heat expands the nut and breaks down any corrosion.
The time taken to remove a bolt differs from a nut because when the bolt expands with heat, it can often stay locked in the hole. Allow around 15 minutes (or sometimes less) of cooling time and the rust bond will release as the bolt shrinks back down to normal size.
Increased competitive advantage
The next time you have to quote a job with new parts because the old ones have rusty hardware that will be damaged in removal, consider the competitive advantage you could have if you didn’t damage those parts. For instance, a master cylinder brake booster typically has old rusty nuts and bolts that will damage the booster if forced off with an impact wrench. There’s no need to force them off when using the Mini-Ductor® II +.
Increased productivity and profits
As a result of these efficiencies, the tool can help increase a garage’s productivity by over 50%. Because downtime is minimised, parts can be re-used and insurance premiums are reduced by an extra 10-20% if an Oxy- Acetylene system is replaced with an induction heating tool.
5 EASY STEPS TO REMOVING TOUGH EXHAUST BOLTS
EQUIPMENT NEEDED: Heat resistant gloves, overalls, goggles and a respirator mask (if smoke will be produced from heating).
KNOWLEDGE REQUIRED: A well-reviewed proficiency of the tool’s safety and opera
TOP TIPS: Heavily rusted bolt removal success requires a little patience.ting instructions.
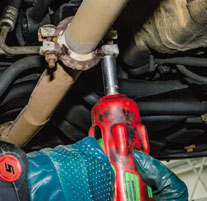
STEPS 1 & 2
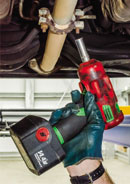
The Mini-Ductor’s bendable coils come in various sizes (up to a standard 3.8cm diameter – larger sizes available) and lengths to access the area and fit around the nut that secures the bolt. The Invisible Heat® quickly heats the nut.
STEP 3
Only the nut is left hot, not the surrounding area. But work quickly, as the heat will transfer. Care should be taken at this stage as it can be very hot to the touch.
STEP 4
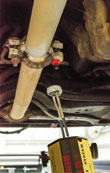
When the nut has cooled a little, use a tool (we recommend an electric impact driver as it has more torque) to easily remove it.
STEP 5
The bolt can now be removed.