In this guide, TRW show you the correct process involved with installing the JKR104 EPHS steering set, using the VM Polo 9N as an example.
It should first be noted that there can be deviations in the removal/installation work routine, depending upon motor type and engine variant. For safety reasons, and to achieve an optimum effect, all maintenance and repair activities must only be carried out by trained professionals in accordance with the latest directives issued by the VM. Steering gears and pumps are safety-critical parts and must only be assembled by trained professionals. When carrying out any work, TRW recommends wearing appropriate protective equipment (goggles, protective gloves, etc).
Before starting the work you should check that all the parts that you will not be replacing are in perfect working order. Take this opportunity to inform your customer about any other damage that may already be on the vehicle or which may arise in the near future, as your customer will be grateful for the increased safety.
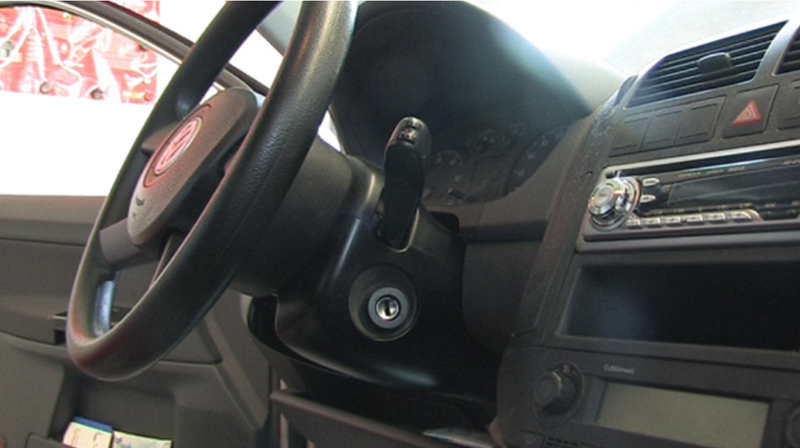
Before starting work, the battery must be disconnected and the steering wheel must be fixed in the centre position by the steering wheel lock. This prevents rotation and any potential damage to the contact roller of the airbag. You may also need to ask the customer for the PIN-codes related to any electronic devices, if installed.
The process
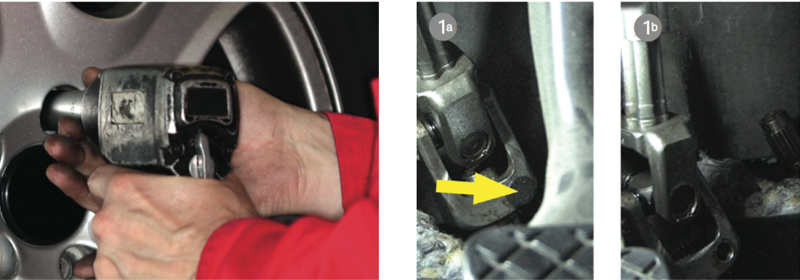
Unscrew the fixing bolt of the cardan joint (see Fig 1a) and disconnect the steering gear and steering column (see Fig 1b).
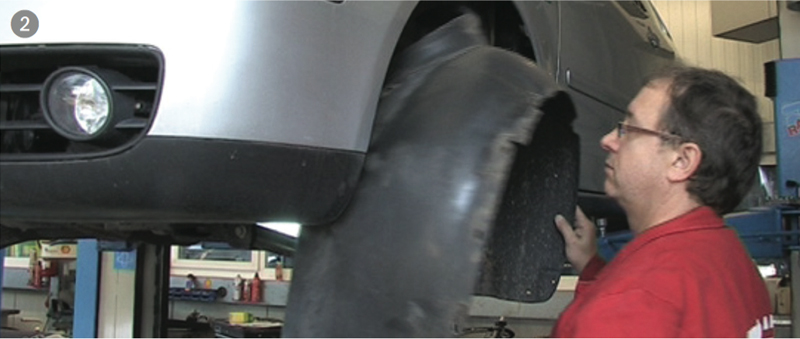
Now remove the cover of the wheel housing and all coverings that may hinder access to the steering pump (see Fig 2). To gain access to the connectors of the motor-pump unit, it is recommended that you remove the fog light. To do this, first remove the cover and then the complete luminaire.
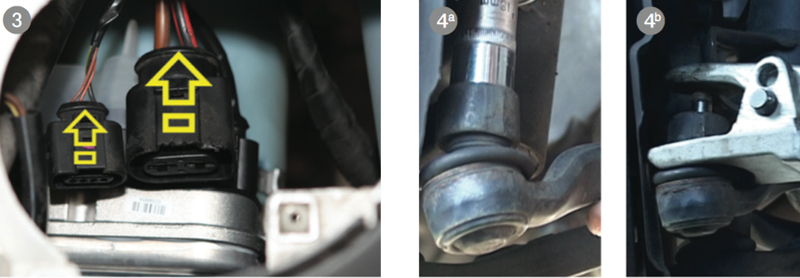
Disconnect both pump connectors (see Fig 3). To prevent any damage, note the different locking mechanisms of the connectors. Now check the plugs and pins for damage and corrosion. Corroded cable connections and faulty plugs need to be replaced. Disassemble both tie rod ends from the steering knuckles (knuckle arm) (see Figs 4a & 4b), making sure you use a suitable special tool to avoid risk of injury.
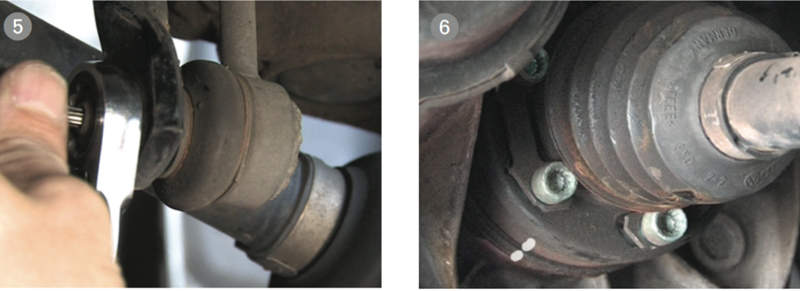
Now remove the fixing nuts of the stabiliser links and disconnect the stabiliser links at the stabiliser (see Fig 5). A suitable tool should be used to prevent rotation of the ball stud during disassembly. Unscrew and disconnect the left drive shaft from the gearbox (see Fig 6); a colour coding will help you to fix the drive shaft in its original position when reinstalling. Disassemble the left ball joint from the steering knuckle (again using a special tool). Pull the complete strut to the vehicle side to create sufficient space for the expansion of the steering gear.
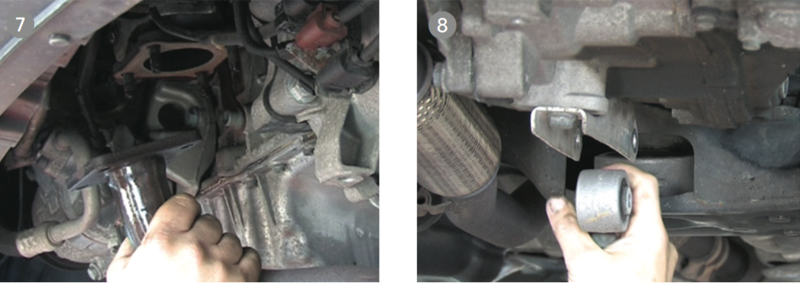
For the next step you should remove the screws securing the front exhaust pipe from the exhaust manifold and disconnect the exhaust pipe (see Fig 7). Remember to have a new gasket on hand during re-installation. Remove the fixing bolt holding the torque arm to the bracket and loosen the torque arm by pulling down (see Fig 8).
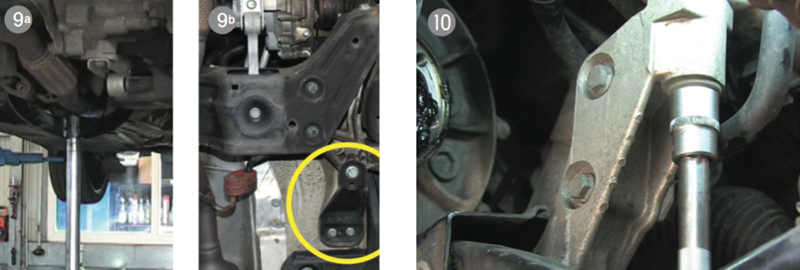
After you’ve supported the engine crossbeam with a hydraulic lifting tool (see Fig 9a), you can then remove the right and left fixing plates (see Fig 9b). Now remove the screws on the axle brackets before carefully draining the engine crossbeam, including the track control arms and the steering gear (see Fig 10).
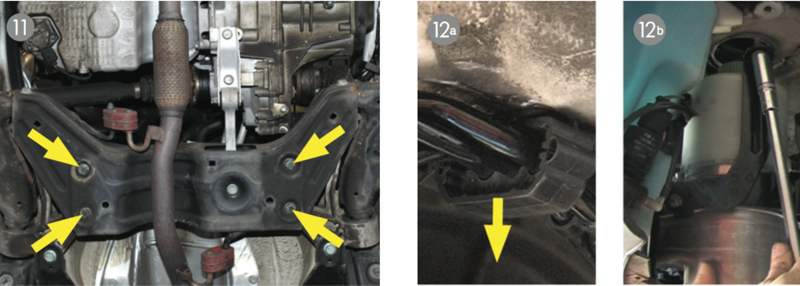
Be careful not to damage any wires or pipes when lowering the crossbeam. Loosen and remove the bolts fixing the steering gear to the engine crossbeam (see Fig 11) and then loosen the fastenings of the cables and pipes to the body (see Fig 12a). You can now disassemble the hydraulic pump by removing the screws of the bracket (see Fig 12b).
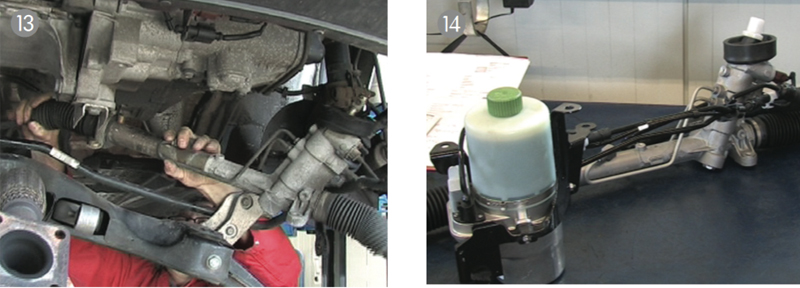
For the next step, a second mechanic is required. Remove the complete steering unit consisting of steering gear, pipes and motor-pump unit from the vehicle (see Fig 13).
The installation then takes place in reverse order (see Fig 14), remembering to tighten all screws with the appropriate torque, following the guidelines and regulations of the VM. After installation of the unit and the wheel alignment, the vehicle must be checked with a suitable test device on any existing fault codes.
