
Launched in 2005, the Toyota Aygo has proven particularly popular in the UK with over 110,000 vehicles on our roads. This handy article from LuK shows you how to correctly perform a clutch replacement on the semi- automatic transmission equipped variant.

Firstly, you should set around four hours aside for this repair. If the vehicle has alloy wheels then there is a good possibility that they’re secured with anti-theft bolts, so make sure the locking tool key is available before starting.
Before removing the gearbox the first thing to do is to set the clutch actuator into a default mode, which will release the preload. To do this install the diagnostic tool and set to the clutch clamp position to release the clutch fully. Failure to do this can result in damage to the adjustment mechanism. In this example we used a two-post ramp, an engine support beam and two transmission jacks to assist with the repair.
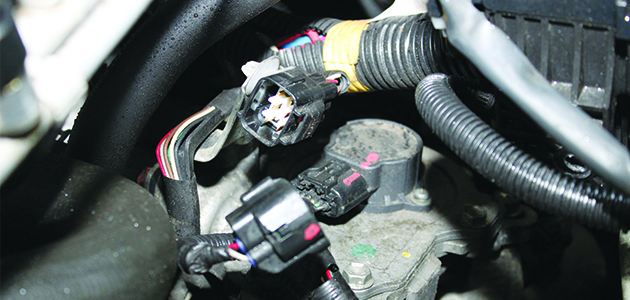
Gear selector unit
Disconnect the battery terminals and stow safely. Remove the battery support clamp and battery. Release five bolts that hold in place the battery tray and remove. Disconnect the three gear shift connector switches positioned on the gear selector unit (pictured). Disconnect the clutch cable from the release lever.
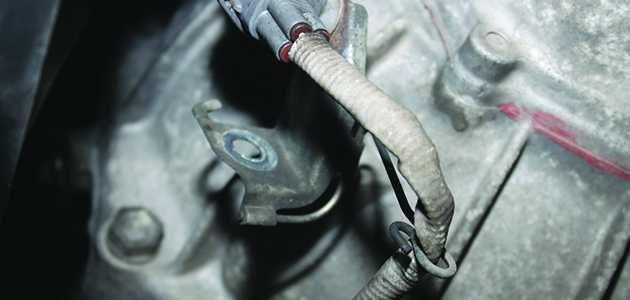
Remove the bolt that holds in place the wiring loom bracket. Disconnect the switch found at the front bottom of the gearbox and the switch found at the rear of the gearbox, before stowing the wiring loom aside. Completely remove the gear selector unit by removing the three securing bolts. It is a good idea to mark the positioning of the bolts to ensure the correct position when reinstalling the unit (pictured). Once removed, this will expose a connector switch underneath that can be disconnected. Stow safely to the side.

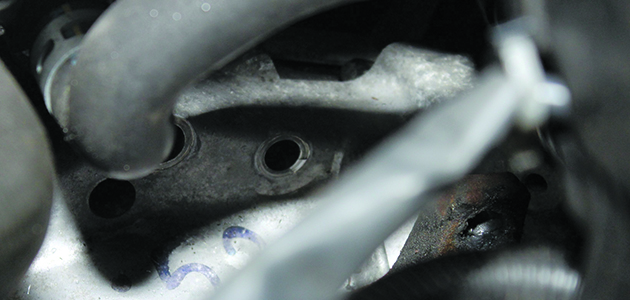
Remove the earth lead bracket that is held in place with two bolts and remove the oxygen sensor connection and bracket (pictured) and stow.
While the vehicle is still at ground level it is a good idea at this point to remove the top two accessible bell housing bolts and one starter motor bolt (pictured). Remove the engine top mount bolts and support the engine with the support beam. Raise the vehicle and drain the gearbox oil. Remove both front wheels and, on the nearside, release the inside wheel arch liner by removing three bolts.
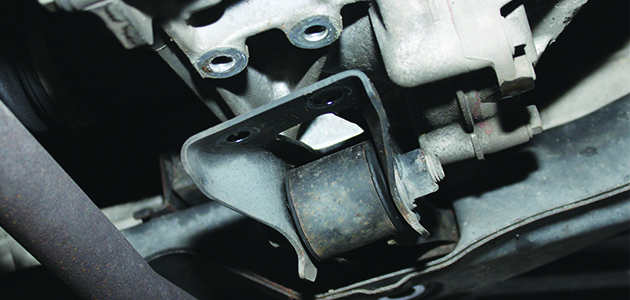
Only the front section needs to be released for better access when lowering the gearbox. Unbolt the bottom ball joints and release from the lower suspension arms on both sides. Remove the drive shafts from the gearbox and the wheel hubs. Remove the bottom gearbox stabiliser (pictured) which is held by three bolts: two at the front and one that secures from the rear through the subframe. Slide the stabiliser out from the subframe.
Remove the back plate from the gearbox (held by three bolts) and remove the starter motor bolt from the rear (pictured). Support the gearbox using the transmission jacks and remove the remaining three bell housing bolts.

Lower the gearbox
Carefully lower the gearbox to the floor and remove the worn clutch cover, drive plate and release bearing. With the clutch removed, check the flywheel for signs of heat stress. Clean the first motion shaft splines and any debris from the bell housing (especially important when a release bearing has failed).
Put a small dab of high melting point grease (not a copper-based product) on the first motion shaft splines and make sure the new driven plate slides freely back and forth. This not only spreads the grease evenly but also makes sure you have the correct kit. Wipe any excess grease off the shaft and driven plate hub. Using a universal alignment tool and checking the driven plate is the correct way round (note “Getriebe Seite” is German for “Gearbox Side”) the clutch can be bolted to the flywheel evenly and sequentially.
Before fitting the gearbox, make sure the locating dowels are in place and not damaged. Refit any that have become dislodged and refit the gearbox. Make sure the gearbox bell housing bolts are secured and the gearbox stabiliser is installed before removing the transmission jacks.
Refitting is the reverse of removal, making sure you don’t forget to reset the clutch actuator and gears using your diagnostic equipment.


